The Division launched with a lot of content back in March, especially when you consider the endless fun you can have in the Dark Zone. The game got even more with the 1.1 update that brought the game’s first incursion with Falcon Lost and now the 1.2 update has arrived and brought us the second incursion that actually feels more like an extra story mission than the wave-based last incursion.
Clear Sky is definitely a lot more straight forward than the previous one, which in some ways can make it feel easier, as it can technically be completed much quicker than the previous incursion. However, do not take this one lightly at all, as the enemies you will be facing can take you down in no time, with mortars also being fired right at your team at later points.
Considering this one has a mission structure, we’ll go over the setup of the stage with a few tips at each part on your best strategy. First of all though, make sure you have a full team of four people. Going into this with any less than four is going to be near impossible without some crazy luck, so don’t even bother trying. Also, communication is key, so either have a headset to talk to teammates or if you absolutely cannot use a headset yourself, listen to your teammates through the TV and react in some way to let them know you understand. Also, it is always wise to let someone who has completed this incursion already to take the lead, so you will want to find out who has done so first.
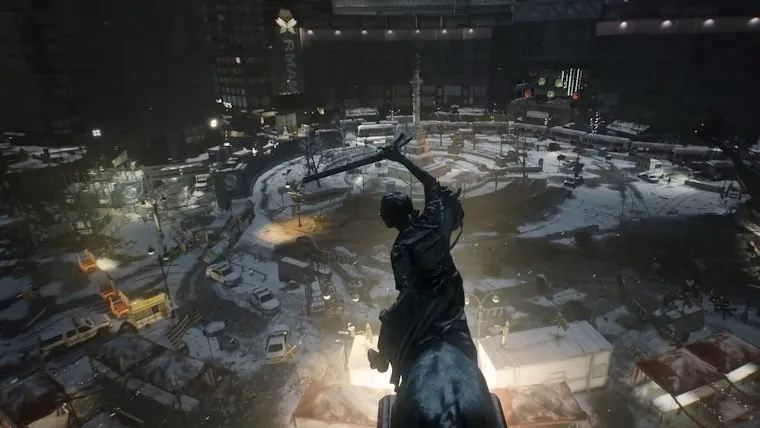
As soon as you arrive at the Clear Sky marker and get a team of four, head forward into the incursion and follow the first marker to reach Columbus Circle. Eventually, you will come across a number of enemies, and this is where it really begins. This is pretty simplistic, as you’ll face infinite waves of different enemies that start off with 32 purples before also introducing some gold enemies. Most of these will be purple enemies though, so you shouldn’t have too much trouble if you don’t let them overwhelm you. Never be afraid to back up in the area to get more distance between you and the others, especially when the shotgunners start moving up and the mortars start flying.
Those who completed Falcon Lost may remember how the turret was not all that helpful due to it being able to be hacked in the later stages, but this can be pretty effective here as a way to distract some of these enemies while you take them down. Health bubbles can also be pretty good to use with your group as you will be consistently on the move, making setting up med stations not all that effective.
Eventually, you’ll notice an enemy with a marker on him that will be holding a bomb, similar to what you will remember in Falcon Lost. Your best strategy is to not kill him from a distance, but try to let him get as close as possible to you. At this point, kill him and grab the bag. Do not make a fast break for the next marker that shows you where to plant it, which is up on the far left side, but instead wait for the wave to thin a bit.
At this point, have someone on your team pop their Survivor Link signature skill, which everyone on the team should have for this mission,. Then plant the bomb and return back to the rest of the group. Now, you will have to do this a second time, so rinse and repeat and upon planting the second bomb on the shipping crate that’s blocking your way, you will have completed the first part of Clear Sky. Unlike Falcon Lost, the game will actually save after this point, so you won’t have to replay this part again and again, with you instead respawning after it for the remainder of the incursion.
The first part might have seemed pretty simple and not all that hard, but the second part definitely takes the difficulty up many notches, as you are not only focusing on killing enemies, but also having to carry items at a slow pace, which means part of the team will essentially be escorting the other teammate.
The overall objective to this second area is to disable the helicopter which is much easier said than done. The first step is to head to the left side of the area and get to the laptop that is marked and deactivate the helicopter’s defenses. Rather than sending the whole group in here and catching the attention of the enemies, just send one person, preferably someone with high toughness, and go use the laptop. If you are careful, the enemies won’t notice you until the objective is complete.
After doing this, the objective becomes to plug in the fuses, which is going to be the toughest part of this incursion more than likely. For the player that deactivated the defenses, they need to quickly get out of there and to a safe area to meet up with the team who should be joining him. From here, you have two options, going for the fuse box on the left or the one on the right. It really doesn’t matter which one you go after, as both will feature continuously spawning enemies that are going to make this very difficult for you.
These enemies are relentless, so you will want to avoid trying to take them all down, as they just keep coming. Adding in the mortar fire that makes it even harder, you will need to stay on the move. As a team, move towards either one of the fuse boxes that are marked and have the person with the highest toughness pick it up and everyone escort them towards the marker where you can plug it in. This is just like the supply recovery missions in the game, where the one holding the fuse box will be moving incredibly slow and only have access to their side arm.
This means the rest of the team must take down or at least slow down most of the enemies in the way, the latter of which can be helped by the use of skills like turrets. They also must be concerned with not only keeping themselves alive, but consistently healing the one carrying the fuse box as well. Also, be careful with your Survivor Link signature skill as well, as they need to be used very smartly. There is also the strategy of splitting the team up and sending two at each fuse box to try and get it done quicker, but you will have to see how effective your team is gelling for that one to work.
After doing this twice, you will then be in the home stretch for the Clear Sky incursion, but it is still not quite over. As soon as you actually place the second fuse box, a new wave of enemies will spawn, including a couple heavies. Instead of activating the ADS, you may want to whittle down these forces just a bit first, but when you feel ready, activate it to bring out the boss of this incursion.
The boss really isn’t anything too special, as he’s the typical boss you would expect but can take a lot of damage. This is why your team needs to try and take him down as soon as possible before getting overwhelmed by too many enemies or the constant mortar shots. This is probably best done with a mix of medium distance and long distance shots, so your team definitely needs someone with a solid marksman rifle.
Upon finally taking down this boss, the enemies will stop respawning and the mortars will cease firing, so all you have to do is clean up the remaining enemies and you will have completed the Clear Sky incursion. At this point, you’ll receive a bunch of goodies that are likely going to help with making your character even stronger, including the drop that the boss gives you. Even with these tips, the Clear Sky incursion is not going to be easy, so I wish you the best of luck.