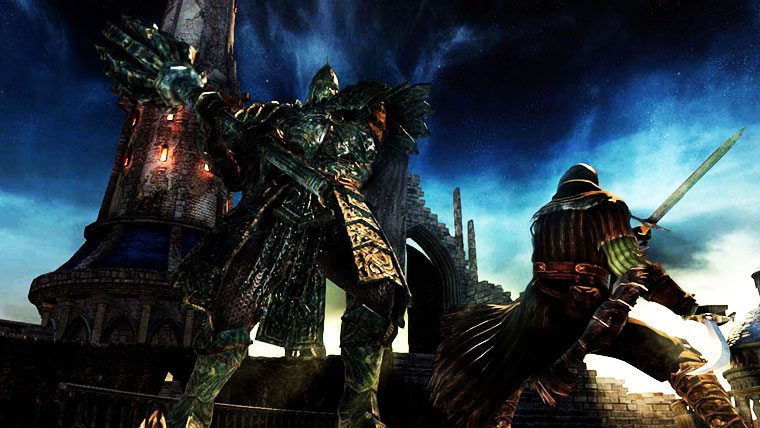
The “Souls” series has long been known for its difficulty. From Software has punished players over the years with their difficult role-playing games, Dark Souls 2 is no different. Well, it is different, but it’s still a punishing game that will take some getting acquainted to. Where should you go? What should you do? We’re here to get you off on the right foot with this Guide to Getting Started in Dark Souls 2. It covers a complete walkthrough from the start of the game, to your first boss fight, uncovering some early game items, and even a little early game soul farming to help you level up more quickly in Dark Souls 2.
Things Betwix
After a brief cutscene explaining some of the Dark Souls 2 story, you’ll start your adventure in Things Betwixt. Head towards the light. As you make your way towards the distant light, you’ll see a building much closer. This is your first objective. Here, you’ll create your Dark Souls 2 character. But, From Software has put a couple of hidden items for you to collect before you do that. When you go through the first passage, head right. A small cave is there, and has a Rusted Coin. You’ll need to cross a bridge to get to the building, but before you do, head left through the bushes. There’s another hidden path that has another item, with a massive cyclops guarding it. Head up the path, run past the cyclops, and on the right there will be a small stream that you can drop into. Drop down and collect the Small Smooth & Silky Stone.

Enter the building. You’ll be greeted with more cinematics, prompting you to create your character. This isn’t a character set-up guide, so choose a character that best suits you. This walkthrough was done with a Swordsman class. In this building there are four NPCs. Three old witches and one younger woman. You can kill all of these characters, and they’ll give you items. Killing the old witches will net you six Human Effigy. Killing the younger woman will net you three Human Effigy. Go upstairs, and there will be another Human Effigy in a treasure chest. Human Effigy is valuable in Dark Souls 2 because they allow you to revive to human form. In Dark Souls 2, when you die you become Undead. Each time you die your life bar will gradually get smaller and smaller, with less starting health for you to work with. Using the Human Effigy will allow you to restore your full health bar. You can also burn Human Effigy in a bonfire to ward off online invaders to your world.
Go out of the backdoor to the house, and you’ll find your first Bonfire. Lighting the Bonfire will mark this as your first checkpoint. Until you light another bonfire, this will be where you start when you die. You can perform various operations at Bonfires in Dark Souls 2. First off, the game now has a fast travel system between Bonfire locations. Since this is the first Bonfire you’ve lit, there aren’t any fast travel options just yet. You can burn items at the Bonfire as well, like the Human Effigy mentioned above, or other items that will give you various bonuses. You can also light torches at the Bonfires in Dark Souls 2. Press Y to toggle the functionality of the Bonfire, and press A to light a torch. Torches can be carried to light your path, or, they can be used to light sconces, which you will encounter when you head into the Dark Souls training grounds in the next area. You’ll need a torch to light first. Head to the right, and behind the cart next to the Bonfire, you’ll find your first Torch and your first Soul of a Lost Undead.
This corpse is one of many that you’ll find on your journey. Always be on the lookout for corpses like these, they contain souls, items, and more. Usually, the more obscure the location of the corpse, the better the loot. In this case, you got a valuable torch. And an even more valuable Soul of a Lost Undead. Using this soul in the items menu will automatically add souls to your inventory. These range in size, and come in a number of different denominations.
Head into the cave ahead of the bonfire, and you’ll begin a training exercise that runs you through the controls of the game. This area will contain a number of doors that prompt you to enter. Go ahead and start with the first door on the left, this will start the tutorial section of the game. This are should not give you much trouble at all. There are numerous corpses to loot in, and instructions are fairly straight forward. Though there are a couple of hidden items in this area. Two are at the top of the ladder. At the top of the ladder in this area there is a nest. When you reach it for the first time voices will ask you to give us smooth and silky. Remember that Smooth and Silky Stone you found just minutes ago. Find it in your items menu and leave it in the nest. It will be changed into something usable for you. Also, directly below you is another hidden item on a corpse. Drop down to scoop up your Soul of a Nameless Soldier. You also be given the opportunity to challenge a couple of Cyclops Monsters in the final door. The Cyclops Ogres can be killed fairly easily with a little kiting. Try to grab the attention of one of the monsters and lure them back up the ramp you came down on, and towards the wooden log bridge. The objective here is to get the Cyclops to go into a full attack combo animation on the bridge. Nine times out of ten, it will fall off the bridge. Now do it again with the second Cyclops, and you’ll earn 1000 souls for each of the beasts. Once both have been defeated, you can go back to the house with the three witches and receive the Handmaiden’s Ladel from Mildred (if you didn’t kill her). The coffin that the two cyclops were guarding can also now be used to change the gender of your character.
One of the brutal aspects of Dark Souls 2 is the ability to lose your souls if you can recover them. You can have all the souls in the world, but if you don’t bank them for items or leveling points, you could lose them at a moments notice. If you die, you’ll leave a bloodstain, marked by a glowing green light. If you can make it back to your bloodstain, you’ll be able to recover your souls. It’s always a good idea to carry a Homeward Bone that can get you out of a difficult area, instead of risking all your souls. Homeward Bones work in boss fights also.

Majula
After you’ve completed this tutorial section, you’ll head through the tunnel at the end of this cavern to make your way to Majula. This is the central hub area for Dark Souls 2. Coming out of the cave you’ll head towards the statue in the distance. To your immediate left is a tunnel and a corpse with a Divine Blessing. We can leave the tunnel for now, because there’s not much we can do at the moment.
In Majula, there are a number of items to find and features to unlock, as it’s the central hub for your adventure. Your first order of business should be to meet with the Emerald Herald. She’ll give you an Estus Flask, and will be your point of contact for leveling up your character going forward. Whenever you collect souls in Dark Souls 2, you can return them to the Emerald Herald to level your character. You can purchase points and build your character however you like. She’s just away from the bonfire, peering over the cliffside. Once you have your Estus Flask, you can start to take a look around.
At the statue just behind you, you can join the Blue Covenant, doing so will net you the Blue Seal.
Heading back down the stairs from the statue, or the right will be the Blacksmith. The Blacksmith is locked out of his shop, you’ll need to find a key to open the shop. (Which you’ll do shortly). To the right of the Blacksmith’s Shop, you’ll find a Soul of a Nameless Soldier and a Lifegem.You’ll also see three other buildings off in the distance. We’ll get there shortly, for now we’ll stay right and head away from the Blacksmith’s shop. Sticking to the side of the cliff, you’ll find a tunnel which leads to Heidi’s Tower of Flame and a path that ascends up the side of the cliff. We’ll head up for now. At the top, you’ll find another shrine, and the ability to join another covenant. Joining the Company of Champions will net you the Champion’s Tablet . The corpse on your left will give you a Homeward Bone, which warps you back to the last bonfire you rested at.
Before doing anything else, you should head over to the other three houses in Majula. One of them has an upgrade to your Estus Flask, giving you your first Estus Flask Shard. Simply head over the big house in the middle, there will be a well on the right side, attack the rock sitting on the ledge and it will drop into the well. Up will come your Estus Flask Shard. Take it back to the Emerald Herald at the Majula bonfire for an instant upgrade to your Estus Flask, giving you two heals instead of one. The Estus Flask should always be on your hotkey list. It allows you to heal your character, and you’ll be doing that a lot. Finding Estus Shards are one of the most beneficial items in the game.
Now’s time for a decision. Talking to the people in Majula, they lead you to a very specific path as your next objective. However, you can currently head into Heide’s Tower of Flame for some early game soul farming against some easy opposition. The choice is yours, but we racked up around 30,000 souls before heading into Valley of Giants.
Hiede’s Tower of Flame
The ramp you took to join the Company of Champions is right near the path to Hiede’s Tower of Flame. Simply take the stone doorway and head down the path into the sewers. You’ll need to pull one lever to open a gate, and you’re there. Hiede’s Tower of Flame is certainly daunting. It’s filled with giant Ancient Knights, with big sheilds, massive swords and clubs. But this is very doable. They are extremely slow, and can be kited. Each giant will net you four hundred souls, there are plenty of giants to go around, and they are so slow that it’s almost impossible to lose your souls even if you die. When you first head into the Tower of Flame area, you’ll want to stay to your right. There is a bonfire immediately on down the path on the right. In case you die, you’ll start here.
Now you can start harvesting souls. You can take a look at the video below to see one of our early game soul farming runs. It’s worth noting though, Dark Souls 2 is considerably different from previous games. The more times you farm an area, the more likely it is for enemies to start disappearing. After about 10 runs through Tower of Flame, enemies were pretty sparse. But it did give us a good start as far as leveling goes.
Soul Farming Dark Souls 2 – Hiedi’s Tower of Flame
Forest of Fallen Giants
Whether you decided to do some soul farming or not, you’re gonna head into the Forest of Fallen Giants now.
If you’re standing at the bonfire in Majul, the path to the Forest of Fallen Giants is on your left. Head down the path into the darkness. On your right, will be a treasure chest with another Rusted Coin. Head deeper into the hallway, and you’ll find a lever. Pull it to open the gate, and you’ll come across a wooden bridge. Go across the bride and take a left. If you go right, you’ll come out in the same place. But, if you go left there are a couple of items to find. Go across the wooden planks to find a treasure chest. In it is a Human Effigy. Leap across the chasm and collect another Homeward Bone and a Soul of a Lost Undead. Continue down the stream to enter the Forest of Fallen Giants.
If you used Heidi’s to level up before entering here, this shouldn’t be very hard. If not, these entry level mobs could give you some trouble. There are multiple enemy types in the first area. Some have knives, some have swords and shields, and there’s an archer in the distance. As is usually the case in Dark Souls, try luring one enemy at a time to you, unless you are strong enough to tackle multiple enemies at once. At this point, you’re probably not. In this wooded area there’s also a new bonfire to be lit. In an alcove on the right hand side is the bonfire. You should light it before taking on too many of these enemies. Resting at the Bonfire will also refill your Estus Flask.
Dispatch the seven or so undead in this area and then proceed up the path, where there will be a ladder awaiting you. Now’s a good time to note that holding B or Circle will allow you get up ladders more quickly in Dark Souls 2, but it does sap your stamina. When you get to the top you’ll have another set of undead to work on, and a knight when you’re ready. The best policy is to clear out all the weak enemies before tackling the harder ones. Take the guys out on the ground first. Next to the ladder you came up on there’s a hole leading outside, go out and up another ladder. When you get to the top of the ladder there will be two more undead to deal with. At the top of the staircase to the right will be a Soul of a Nameless Soldier. Now drop down and take out that pesky archer. Past the archer is yet another corpse with two items a Shortsword and Soul of a Lost Undead. Head back down to tackle the Knight. Targeting the Knight and dodging his attacks will be the way to take him down. Stay close, and when he goes for an attack, roll behind him. Defeating him will net you the Heide Knight Sword.
All enemies down and new swords in hand, you’re ready to enter the Mist into a new area. Heading down into this new area you’ll find multiple undead. One when you round the first corner. Two in the room to the right, and then another just down the hallway. Piece of cake. Heading towards the staircase you’ll find an archer. Where the archer is, there is a undead lobbing firebombs, and a third undead ready to knife you when you get to the top of the stairs. Taking out those three, you can grab the Buckler off the corpse in the back of this area, but be careful, there’s one more enemy waiting to ambush you. Ascend the ladder and open the door on your right. Congratulations, you made it to another bonfire.

Your next order of business should be to talk with the merchant at the bonfire. She can sell you a number of different things, but importantly, she can sell you the Blacksmith’s key. You should have enough souls to purchase it, so do so. Fast travel from the Bonfire to Marjul and open the Blacksmith’s shop for him. There’s a treasure chest inside the Blacksmith’s shop that contains a bow. In Dark Souls 2, the Blacksmith functions similarly to how it did in Dark Souls. The Blacksmith can reinforce your weapons and equipment, making them stronger if you have Titanite Shards and Chunks and Slabs. He can also repair damaged equipment and sell you numerous items. The Blacksmith won’t be available right away, so you can take the Bonfire back to The Forest of Fallen Giants. Blacksmithing has changed somewhat in Dark Souls 2. Well, weapon degradation has changed drastically. Weapons no longer persistently degrade with use. When you rest at a Bonfire, you’re weapon durability returns to full. If you break a weapon, you’ll need to get it repaired.
Head back out the doorway that you came in to get to the Bonfire, and drop down over the ledge. You’ll encounter two undead soldiers. Head along the wall and hop across the ledge for a Human Effigy. Drop straight down for another encounter with an undead soldier. Looking towards the ground from there, you’ll notice there’s a corpse on the tree to your left. Walk along the tree branches to collect another Torch and Soul of Lost Undead. There are quite a few undead at the bottom of this area. Try to tackle them in small groups. Once cleared, enter the small cave to on your left. Be careful. There’s a monster at the end of the tunnel spewing fireballs that can kill you almost instantly. There’s a door in the tunnel on your left that can be opened, and in it, the Fire Longsword. Head back to the Bonfire. You’ll need to go back the way you came in. Up the tree, over the ledge, and then through a hole in the wall. You’ll be back in a familiar area. Since you’ve rested at the last bonfire, this area will contain enemies again. One immediately on your left when you jump in the hole in the wall.
Now that you’ve made it back to the Bonfire, you’ll see that you have some options in this room. The obvious one is that there is a staircase. The staircase is a dead-end right now. You’ll need to beat the boss of this area to access the door at the top. To the right is a ladder heading down. That’s where you’ll go. If you’ve got the souls, you should also pick up the Pharros’ Lockstone. It’ll unlock a couple of valuable treasures in the next area. Head down the ladder and you’ll encounter a couple of new enemy types, as well as seeing the giant monster that’s been spewing fireballs at you. Don’t worry about the monster for now. Instead, you’ll be opening up a shortcut to get to the boss of this level. Dispatch the Hollowed Soldiers and head across the bridge for another Soul of Undead. Back across the bridge and to the right is a new area to enter. Enter the mist and you’ll find numerous archers and enemies lurking.
Head up the tree branch to the top of the wall. Here you’ll encounter numerous enemies, and probably encounter a massive Gryphon and The Pursuer. Don’t worry about them for now, you’re not strong enough to fight them anyway. You’ll get a chance to tackle The Pursuer a little later on. Instead, take out the first two Hallowed Warriors. Pass up the ladder and continue towards the firebombing Hallowed at the end of the wall. You can use this enemy to blow a hole in the wall for a shortcut back to the bonfire. You’ll need to stand in front of the cracked wall and hope that his aim is good. Heading down the stairs will find you facing off against two more Hallowed. Taking them out will give you some breathing room, and open three new areas for you to explore. Head down the ladder and you’ll find a man sitting on a bench at the end of this hallway. You’ll also find a door to your right, and a passage to your left.
The passage to your right is a trap. It has a number of ballista ready to go off when you enter. You can enter and exit quickly to make them go off without hitting you, but you’ll have four Hallowed to deal with. The Ballista might even take one of them out for you. It’s worth clearing out this room, as there is Blue Wooden Shield inside. There’s also a ladder at the back of this room that will take you to more treasure. The chest at the bottom of this room is trapped, but it has a Titanite Shard, so it’s well worth it. In the back of this room, you can also use the Pharros’ Lockstone to get even more hidden treasure when it opens a hidden room. In the room you’ll find two chests. Opening both will get you a Titanite Slab and Chloranthy Ring.
Head back up to the Ballistas and directly across from the exit of this room is your next objective. However, there’s a powerful Turtle Knight guarding our path. Head straight across to the Turtle Knight, but be careful there are also firebombing Hallowed above, so the best policy is to bait the Turtle Knight to come out. Lure the Knight to the Ballista room, and then use the Ballistas on him. They’ll kill him in two shots. He won’t follow you all the way in, so it’s safe to kite him inside as far as he’ll go. When he starts backtracking for the door. Fire on him. To fire the Ballista get behind it and press A or X.
Once the Turtle Knight is gone, you’re very close to opening a shortcut to the first boss. You’ll need to deal with only a handful of Hallowed. You can either do this the easy way or the hard way, but being this close it makes sense to do it the easy way. Entering the room the Turtle Knight was guarding you’ll find two Hallowed guarding the door you need to enter on your immediate left. You can try to bait them out one at a time for the easiest advance. Before you do, head right and up the stairs and you’ll find another corpse with a Lifegem and a Homeward Bone. If you’re really feeling adventurous, after you’ve cleared the two Hallowed guarding the door, you can head up the sword in the middle of this area to fight the Hallowed guarding a Halberd and Soul of a Nameless Soldier. You’ll have to deal with him, and another Hallowed that will drop down behind you, be warned.
Enter the mist that the Hallowed were guarding and head to the left to open the shortcut to the elevator. Where you entered this area, there’s also a Crystal Lizard which can be killed as well. In the room with the Lizard you’ll also have to deal with a Hallowed. Though the reward is a Large Leather Shield and a Lifegem.
Now that you’ve got the shortcuts opened up, you can start exploring this area more thoroughly for other items, or you can go ahead and tackle the first boss. We recommend at least getting the Majul mansion key and the items in the mansion before tackling the first boss, but if you’ve been collecting souls along the way, you should be properly leveled to tackle the first boss. He’s slow and predictable, a very easy kill.
The Mansion Key is fairly easy to get. You’ll need make a couple of well timed leaps across the rooftops, while archers are trying to pick you off. Not a problem. The video below shows off the path to get there. The Mansion Key will get you a couple of items. The important one being another Estus Shard, important to have in your upcoming battle.
Mansion Key Dark Souls 2
At this point, you should be feeling pretty confident in this area. If you want to farm souls, or explore for items that we didn’t mention in this guide, you should be adequately leveled to do so, and have plenty of shortcuts at your disposal. You’re also ready to tackle the first boss — The Last Giant.
The easiest way to beat The Last Giant is to roll under his legs every time he runs at you to attack you with his arms. Once you roll through his legs, attack his feet. Get in a couple of good attacks, and then get out of the way as he’s going to try and stomp on you. Put some distance between you and the giant, and he’ll charge you again, rinse and repeat.
Killing him will net you Soul of the Last Giant and Soldier Key. You’ll also get plenty of souls to spend on leveling your character. At this point, it’s wise to level up before you go looking for new doors to unlock with the Solider Key.
The Last Giant Boss Fight
Once you’ve banked your souls from this run, you’ll find that The Soldier Key opens a number of different areas for you to explore. It will allow you to more thoroughly explore this area, it opens up the boss fight with The Pursuer as well. You could also head back to Heidi’s Tower of Flame to start progressing through that area as the bosses there are probably well within your level now.
Made it through these early areas of Dark Souls 2? Learn where to get the four Great Souls and beat Dark Souls 2.