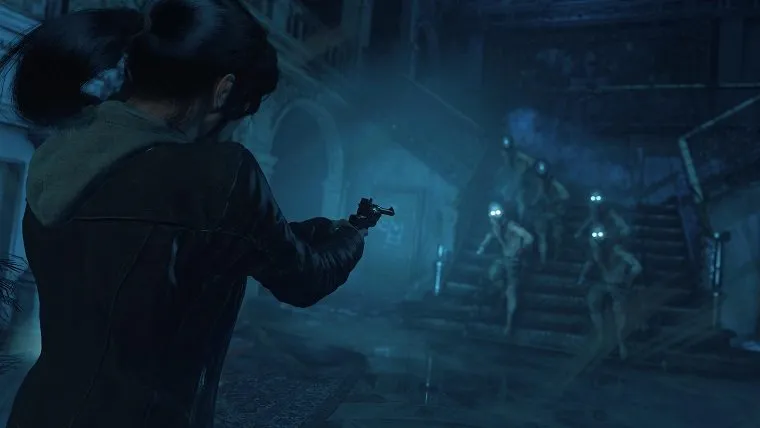
While Blood Ties is the major story expansion that features no combat as Lara explores Croft Manor, Lara’s Nightmare is the complete opposite. Instead of leisurely exploring the Manor for secrets, Lara will instead be fighting off the living dead as she attempts to make it out in one piece, and with the tips and tricks of this guide you should be able to do just that.
Despite the mode initially seeming like just another zombie-killing fest, the actual goal is to find and destroy the 3 floating skulls that are scattered throughout the Manor. These skulls are easy to spot as they’re big and float around in one spot, though they can attack you by spitting fire at you. They can take a decent amount of damage, but once you’ve plugged them enough times they’ll explode. Just make sure that you remain constantly aware of your surroundings, as it is while you’re trying to take out these skulls that you’re likely to be ambushed by zombies and potentially get killed.
The thing with these skulls is that odds are that at least one of them will be hidden within a room that is initially locked, and those who played through Blood Ties will know that they’ll need the Master Key in order to get through. However, Lara’s Nightmare keeps things fresh by randomizing the location of the Master Key, so I won’t be able to tell you exactly where it is. However, in my time with the mode I found that it was most often in secret vault in the basement, or on a table in the main area of the basement. It can be in several different locations, though, so just keep your eyes peeled for a toolbox.
As you’re wandering around the Manor you also want to be sure that you stay on the lookout for the numerous weapons that are scattered about, as you’ll need all the firepower you can get to achieve victory. You have four weapon slots for a pistol, machine gun, shotgun and bow, though you’ll find different variations of each that will be replaced by the latest variation you pick up. Do your best to fill all four slots, as this will not only help in taking down zombies but also taking down the final boss.
However, if you find that you’re getting overwhelmed by the zombies and you’re dangerously low on ammo, there is a little trick that you can do to get to safety. If you remember the hallway that leads to the secret vault in the basement, you can go there to get away from the zombies. You can also do this in the stairwell leading to the basement. In all my time with the game the zombies were not able to get through either of these passages, giving you a little breather to regroup and also getting all the zombies to crowd together to pick them off from a safe distance.
Once you’ve taken out all 3 of the skulls the final boss skull will be summoned and appears in the grand hall. This battle is seriously tricky, as it is much bigger and takes much more damage to kill than the others. Also, it will summon hoards of zombies regularly to kill you, and will activate a forcefield that can only be removed by taking out the zombies it summoned. It also has several rocks floating around it, which you need to aim around in order to land your shots.
The key to winning this battle is to keep moving, because if you’re sluggish you’re as good as dead. More zombies will continuously be summoned, so you need to take them out when they’re near you and keep moving around the grand hall’s upper level in a circular route so you don’t get surrounded. When the boss’ shield goes down plug him as many times as you can, but do not get greedy. You may be able to get a lot of shots in, but if it comes at the price of getting surrounded by zombies it isn’t worth it. Instead, get as many shots in as you can and as soon as you sense zombies are closing in get on the move again.
The strength of the zombies will increase as the battle wages on, with zombie dogs being summoned at one point that are incredibly fast and incredibly annoying. You’ll want to have a machine gun or shotgun ready to deal with these puppies, as if you miss too many shots you’ll soon be overwhelmed and will probably die. As soon as you see the dogs appear forget about the boss for awhile and just focus on taking out the dogs, as they can take you down very easily.
Using the above tips and tricks mixed with a little luck and perseverance should result in you eventually emerging the victor. If you did, congrats!