Being able to slap your ugly mug on your created player is one of the coolest features about NBA 2K19. Unfortunately, there is much information on the feature within the game itself. So here’s what you’ll need to import your face into NBA 2K19.
First you’re going to need the My2K19 App for mobile devices. Once you’re in the app, it’s going to give you the option to scan your face right away. Just select this option and then you’ll be prompted to pick the service that you’re playing the game on, whether that’s Xbox Live, PlayStation Network, Nintendo Switch Online, or on Steam. You’ll then need to login with that account to make the scanned face available to use.
Now’s for the tricky part as you want to get a good picture for your player. You’re going to use the tool within the app to take the picture but you’re going to need sufficient lighting and the ability to move your head back and forth so the app can scan your face. Once it’s got a good picture it will spit out a model for you and then you can choose whether or not you want to use it or try again. Sometimes it will also warn you that an error has occurred and that you should try again. If that’s the case just try it again until you’ve got a good image.
Once both you and the app are satisfied it will then upload the images to your profile. Once they’ve been upload you can check out your character on your My Career game mode. You may need to restart your game for the changes to be applied to your player in My Career or your avatar in the game.
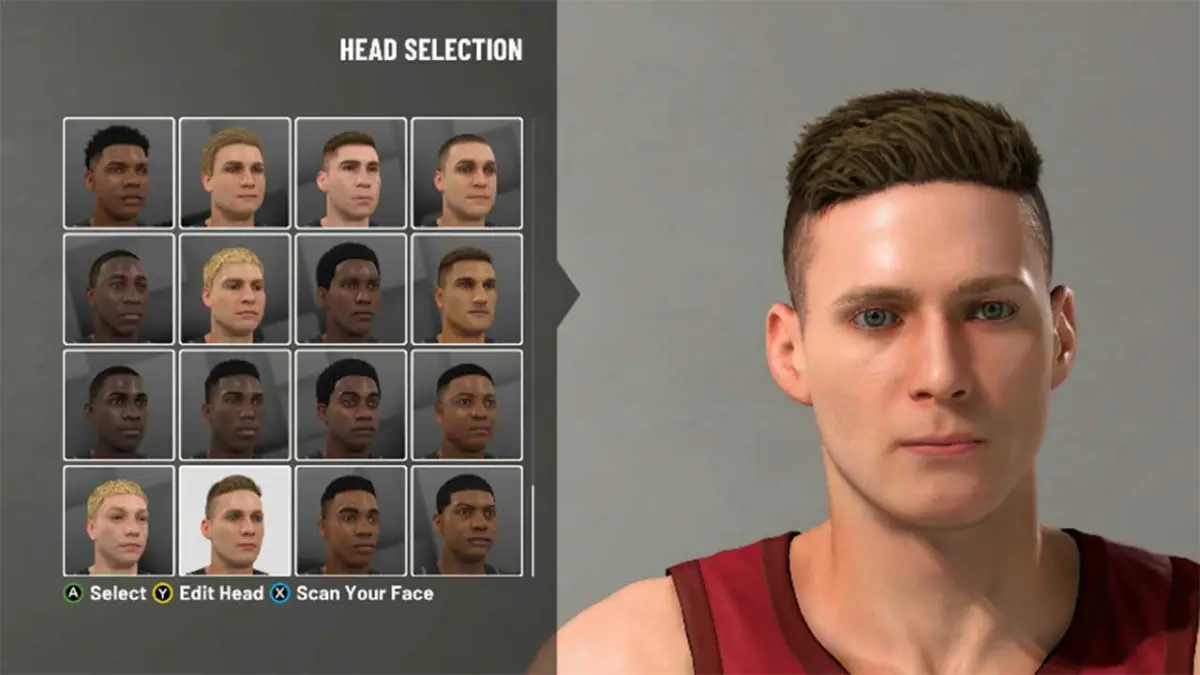
If you’re creating a brand new My Player, you’ll want to have the pictures ready before you do your head selection on your player. At the bottom of the head selection screen which gives you a bunch of different pre-made heads to choose from you’ll see an option press X to scan your face. At which point the game will look for saved data from the My 2K19 App. If you’ve got face scan data uploaded, you’ll be able to switch the head by clicking on the face scan square in the menu.








Published: Sep 13, 2018 08:52 pm