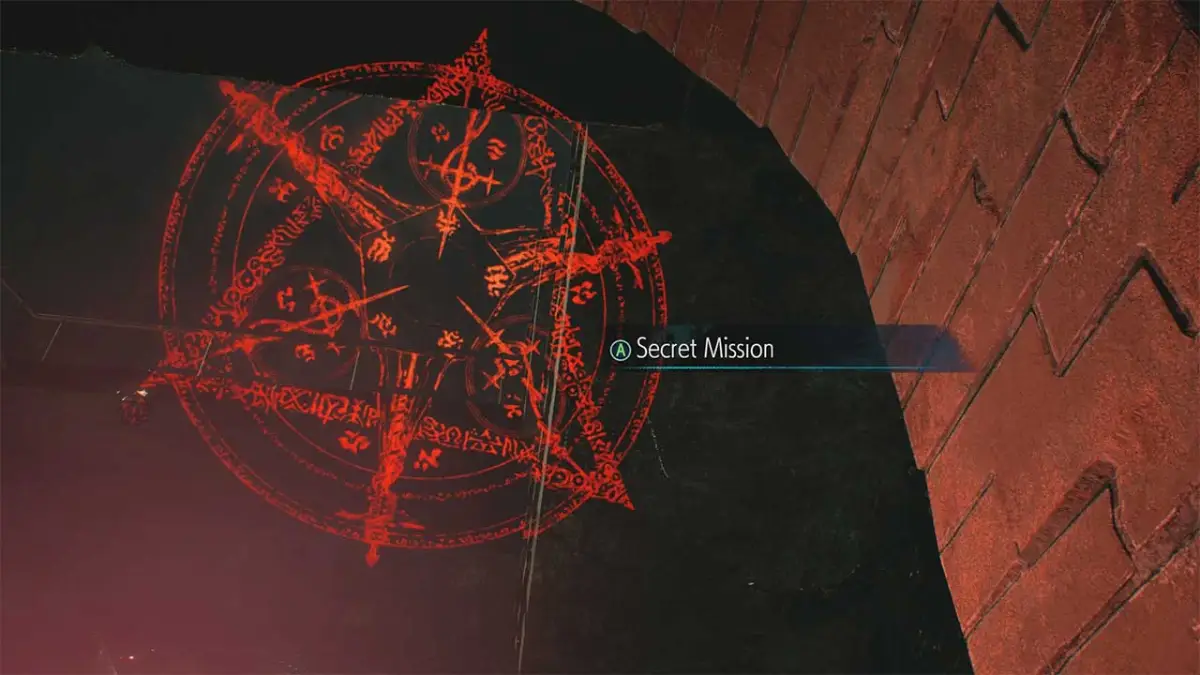
There are a ton of cool secrets to find in Devil May Cry 5. Some of the best of them are in the Secret Missions that can be found throughout the game. There are twelve different secret missions in Devil May Cry 5, and you can find them through doing a variety of different challenges. Mostly these secret missions involve you jumping or navigating the world and keeping an eye out for a red light and emblem like the one seen above. Once you find the emblem or the light you will know you are in the right place. You simply need to line-up the emblem until it looks like the one above and gives you the prompt to start the Secret Mission.
Each Secret Mission in Devil May Cry 5 is going to be different and offer different challenges. Some will require that you beat enemies under a certain time limit or other condition, while others will test your skills in other areas. Completing Secret Missions in Devil May Cry 5 will require that you find them first and this guide will show you the locations and levels to find the Secret Missions.
Secret Mission #1 Location – Found in “Qliphoth” Mission 2
The first secret mission location is unmissable and must be accessed to progress through this mission. To open this mission you will unlock the pathway by lining up the circular pattern on the doorway.
Secret Mission #2 Location – Found in “Flying Hunter” Mission 3

The second secret mission is located in the early parts of Mission 3: Flying Hunter. Once you’ve passed through the grappling sections at the beginning of the game you will enter a tunnel that requires that you clear branches that are blocking the doorways. Once you’ve destroyed the two branches (and beat a few rooms of enemies) you will get access to a stairwell that leads upwards to the rest of the level.
You can access secret mission #2 by lining up the pentagram by heading to the bottom of the stairwell.
Your objective in Secret Mission #2 is to not let any Red Empusa escape! Your reward for completing the Secret Mission #2 is a Blue Orb fragment.
Secret Mission #3 Location – Found in “V” Mission 4

Two access Secret Level #3 in Devil May Cry 5 you’re going to need to collect two Nidhogg Hatchlings in the V Mission. The first hatchling is pretty easy to find as you’ll encounter it naturally when heading through the level. The second, however, is a little trickier.
Once you get to the area in the image above, you’re going to want to call the Nightmare attack by V. This will have the Nightmare bust through this mural on the side of the building and open up a new area for you to explore. Heading into the building you will find a blue orb fragment and the second hatchling.
Continue through the linear portions of the level until you get to the area where you can use the first hatchling. Once you do, you’ll see that you’ve gained access to a second hatchling door. Open the second and then proceed up the stairs to the puzzle and entrance to the Secret Mission #3.
Secret Mission 3 tasks you with collecting all of the red orbs in the level within a set amount of time. Your reward will be a Blue Orb Fragment.
Secret Mission #4 Location – Found in “The Devil Sword Sparda” Mission 5

The fourth secret mission location is going to be another mission where you’ll need to call in the Nightmare during a battle to make a passage way. After you’ve dropped into the construction area there are going to be a couple of fights where the walls close off. When you are in the position indicated in the image above you’re going to want to make sure that you call in Nightmare during the fight and he’ll break down a big wall that’s in the way between you and the Secret Mission.
Once you’ve opened the wall, you’ll need to fight another group of enemies, but once you are finished you will head up the stairs to access the secret mission #4. The goals of the mission are to Eliminate all of the demons without taking a hit.
Your reward for completing Secret Mission #4 is a Blue Orb Fragment.
Secret Mission #5 Location – Found in “Demon King” Mission 8
The fifth secret mission location can be found deep in Mission 8 “Demon King”. This mission will have Nero making his way through a vast cave with numerous elevators that keep him pressing forward. This Secret Mission is actually a little bit difficult to find and somewhat deep into the level. Near the end of Mission 8 you will take a second elevator that has rocks that go upward in lava. You’re going to want to ride the rocks to the top of this lava elevator (don’t forget the gold orb at the top) and then jump off to the left once you get to the top.
Take a moment to look over the ledge to your left and you will see that if you are facing the lava elevator the other side of the wall has a hole in it that you can jump in. Simply jump in this hole and go down to find the red light that indicates a secret room is nearby. Line-up the emblem and then access Secret Mission #5.
Secret Mission #5 tasks you with completing the mission without touching the ground, using Nero’s grapple hook to traverse.
Your reward for completing the mission is a Blue Orb fragment.
Secret Mission #6 Location – Found in Mission 9 “Genesis”

This is another mission that needs to be unlocked by using Nightmare to clear your path to the Secret Mission. (If you don’t have your meter filled enough to call Nightmare when you reach these vines in your path, you can also shoot them with the bird to remove them from your path.

You’re going to want to keep an eye out for the location in the image above. Once you get to this tree with the tombstone you’re going to fight against a couple of knights and a Baphomet. Beating them will clear a path to either jump down a big hole or you can hook a left and enter the secret area for Secret Mission #6. Using the visual aids above, you can either clear these vines by summoning a Nightmare, or you can shoot the red vines in the large hole to gain access. Once inside you will get a piece of a blue orb and you’ll be one step closer to the Secret Mission.
Secret Mission #6 is a timed mission that requires you beat all demons in 20 seconds. Your reward is another Blue Orb Fragment.
Secret Mission #7 Location – Found in Mission 10 “Awaken”

To find the seventh Secret Mission you’re going to need to choose correctly at one point in Mission 10. Once you’ve been introduced to the Phoenix type creature that blows up once defeated (bright red flying monster) you will get an opportunity to find Secret Mission 7. Just head through door that’s moving that was on the right of the room when you entered. Once you go through this door you will simply need to follow the path to reach the red light and then access the Secret Mission.
Secret Mission 7 asks you to aim at enemy weak spots and take them down with a single bullet.
Secret Mission #8 Location – Found in Mission 11 “Reason”

Secret Mission #8 is located at the very beginning of Mission 11. At the beginning of the mission you will need to cross a bridge of broken rocks. This area is a puzzle that you must lower to progress. You will basically need to destroy three sets of vines to lower the building to a point where you can progress. For the purpose of the Secret Mission, you’ll simply need to destroy the first set of vines then you’re going to want to go back into the tower area that you lowered and line-up the picture.
This secret mission tasks you with Maintaining an S Stylish Rank.
Secret Mission #9 Location – Found in Mission 12 “Yamato”

Once you’ve completed the blood fountain puzzle in Mission 12, Yamato, you’re going to be want to be on the lookout for Secret Mission #9. After you’ve moved the statue and proceeded underground you’re going to want to be on the lookout for the Secret Mission symbol. In the image above you can see the Secret Mission emblem in the cave, but you’ll need some fancy footwork to reach it.
The normal path of the level will take you up a group of rocks and you will see the emblem. Turn around and jump to the area to your back and you will be able to enter the Secret Area. You will need to use Double Jump to make this leap.
Secret Mission #9 tasks you with staying in the air for more than 15 seconds.
Secret Mission #10 Location – Found in Mission 14 “Diverging Point: V”
Secret Mission 10 is another mission where you’ll be controlling V. This one is pretty easy to find, but you’re going to need to go towards the end of the level. This includes a couple of boss type fights. Near the end of the level you’ll find a number of blood rushing in tubes and you’ll want to continue sliding down the big ramp. Instead of heading straight towards the end of the level you’ll want to veer left at the end of the sliding segment. This will bring you to Secret Mission #10.
Secret Mission #11 Location – Found in Mission 15 “Diverging Point: Nero”

Secret Mission #11 is one of the hardest to find in Devil May Cry 5. Not only do you need a couple of different power-ups equipped before you head into the level, but you’ll also need to purchase some unique ones as well.
To get Secret Mission 11 you will want to head to the Nico Customization Statue midway through the level. Once you are here, you are going to look behind the statue for a pathway. Once you head inside you will be shown a short cinematic that shows off a blue orb. There are numerous Punch Line Devil Breakers in the area that you can pick up. Picking up the Punch Line is all that you need to actually make it to the Secret Mission. Just ride the Punch Line over the ramps and up the hills to make it to the area just below the Blue Orb Shard to access the Secret Mission #11.
Secret Mission #11 asks you to “Head straight for the goal”. That cryptic description actually means that the game wants you to traverse an obstacle course to reach a Blue Orb Shard within a certain amount of time (0:30).
Secret Mission #12 Location – Found in Mission 16 “Diverging Point: Dante”

The final Secret Mission is in Dante’s Diverging Point Mission. And it’s one of the trickier Secret Missions to find as you’ll need to keep a watchful eye when making your way through a disorienting area of the game.
Dante will be making his way down and down the level and you’ll want to keep an eye out for two different things to make sure you find this Secret Mission. The first is a fight between three lizard enemies. This will be two of the lizards that turn into buzz-saws and one will be one of the teleportation kind. After this fight you open a path to another steep drop. Instead of jumping off you will look for a platform very close by instead.
Head onto that platform directly below you and destroy the blood orb tree. Once you do it will reveal a new passageway. If you look below you will see yet another blood orb tree. Directly above that tree there is a tiny area that you can access. This is the location of the Secret Mission #12.
Secret Mission 12 requires that you collect a set amount of Red Orbs within a certain time period.


Published: Mar 8, 2019 12:21 am