You’ve finished Scrying a Lead in search of an antiquity in The Elder Scrolls Online: Greymoor, and now you need to use Excavation to dig it up. The process may seem simple on paper, but you can easily destroy the item if you are careless.
Excavation basics.
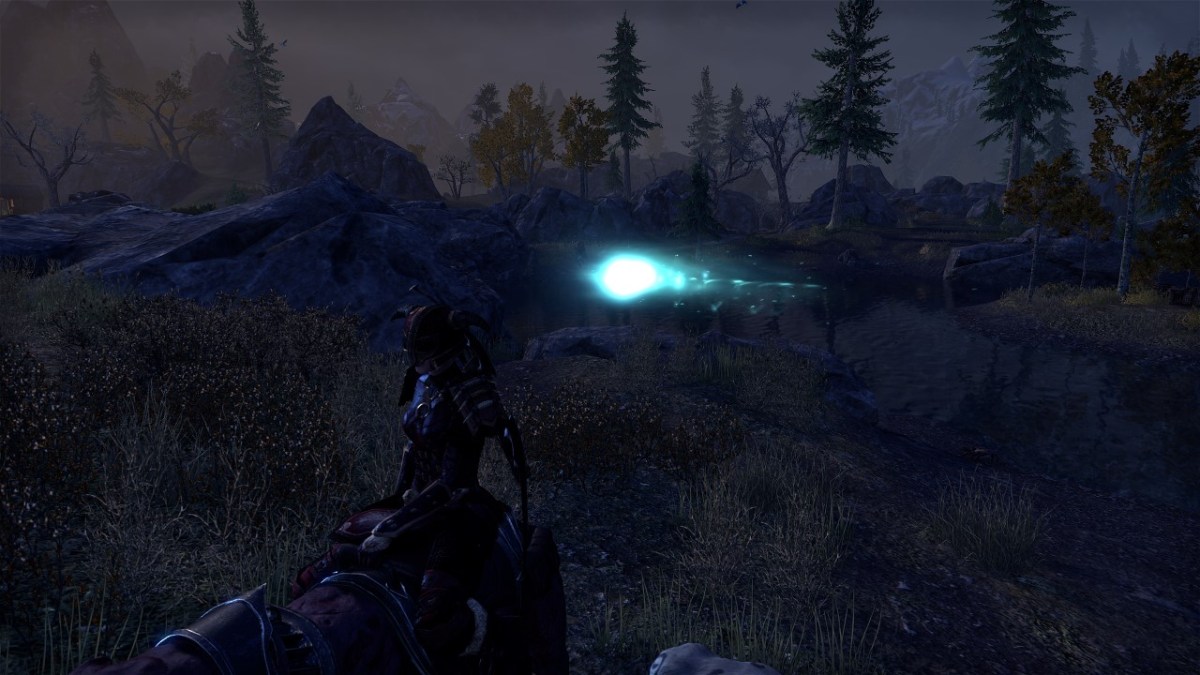
Before you get started be sure to assign the Antiquarian’s Eye to a quickslot. This will make locating your digsites easier once you reach the area you uncovered via Scrying. Just go to your inventory, select the Quickslots tab, and assign the Antiquarian’s Eye to an open slot. Once that’s out of the way head out to your digsite, which will be highlighted in blue on the map and have an Antiquities icon on the compass.
Once there the compass will turn blue, and activating the Antiquarian’s Eye will generate a glowing orb that will point towards the actual digsite with a glowing tail. The direction the tail is flowing toward is the direction you need to go, so orient yourself to the tail and press forward. You are looking for a mound of dirt that is spouting off blue energy and sparkles gold.

Once at the digsite interact with it to bring up the Excavation mini-game. It’s a giant 10×10 grid full of dirt, and each grid will be one of three levels of depth. Your treasure is hidden by this dirt, and you’ll need to use the Antiquarian’s Eye and your available tools to unearth it. You’ll begin with the Antiquarian’s Eye (or “Augur” skill as it’s known in this mini-game): it’s a “Hot and Cold” mini-game to locate the exact position of the item.
Selecting a grid with the eye will bring up a color, which represents how close you are to the treasure. Red means you are 5+ grids away from it, Orange means you are within 4 grids of it, Yellow means you are within 2, and Green means you are right on the money. The crystal next to the Eye indicates how many charges you have before you can no longer use the eye, so if you don’t find a Green grid before running out you will want to dig around the Yellow grids. The best way to “Augur” is to start with the four corners of the site and then the center – this will not only help you hone in on the loot, but identify which quadrants are best ignored.
Once you have either located a Green grid or have run out of charges for the Antiquarian’s Eye it’s time to start digging. In the beginning you will start off with only a Hand Brush, which removes one layer of dirt per use. Every use of a tool other than the Antiquarian’s Eye will consume your “Time” resource, or the light-yellow bar at the top of the screen. Run out of time before finding your treasure and you will fail the dig. Don’t stress too hard over this: you can find the digsite again without having to scry the Lead.

So, let’s break down your tools real quick:
- Hand Brush – removes one layer of dirt from a single grid per use, but generates Intuition (charges for your other tools).
- Trowel – remove up to three layers of dirt from a single grid.
- Heavy Shovel – remove a single layer of dirt from multiple grids in a large area; only affects the highest layer of dirt.
You need to level up your Excavation skill-line to access the other tools (though the Trowel is grabbed early on at level 2), so at the start you will want to zone in on those Green grids and use the Hand Brush to push away the dirt covering the antiquity. The Trowel can used for this purpose as well, but will damage the antiquity if you use it on dirt that is less than three layers deep (the thick, rocky grids are three layers deep, moderately rocky two, and no rocks are one). The Trowel won’t destroy the treasure outright if you do this, but keep an eye on the red health bar below your Time gauge.
One you unlock the shovel you want to use it in tandem with the Hand Brush to clear as many grids as possible. Because the Heavy Shovel only knocks down the highest level of dirt within its area of effect, use the Hand Brush to equalize as many layers as you can before using it. Remember to be mindful of your Time!
As you take on more difficult Leads you’ll start to notice purple gas clouds in your digs: these are underground gas veins that can be used to your advantage, but can also lead to failure if not triggered correctly. Essentially, gas veins can blow up, and if they are above the antiquity this will destroy it outright. However, if they are near it these can be chained together with the Trowel and detonated to clear mass quantities of dirt from the board (making bonus loot all the easier to locate). If you see purple grids be mindful of their location and the antiquity’s.


Published: May 27, 2020 10:15 am