Valorant has a vast array of maps to learn and knowing the best lineups and setups in maps such as Bind will give you an advantage over other teams. Bind has many areas where there can be benefits in having a well-prepped strategy ready to utilize with agents like Deadlock. This article will take you through the best Deadlock Bind lineups and setups.
Best Attack Lineups to Use With Deadlock in Bind
Site A
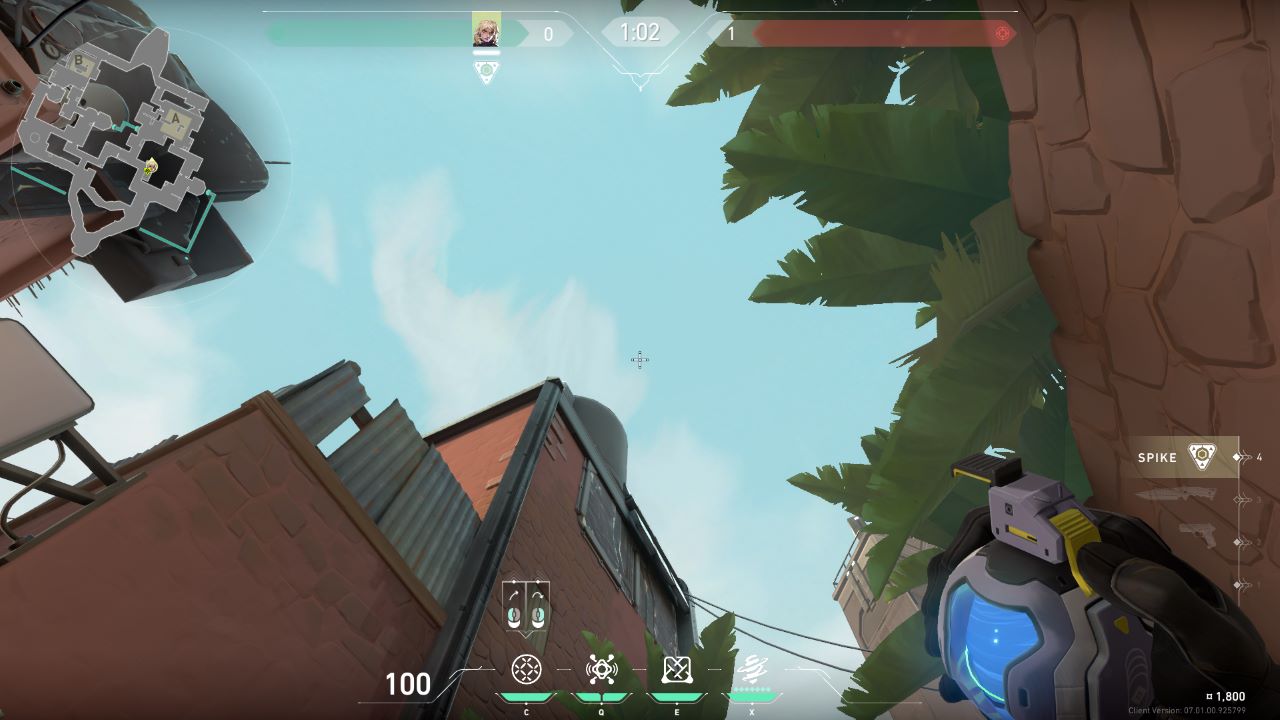
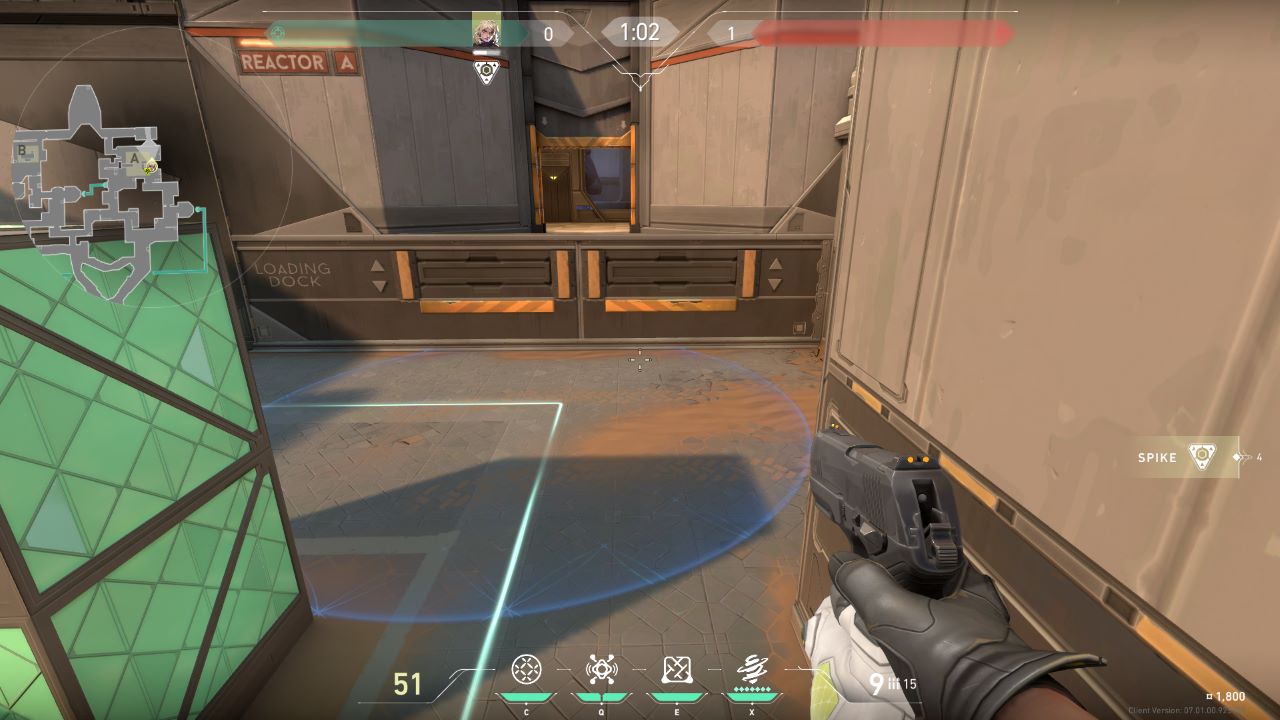
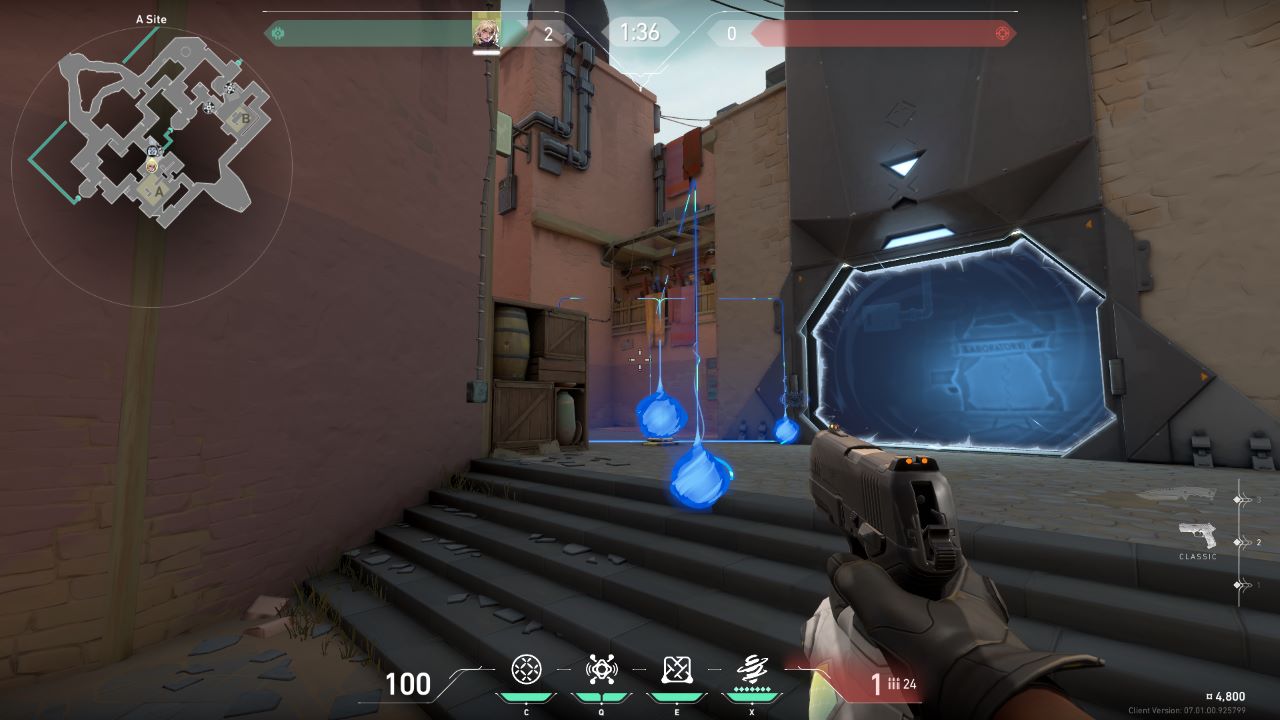
The first Gravnet spot I have for you will ensure that you easily are able to cover your team’s push from the left side of A. When your team is on the push to A, head to the corner with the crates and aim your Gravnet just above the tip of the right-side cloud as shown in the image above. Throw it and it will land between the stairs and slow down any enemies checking out the push direction.
Other community members recommended using a position that throws the Gravnet into a nearby corner exit instead, but I have found this particular spot works the best for stopping enemies in their tracks near the corridor.
Related: 5 Coolest Valorant Crosshairs
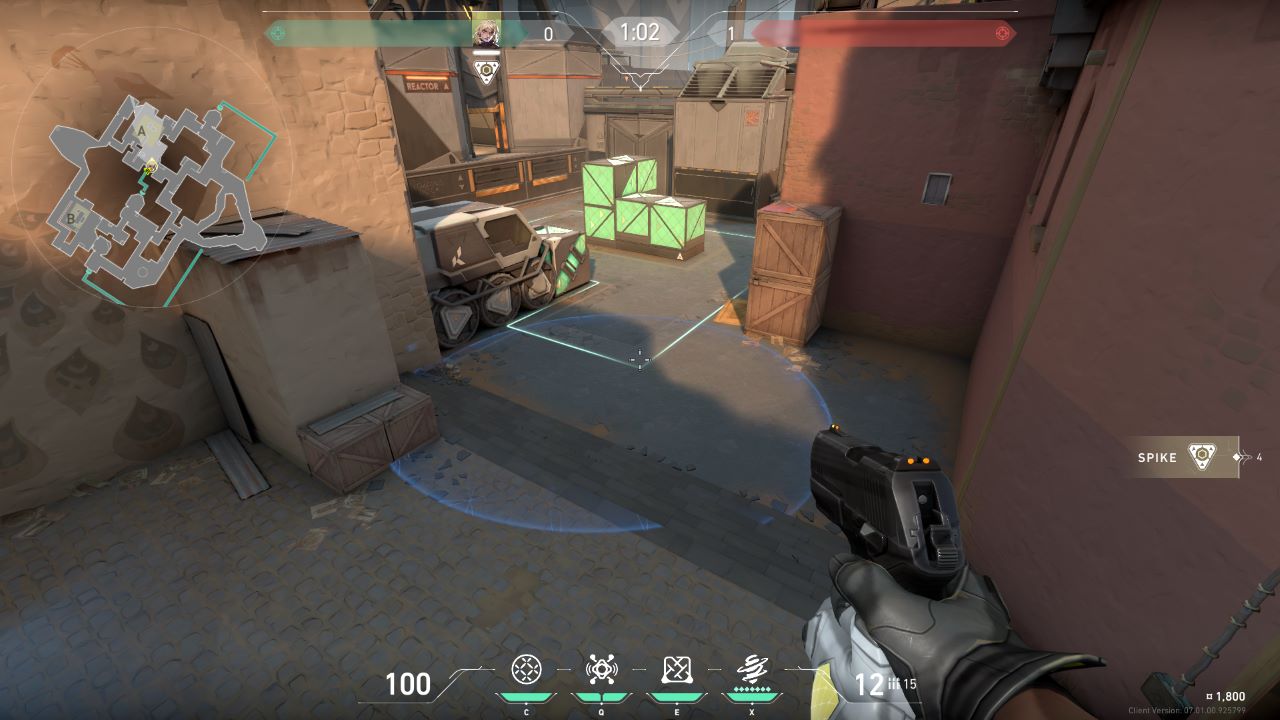
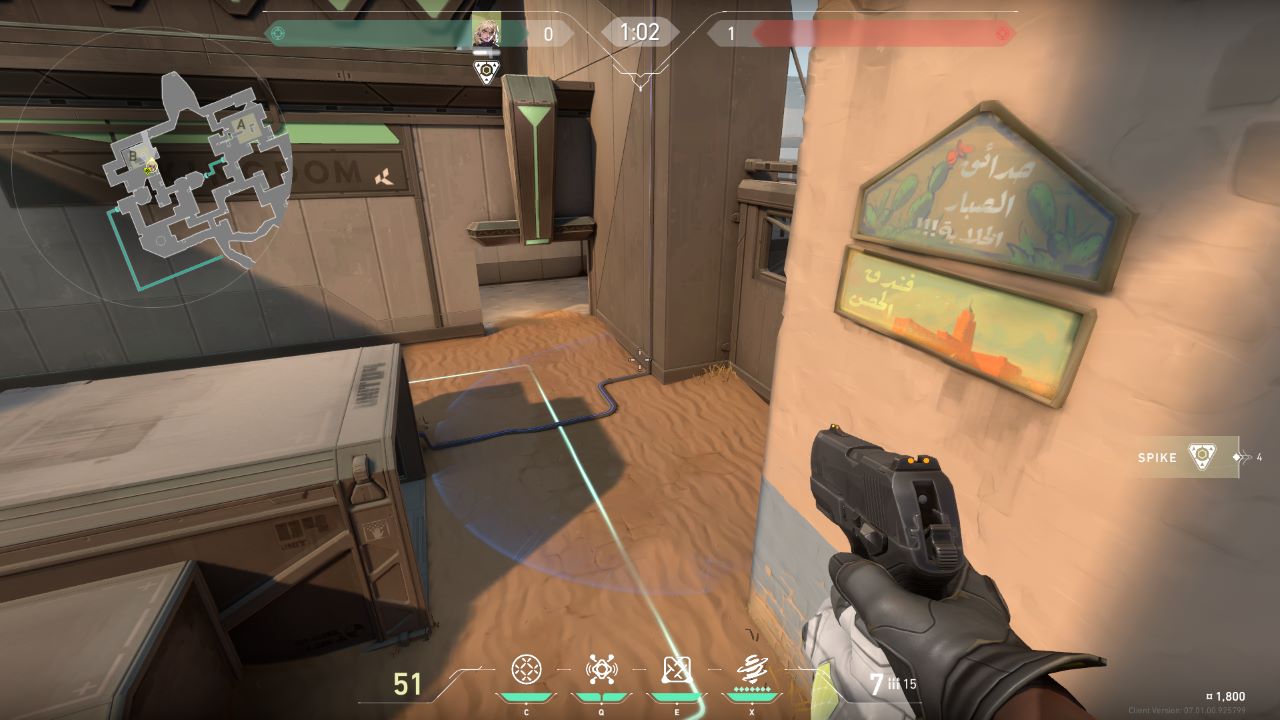
The second Gravnet Lineup is extremely useful if (like me) you want a lineup that lands directly in the back of site A. This is great for when your team is just about to enter Site A and enemies are likely to be using the back for cover — totally unaware of your sneaky Gravnet. Head to the spot shown on the map in the third image above. When you are there, walk forward from the wall, jump, and throw the Gravnet.
The Gravnet should go between the leaves and then head straight to the back behind the stacked glass crates in front of the “Loading Dock” platform.
Site B
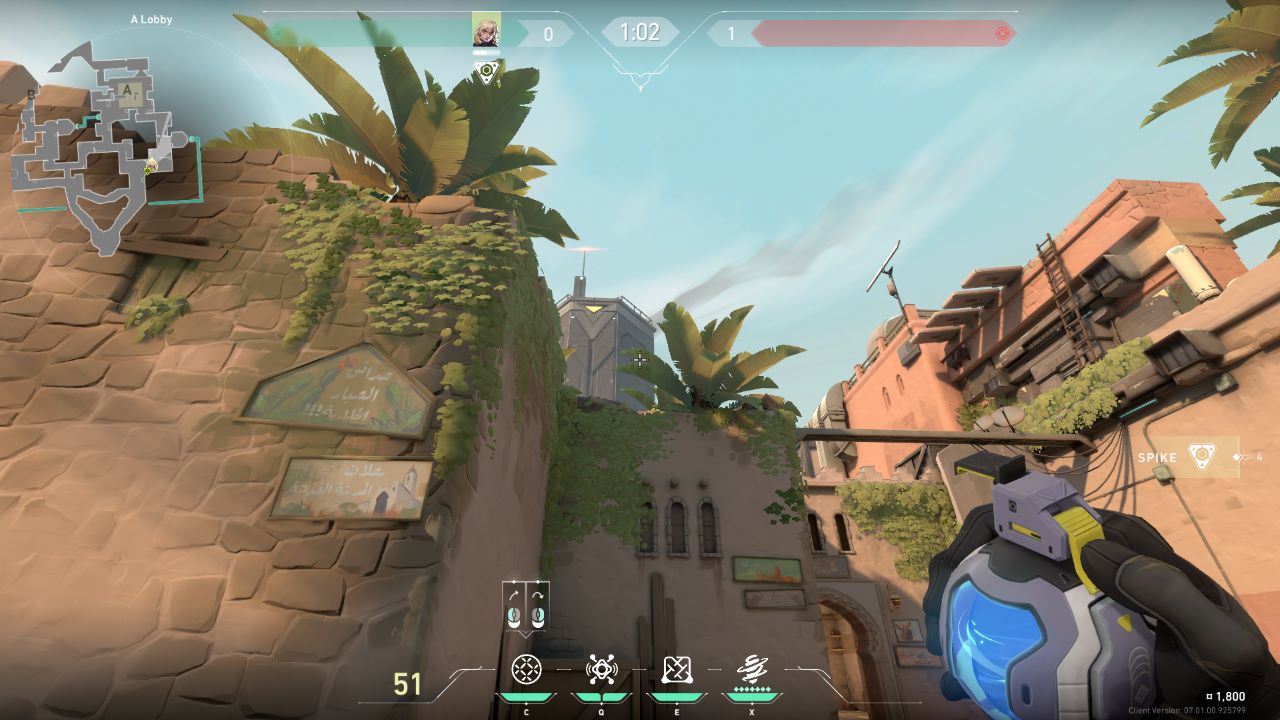
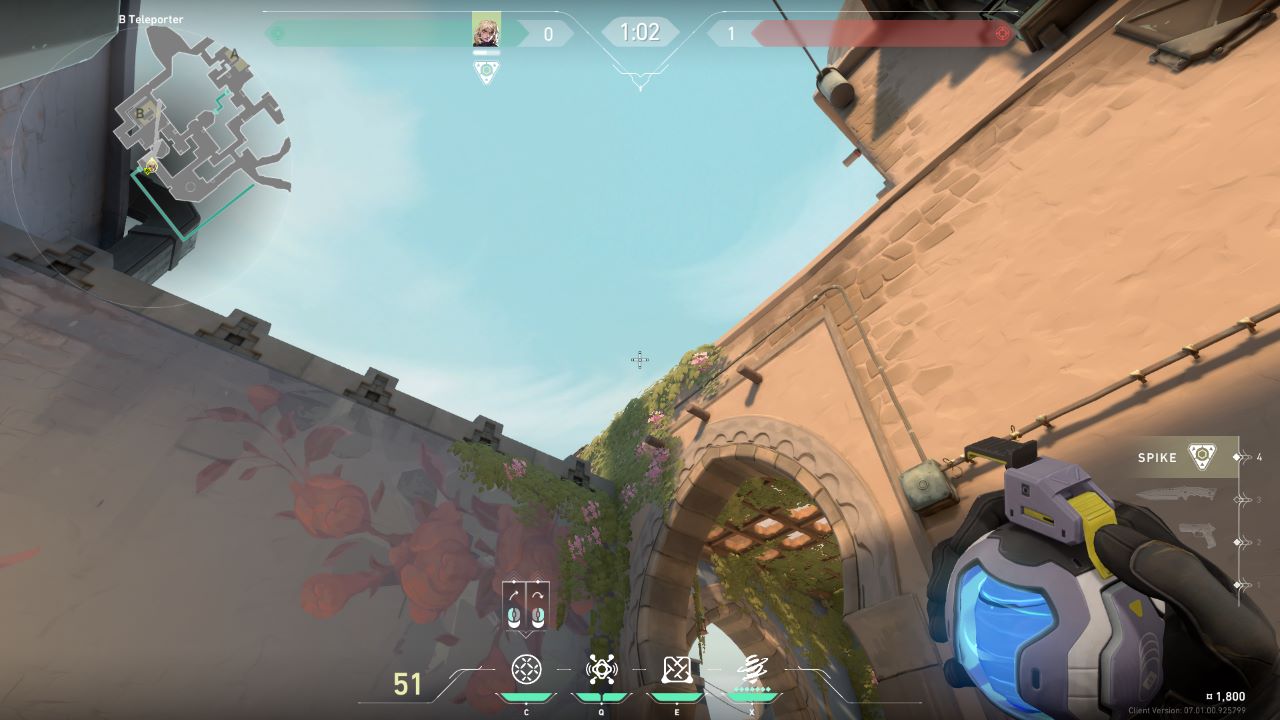
The Lineup on Site B will again help with any direct push your team makes on the site. When you are pushing from the left side, position yourself in front of the corner of the wall just before the archway entrance. Aim your crosshair on the middle-pink flower then go up above the leaves then slightly to the left. Throw the Gravnet over and it will land nicely directly in the right-back of the site.
Related: The Best Valorant Pick-Up Lines
Best Defending Setups to Use With Deadlock in Bind
Site A
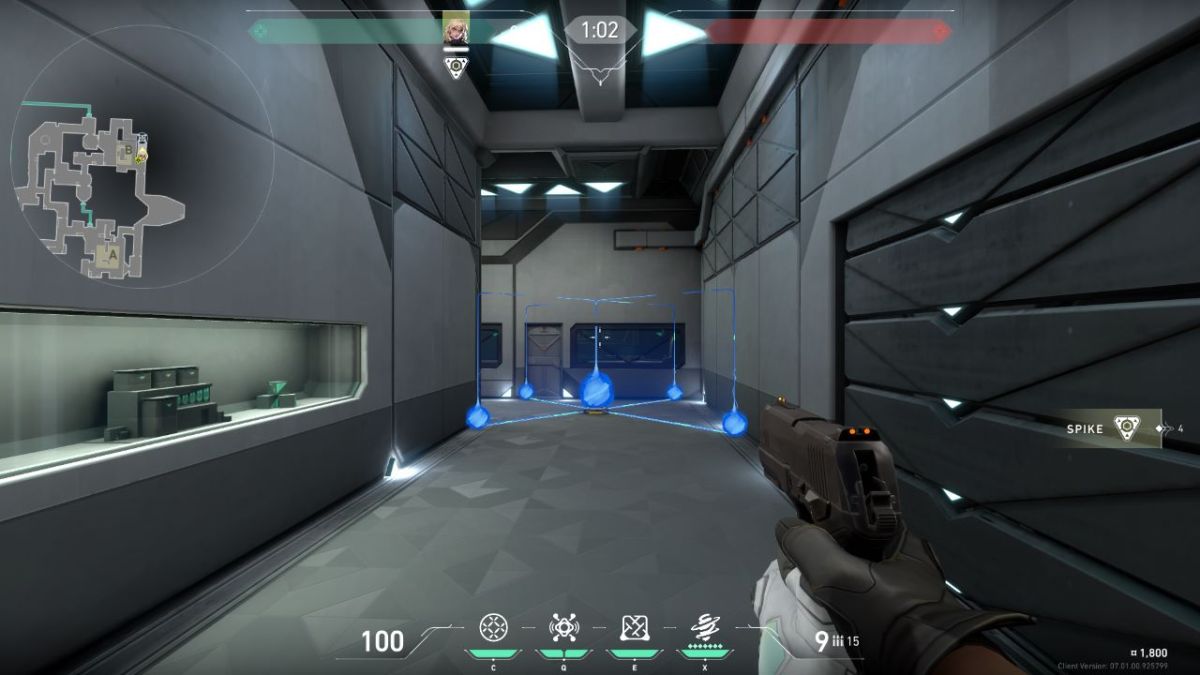
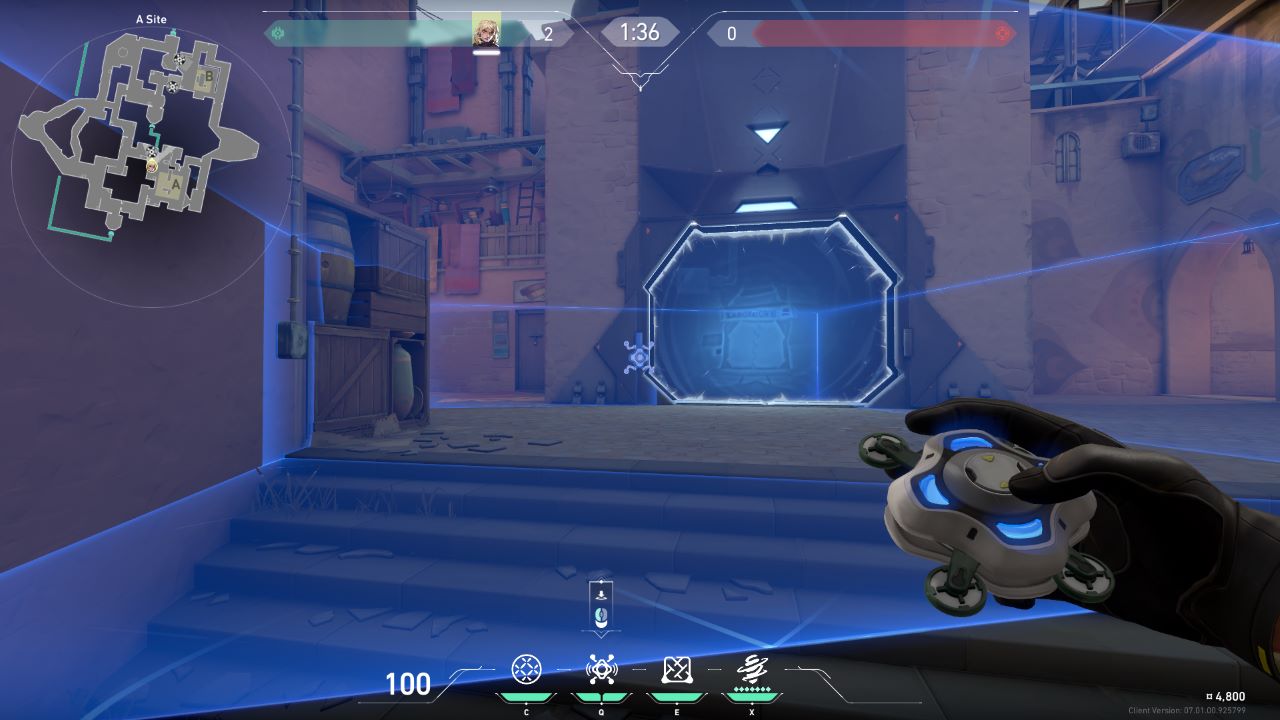
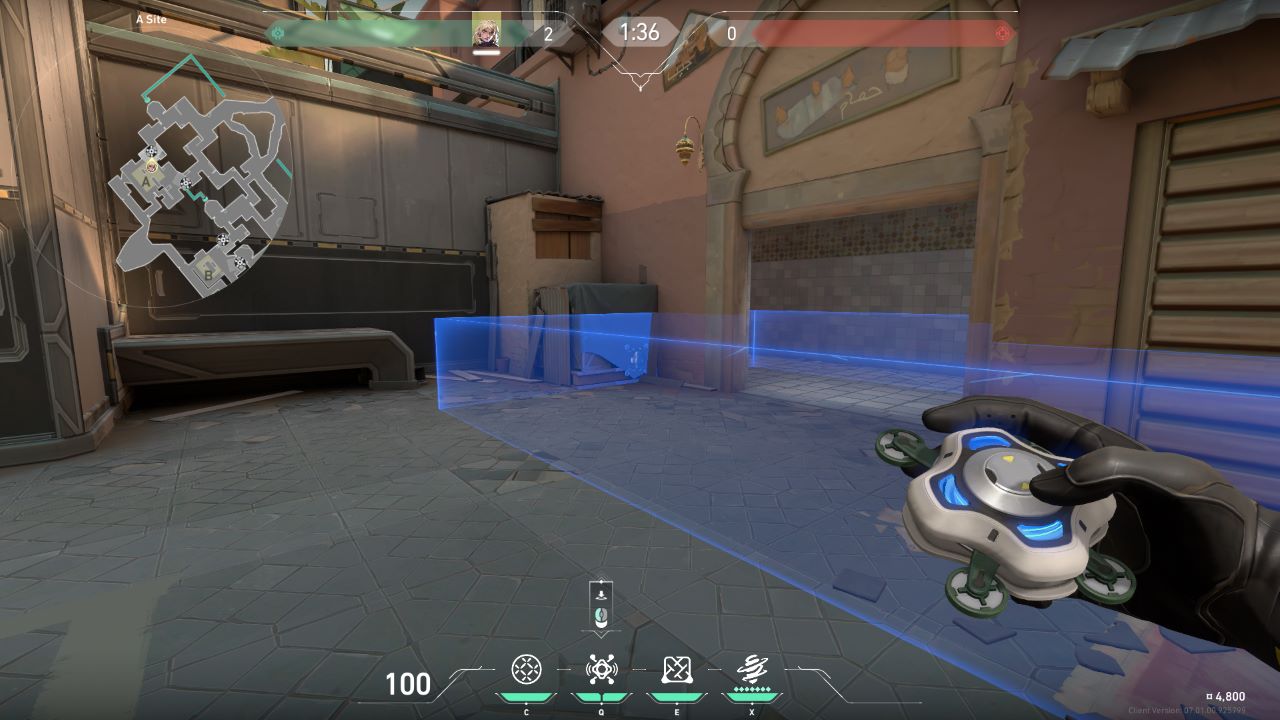
I recommend that you place one of your Sonic Sensors on the corner near the forcefield at the top right of the area. If you place it directly on the corner facing inwards to the site, it will cover a good portion of the stairs and the entrance corridor. Along with this, it also can alert you to any enemies who accidentally trip the sensor when moving in from the side.
Related: How to Convert Your CS: GO Sensitivity to Valorant
The second sensor you place should cover the doorway entrance at the left. This is a simple sensor placement but just make sure it is placed behind the plank on the crate with the fabric hung from it. As for the Mesh Barrier, I recommend using it to stop any push coming from the right side. Throw it just to the left of the Forcefield in the central slabbed area between the field and the crates.
Related: Can You View Your Valorant Purchase History?
Site B
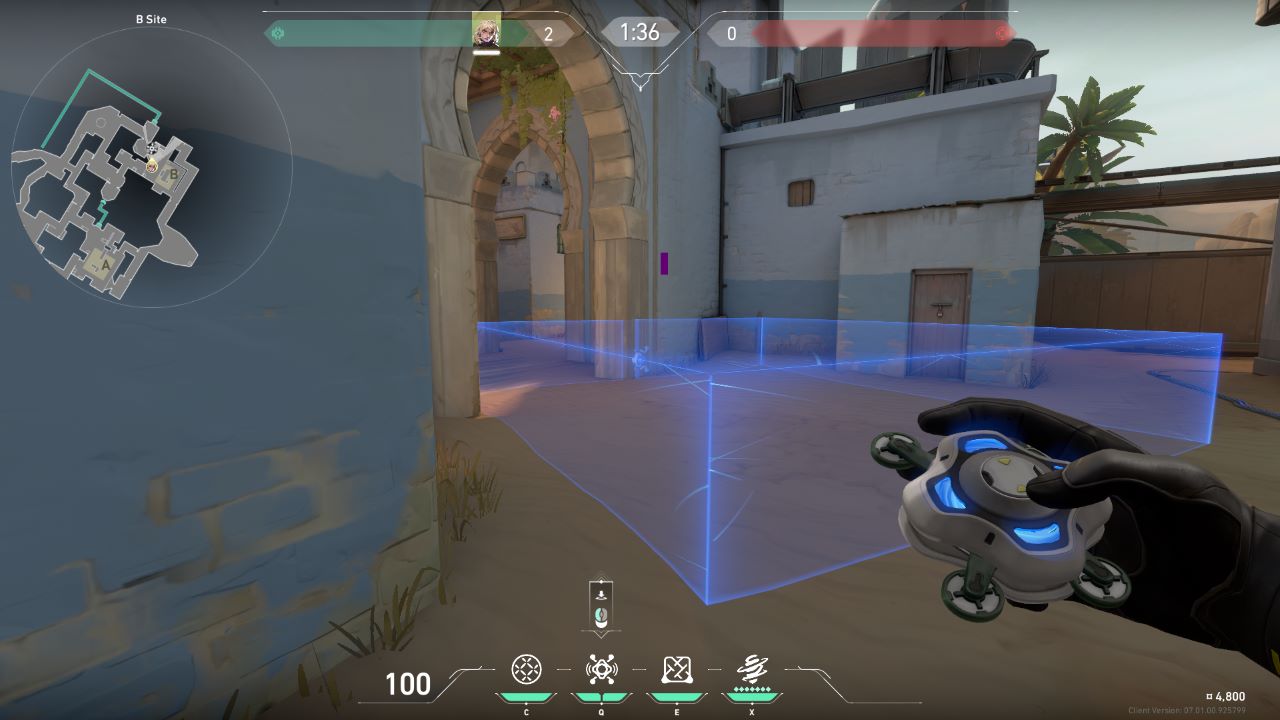
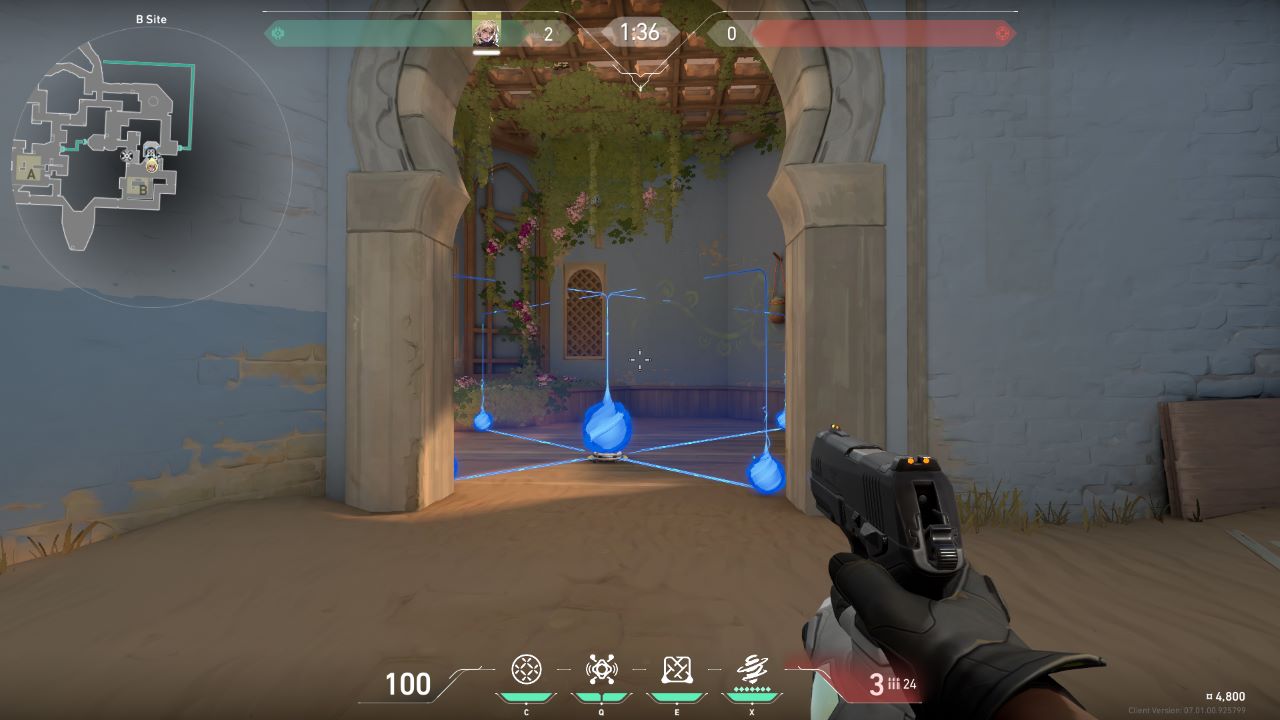
For one of your Sonic Sensors in Site B, place it on the right-side corner of the archway entrance. It can take a little time at first to get the placement just right but when you have it facing outwards from the corner (as shown above) and can see the indicated area, throw it. This is an excellent spot that covers the full of the entrance and goes out into the main section of the site.
Related: Ultimate Valorant Settings Guide: Maximize FPS With These Graphics Settings
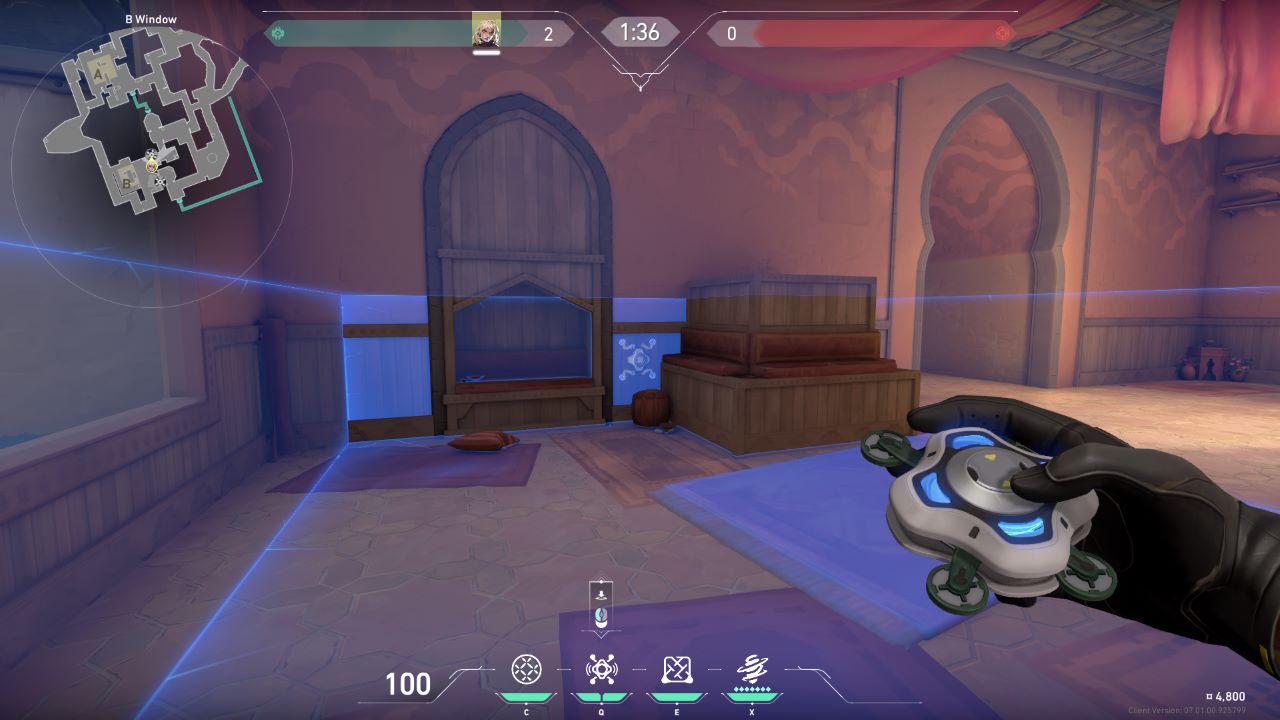
To cover the window of Site B, hop in and throw a Sonic Sensor behind the crates on the side wall. This will alert you to any enemies making their way into Site B through that direction before they actually make it to the window. For your Mesh Barrier, I prefer using it within the Archway entrance area when enemies are pushing. Don’t place it directly at the entrance but just inside the room at the back instead.
Now that you know the best Deadlock Bind Lineups and Setups you can head back into the game and test all of them out for your team.




Published: Jul 24, 2023 06:52 am