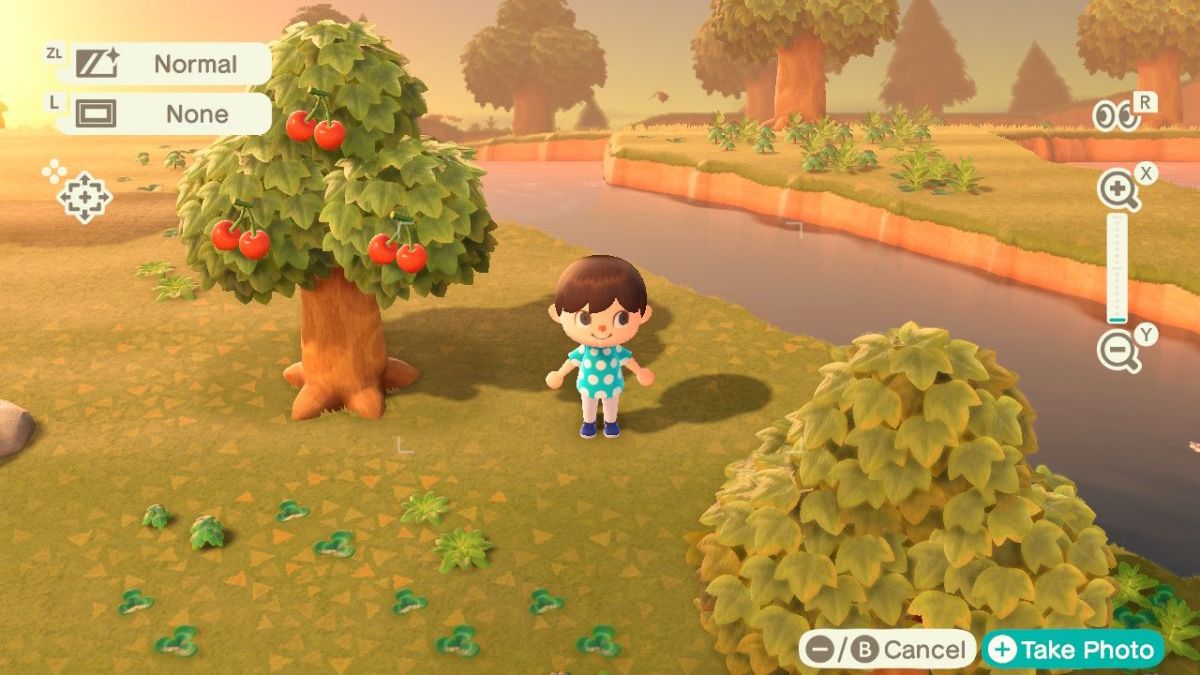
The Nintendo Switch itself has a native screenshot feature that can allow you to take pictures whenever you like with the press of a button on the controller. Sometimes you want something a little more though, especially in a game like Animal Crossing: New Horizons with your customized character. As a result, the game features a Photo Mode that you can use to get the perfect picture and this guide will explain how you can access it.
How To Use Photo Mode
Photo Mode in Animal Crossing: New Horizons is not something that is available right out of the gate as soon as you boot up the game. You won’t have to wait too long to get access to it though.
What you need to do is follow the tasks given to you by Tom Nook after starting up and eventually it will lead to him giving you a NookPhone to use in the game, which is the equivalent of a smartphone. This very smartphone is where you now have access to Photo Mode as well.
To access Photo Mode after acquiring the NookPhone, press ZL at anytime to bring up the phone itself. From here, the cursor should automatically be on top of the camera icon, which is what you want to select by pressing A.
Now you will enter Photo Mode, which has some options for you to play around with. You can change the filter by pressing ZL or add a frame by pressing L. The frames can even add in times and dates, which is cool for keeping track of what’s going on in the game.
Pressing R will whistle to your Villager, getting them to look straight up at the camera, while pressing it again will cause them to look back down like normal. You can also move your Villager around with the left analog stick as per usual if you would like to place them in a particular area. Lastly, you can zoom in and out by pressing X or Y to get the right picture.
Once you have everything set to how you want it, just press + to take the picture and it will automatically be added to your Album on Nintendo Switch.


Published: Mar 20, 2020 04:48 pm