The Route Forward is a White Lotus mission in Warzone DMZ that requires you to pick up seven tracking devices, plant them individually on seven AQ trucks, and then download data in the Sattiq Caves. Luckily, only the first part of this mission needs to be done in one run, but if you want to knock out the entire The Route Forward DMZ mission in one go, you’ll need help knowing where to go.
Related: All DMZ Barter Recipes
How to Complete The Route Forward Mission in DMZ
The Route Forward is a DMZ mission that is only completed in Al Mazrah. Grab your best operator load out and jump into Al Mazrah.
Once the match starts, you won’t want to waste time getting to the Al Sharim dead drop to get the seven tracking devices. Then, you need to locate all seven AQ trucks in the Sattiq Caves and plant the seven tracking devices. Once both of those objectives are done, you need to find the server rack in the bunker in the Sattiq Caves and download the data.
When I completed this mission, I found that locating all seven AQ trucks was the hardest part. If you’re stuck on that part, scroll down to that section. Then, you’ll likely need help finding the server rack and downloading the data as I thought finding that was a hassle. The good thing about this mission is you don’t need to exfil successfully, although that is always a good outcome.
Where is the Al Sharim Dead Drop in DMZ?

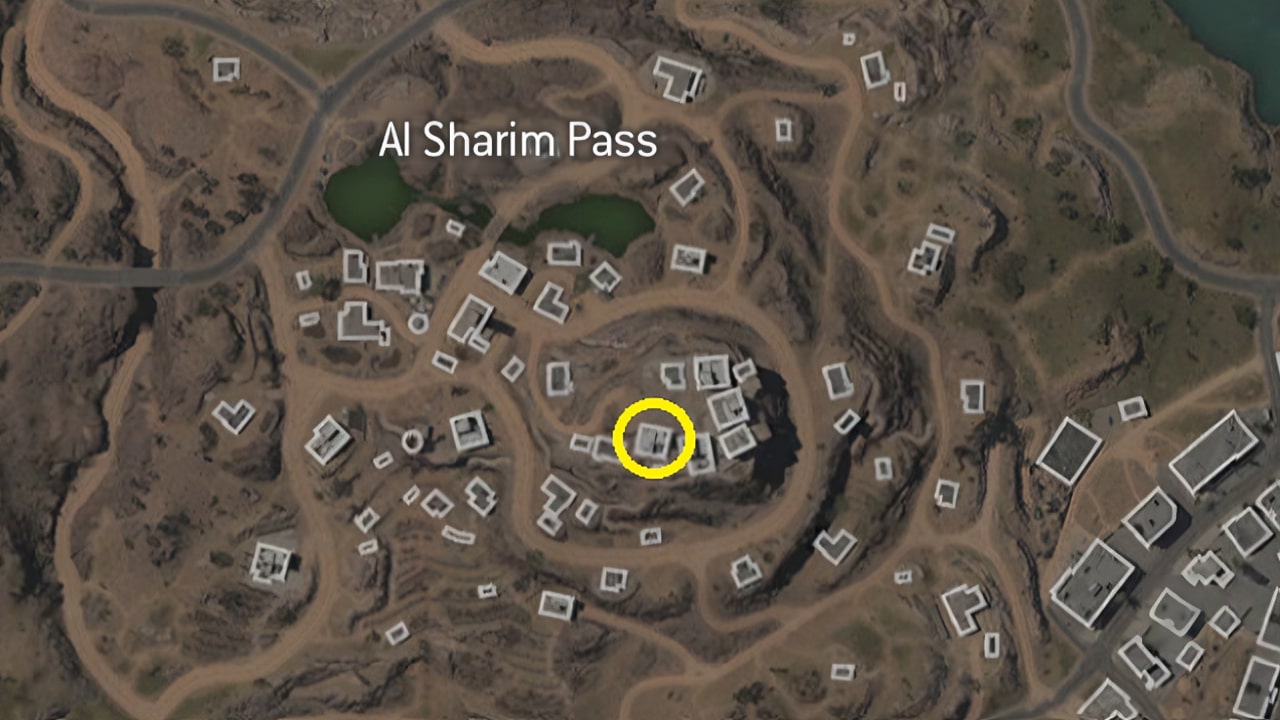
The first task to complete The Route Forward is to find the Al Sharim dead drop. I recommend approaching Al Sharim Pass from the south side. Approach the hill, climb the stairs, and climb the ladder to quickly find the white dumpster that is the Al Sharim dead pass.
Open the dead drop and you’ll find the seven tracking devices here if you have the The Route Forward mission equipped. Drop them into your backpack and start heading toward the Sattiq Caves.
All 7 AQ Truck Locations in DMZ

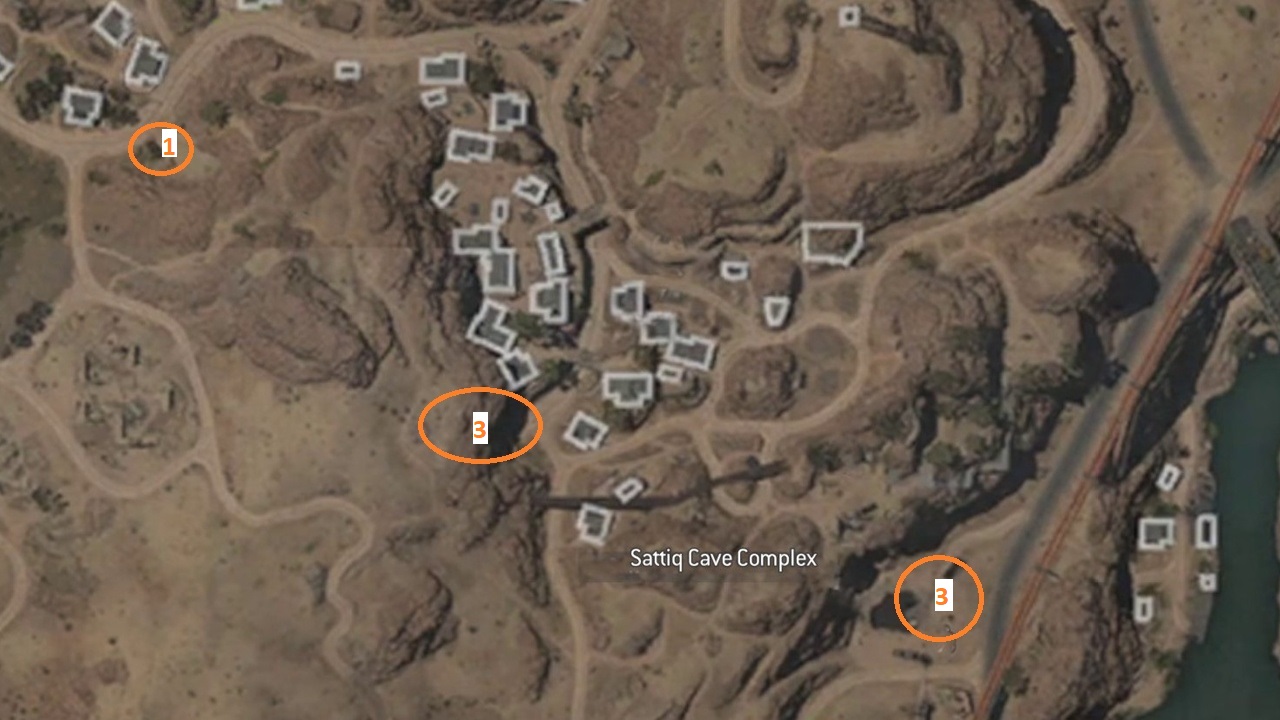
After securing the seven tracking devices, you need to travel to the Sattiq Caves and find the seven AQ trucks. The general locations of every truck is in the image above, so use that to your advantage. Fair warning though, the Sattiq Caves are heavily guarded, so focus on dispatching all the enemies first. You might want to make sure you have the best weapons and loadout to take on this challenge.
You’ll find three trucks near the orange oil pipe on the southeast side of Sattiq Caves. One truck is on the dirt here and two are located underground. Jump down the hole and look for the two trucks parked near the dock.
Make sure to plant the tracking devices on one of the truck doors. In my research, I found that if you aren’t seeing the plant prompt, keep circling the car until you see it.
Three more trucks are found in the cave in the center of Sattiq Caves. One is outside and two are inside. The last truck is located in front of the cave entrance found in the northwest corner of Sattiq Caves.
Where is the Server Rack in the Bunker in Sattiq Caves in DMZ?

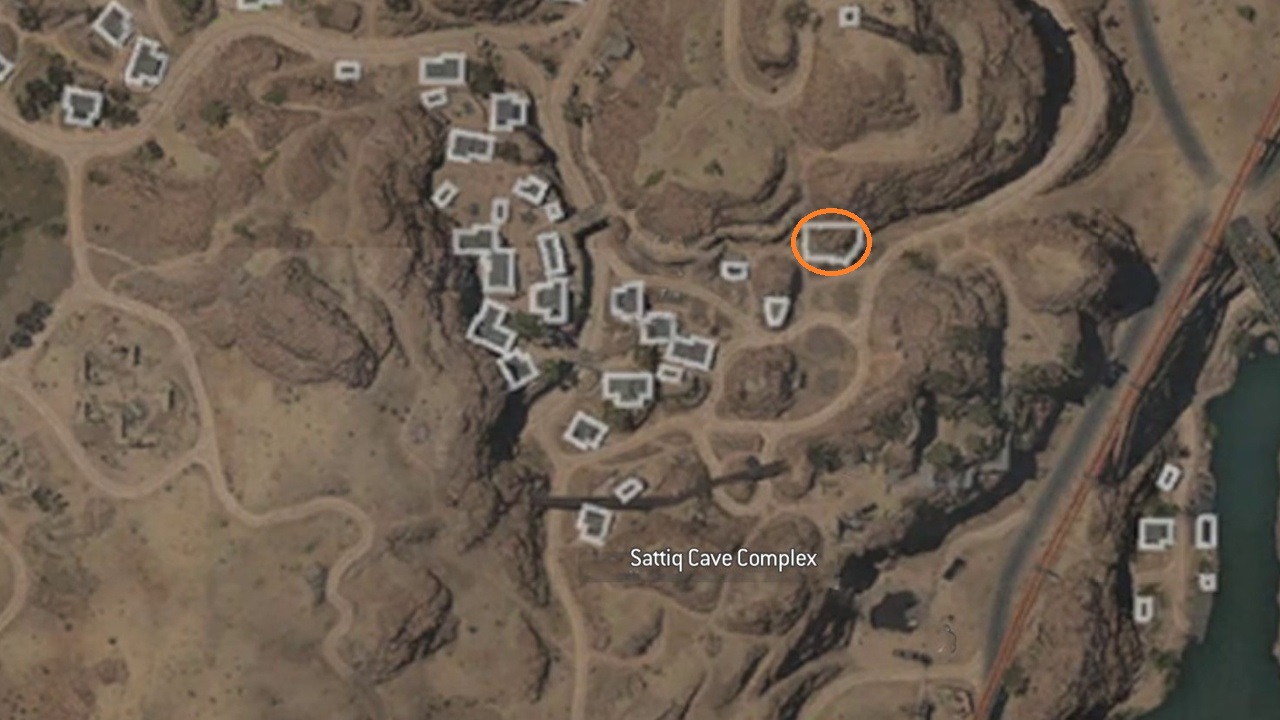
The last objective you need to do to complete The Route Forward is to find the server rack in the bunker in the Sattiq Caves. The exact location is in the image above, so use that to find out exactly where to go.
Once you find the right building with the server rack, simply approach the server rack and press the button prompt to download the data. This is a fairly quick process that doesn’t call enemy NPCs to your position.
Once the data has been downloaded, you have completed The Route Forward. If you died trying or just want to get great gear for a different operator slot, check out what the best loot locations in DMZ are.


Published: Jul 24, 2023 02:18 pm