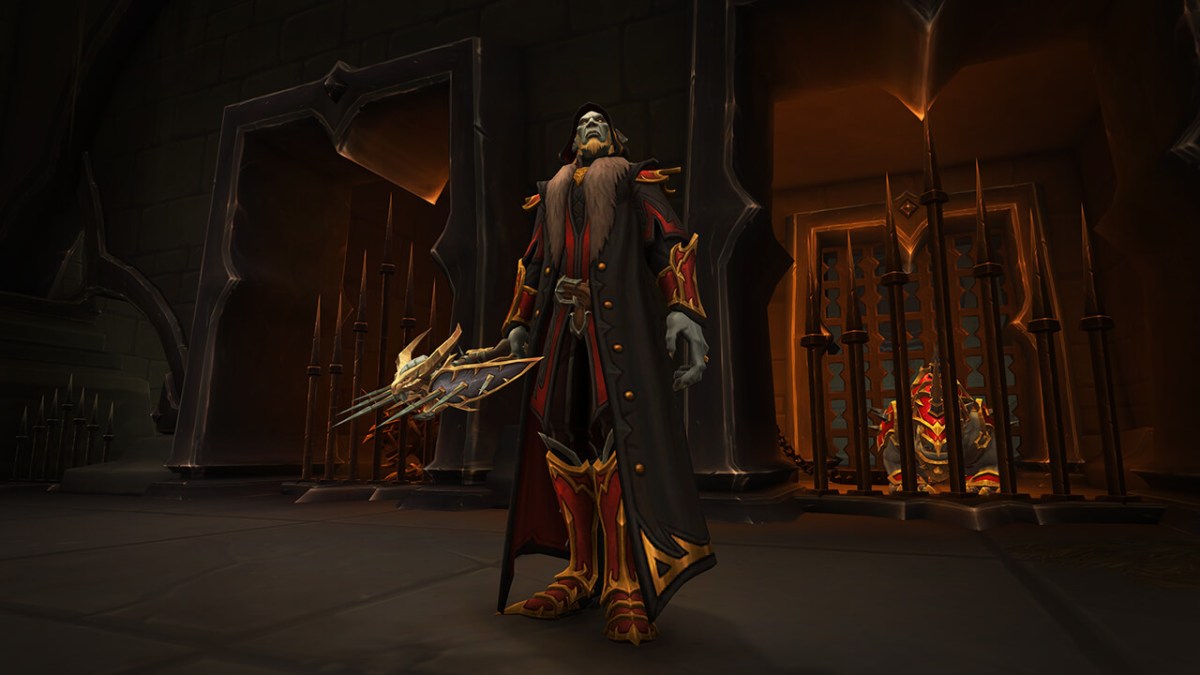
Castle Nathria is World of Warcraft Shadowlands‘ first raid, and Huntsman Altimor is keen to make you his next trophy. Prospective raiders will need to take him and his pets down before pressing deeper into Castle Nathria. Below I break down each of Huntsman Altimor’s abilities in Castle Nathria, followed by a quick rundown of the encounter. This guide is tailored for the Normal version of the raid, but will work just as well for those using LFR (any major differences will be noted).
Huntsman Altimor doesn’t fight alone, instead summoning one of his three pets to fight alongside him. Margore, Bargast, and Hecutis each have their own unique attacks, and the fight will vary based on who is on the field. They spawn in the order I just listed, only appearing after the previous pet has been slain.
Since Huntsman Altimor only has a handful of abilities he repeats throughout the fight, he will have his own section to start. The three phases in this encounter are based on each pet, so their abilities will follow. All pets need to be tanked by the off-tank, and the fight will begin with Margore spawned.
Huntsman Altimor Abilities
Huntsman’s Bond: 100% of damage taken by Altimor and his hunting gargons is additionally taken by the other.
- Huntsman Altimor will always have one of his pets at his side. Since damaging one damages the other you’ll want the tanks to keep Altimor and his pet near one another for cleaves, AoE, etc.
- This ability does not apply to any other adds summoned during the fight.
Spreadshot: Altimor fires a cone of bolts at players inflicting 7511 Physical damage.
- Huntsman Altimor will target a random player for this ability, so spreading out is a solid way to minimize raid damage.
- The damage is also pretty low, so don’t prioritize it over other abilities.
Sinseeker: Altimor marks 3 players and fires at them. Each bolt inflicts 11367 Physical damage and an additional 3414 Shadow damage every 2 sec for 30 sec to the marked player and any players in a line.
- Sinseeker will place a debuff on the targeted players, and leave an arrow over their head. Additionally, arrows will appear on the ground leading from Huntsman Altimor and the targeted players.
- Those targeted by Sinseeker will want to move away from each other then stop moving, to allow other players a chance to move out of the attack’s path.
- Sinseeker penetrates, so anyone in the path will be struck.
- Targeted players cannot avoid the attack.
- Spreading out helps melee not get nuked by this and all the other projectiles they have to dodge.
- Healers should ensure players targeted by Sinseeker are healthy before the attack goes off.
Margore Abilities (Phase 1)
Jagged Claws: Margore shreds his target, inflicting 15933 Physical damage and an additional 4097 Physical damage every 3 sec for 30 sec.
- Jagged Claws debuff is a bleed, so bleed removing skills can purge it from the tank.
- Otherwise, tanks will want to swap targets once the Margore tank reaches two stacks.
- This attack goes off every 10 to 20 seconds, so tanks will need to be mindful of each other.
Vicious Lunge: Margore sets his sights on a player, after 6 sec he lunges at them inflicting 51212 Physical damage divided evenly by players within 6 yards.
- Vicious Lunge must be split by other members of the raid, otherwise the target will die.
- The target is chosen randomly.
- Abilities that grant physical immunity will mitigate this attack, so communicate with your raid if you plan to use one.
- Sinseeker and Spreadshot can go off during Vicious Lunge, so everyone needs to be ready to move after Lunge goes off.
- Players targeted by Sinseeker should NOT stack with the Vicious Lunge target.
- The targeted player will have a red circle around them: a quarter or more of your raid should stand in it to spread the damage.
Bargast Abilities (Phase 2)
Rip Soul: Bargast rips out the soul of a player, inflicting 20485 Shadow damage and causing a soul to appear that drifts toward Altimor until it is healed to full. The soul’s starting health is proportional to the health of the player being struck by Rip Soul. If the soul reaches Altimor, he gains Devour Soul for 30 sec.
- The tank controlling Bargast will want to pull the beast away from Huntsman Altimor before Rip Soul goes off to create more space between the boss and the add that’s spawned. This is to better prevent the add from reaching Altimor and providing the Devour Soul buff.
- Devour Soul: Altimor consumes the player’s soul, increasing all damage done by 100%.
- The add cannot be attacked, but it can be healed. Once it is fully healed it will disappear.
- Since the add spawns at the same percentage of health as the tank struck by Rip Soul, it’s a good idea to top off the Bargast tank before the attack hits, and for the tank to mitigate the damage with abilities.
- The percentage of health the add will spawn with will not exceed 90%, however.
- Since the add spawns at the same percentage of health as the tank struck by Rip Soul, it’s a good idea to top off the Bargast tank before the attack hits, and for the tank to mitigate the damage with abilities.
- Huntsman Altimor can be pulled away from the add as needed, but he will not move while casting Sinseeker or Spreadshot.
Shades of Bargast: Bargast creates shades of itself that cast Deathly Roar. While under a loss of control effect Shades of Bargast gain stacks of Destabilize, increasing all damage taken by 100%.
- This add spawns with a wealth of health, so you need to get the Destabilize debuff up to roughly twenty stacks to effectively kill it.
- 1 Destabilize stack is earned every 2-seconds while CC’d; stacking CC’s does not stack the effect.
- The add will cast Deathly Roar when not under a crowd control effect.
- Deathly Roar: Inflicts 7511 Shadow damage to all players and an additional 3414 Shadow damage every 2 sec for 20 sec.
- Have the tank pull Bargast away from Altimor when Shades of Bargast is cast, to avoid cleaves and AoEs from hitting the add and breaking CC.
- Once the add reaches twenty stacks of Destabilize the raid should burn it down ASAP.
- After 70-seconds the add’s energy bar will fill, and it will become immune to CC.
Hecutis Abilities (Phase 3)
Crushing Stone: Hecutis’ melee attacks increase his Physical damage done by 25% and reduce his movement. While moving, Hecutis sheds stacks of Crushing Stone and triggers Shattering Stone, inflicting 3414 Nature damage to all players.
- Hecutis’ damage will increase while standing still, but the buff will drop when it moves. Moving causes raid-wide damage.
- The trick is to only move Hecutis when Crushing Stone reaches 4 t0 5 stacks.
- Keep Hecutis near Altimor, and when it’s time to move have both tanks move together. Once Crushing Stone wears off both tanks can stop moving and stay where they are.
- This also helps healers better time their heals. Big raid heals will be required during this procedure, and the rest of the raid needs to remain mindful of both Sinseeker and Spreadshot.
Petrifying Howl: Hecutis petrifies players, inflicting 455 Nature damage and reducing movement speed by 5% every 1 sec. When this effect expires, petrified players shatter inflicting 3414 Nature damage to players within 10 yards and create a patch of Stone Shards at their location.
- Stone Shards leave a permanent pile of shards on the ground, and they will damage and slow anyone that steps in them.
- Stone Shards: An area of sharp stone erupts from the player, inflicting 1819 Nature damage every 1.5 sec and reducing movement speed by 25% to players standing in the area.
- Players targeted by Petrifying Howl will have a brown circle under them: they need to move to the outside areas of the arena, preferably where traffic is lowest.
- Since Petrifying Howl slows more and more as it’s channeled players will want to start moving early, and use any movement skills they may have.
- Anyone not targeted by the attack should get away from those who have been to avoid the Nature damage explosion.
Castle Nathria Huntsman Altimor Rundown
The Huntsman Altimor encounter in Shadowland’s Castle Nathria raid is largely about add management and positioning. Each of Altimor’s three pets are a distinct phase in the fight, and the adds spawned by Bargast in Phase 2 can and will wipe the raid. Margore in Phase 1 and Hecutis in Phase 3 will require all players to be mindful of their position within the raid, otherwise they’ll strain the healers by causing more damage, or triggering deaths. Huntsman Altimor will have roughly 10% health left after Hecutis dies, but there are no new mechanics or an enrage to worry about. Just burn him down to finish the encounter.
To break it all down to bullet points:
- Entire Fight
- Off-tank should be ready to grab Huntsman Altimor’s pets whenever they spawn, and to position them appropriately near the boss.
- Everyone else should spread out to minimize damage from Spreadshot, and to make Sinseeker easier to avoid.
- Phase 1
- Tanks should be ready to swap at 2 stacks of Jagged Claws.
- Players should be ready to stack on the red circle whenever someone is targeted by Vicious Lunge.
- Phase 2
- Bargast needs to be moved away from Huntsman Altimor when casting Rip Soul.
- Healers should top off the tank, and the tank should use defensive abilities to ensure add has as much health as possible.
- Healers then need to fully heal the add to despawn it before it can reach Altimor and buff him with Devour Soul.
- Everyone else needs to CC the add from Shades of Bargast, then burn it down once it reaches roughly 20 stacks of Destabilize.
- Phase 3
- Hecutis should be moved once it reaches 4-5 stacks of Crushing Stone; move Altimor in tandem.
- Players targeted by Petrifying Howl need to move towards the outside of the arena to drop Stone Shards in less trafficked areas. Everyone else needs to move away from these players.
Follow these steps to defeat Huntsman Altimor in World of Warcraft Shadowlands’ Castle Nathria raid.


Published: Dec 13, 2020 07:00 pm