As a stark contrast to Eternal Gardens, Mirrorsea in Solar Ash is expansive and bright. With such a big area, finding all of the caches within it can be challenging. Here is how to collect all Mirrorsea caches in Solar Ash.
Mirrorsea is the fifth of six locations in Solar Ash. Developed by Heart Machine and published by Annapurna Interactive, Solar Ash takes players to the devastating, broken worlds inside of a black hole in order to stop further destruction and loss. If you’re struggling with finding the last cache in Eternal Gardens or Broken Capital, or just need some help with a boss, you can find it at our Solar Ash guides.

Scuttlecraft Cache
When welcomed to Mirrorsea, you’ll need to take rails to ascend up to the main ship. Along the way, you’ll see a Voidrunner sigil leading you down a path to the left. Before taking that, you’ll want to continue just a little bit further to unlock the next false safe rail just in case you fall trying to get this cache. When you’re ready, take the grapple points and hop on various ships to get to the cache on the scuttlecraft.

Ruins Cache
Once you are past the shipyard section of Mirrorsea, you’ll be at the waterfall section. On the leftmost side of this section, there are ruins. Travel up and over to them and dispatch the enemies. Here, you’ll need to use the new mushroom rail grower to get to the top of one of the ruins. Your cache will be there.

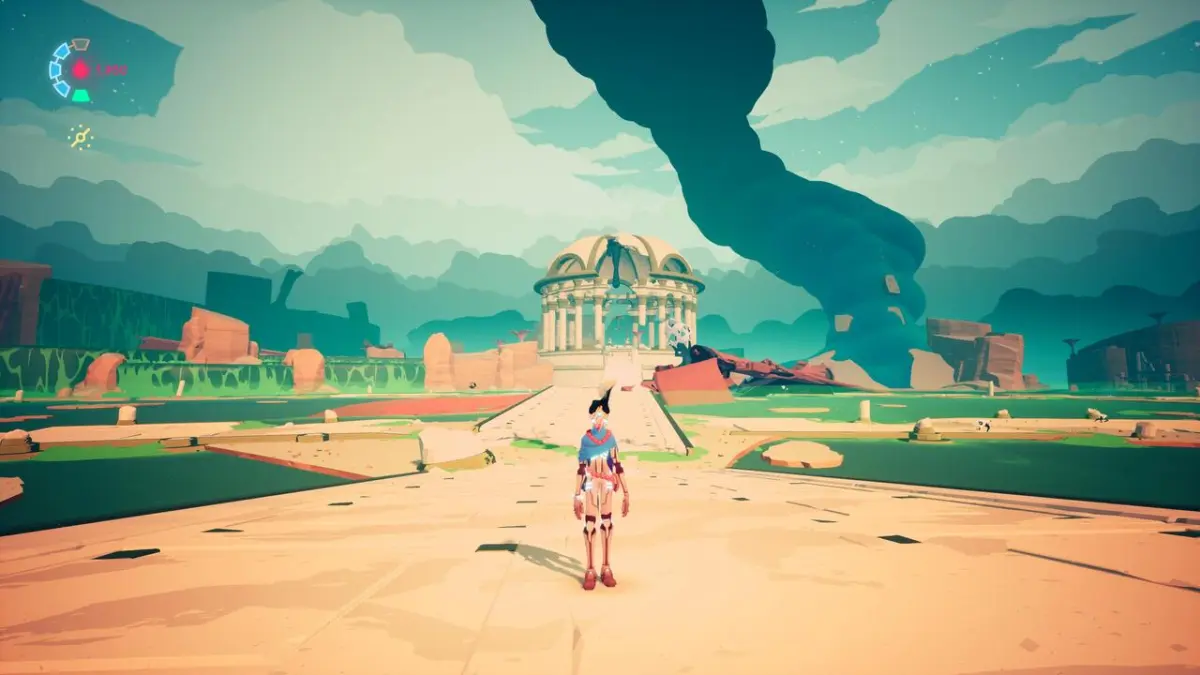
Pavilion Cache
After ascending the waterfalls and the dam, you’ll reach the great expanse section. The pavilion is hard to miss; head over to it. Once you’ve cleared the anomaly inside, you’ll use the rail grower mushrooms to climb to the higher tier inside the pavilion. Then, boost jump to the black ooze handing down and climb to the top. The cache will be right at the top.
Ghozam’s Camp Cache
While at the top of the pavilion, if you look to the right, you’ll see a ginormous billowing cloud with a city at the top. Tucked underneath the blue clouds is the entrance to Ghozam’s camp. Head over to it. Once inside, you can read his journals and check out his hammock, but most importantly, grab the cache.

Waterfall Cache
The last two caches are on the underside of the floating city above Mirrorsea. Right when you arrive at the underside, you’ll see a Voidrunner sigil across for the lake of green toxins. Take out the enemies and break the anomaly-covered door. On the wall will be a rail grower mushroom. Hit it to the right and take it through the waterfall. Inside will be your cache.

Underside Building Cache
Still in the underside of the floating city, find your way to the top. The first building you come across will have a Voidrunner sigil. You’ll need to hit the rail grower mushroom up. Go around the building and get on the rail heading towards the building. Hop off and nab your cache.

You have successfully collected all the Mirrorsea caches in Solar Ash. Once the last cache has been collected, you’ll receive Ghozam’s Suit which is called The Hand of the Unknown. This suit equips Rei with a blue cap and awesome red beads. It also doubles your attack power, making most small enemies one hit.
Solar Ash is available on PlayStation 5, PlayStation 4, and PC.


Published: Dec 2, 2021 11:00 am