Breeze is not an easy map to play on in Valorant. Longer angles mean long-aim duels. Additionally, rotation times are long compared to smaller maps. However, if there’s one character that can turn the tide in your favor, it’s Sova. Armed with his bow and arrow, Sova’s Recon bolts will prove to be a lifesaver. To help you out, here are the best Sova Breeze lineups and setups.
What are the Best Sova Breeze Lineups and Setups?
Below are some lineups that I like to play with Sova on Breeze.
B Default – Shock Dart
Stand in the B Lobby and go to the corner of the box near the wall. Aim your arrow right where the leaf meets the line on the wall above you. Fire with two bars of charge. The arrow will land at the B site, annihilating any enemies in the region.
Related Link: Best Viper Breeze Lineups and Setup in Valorant
Mid Doors – Recon Bolt
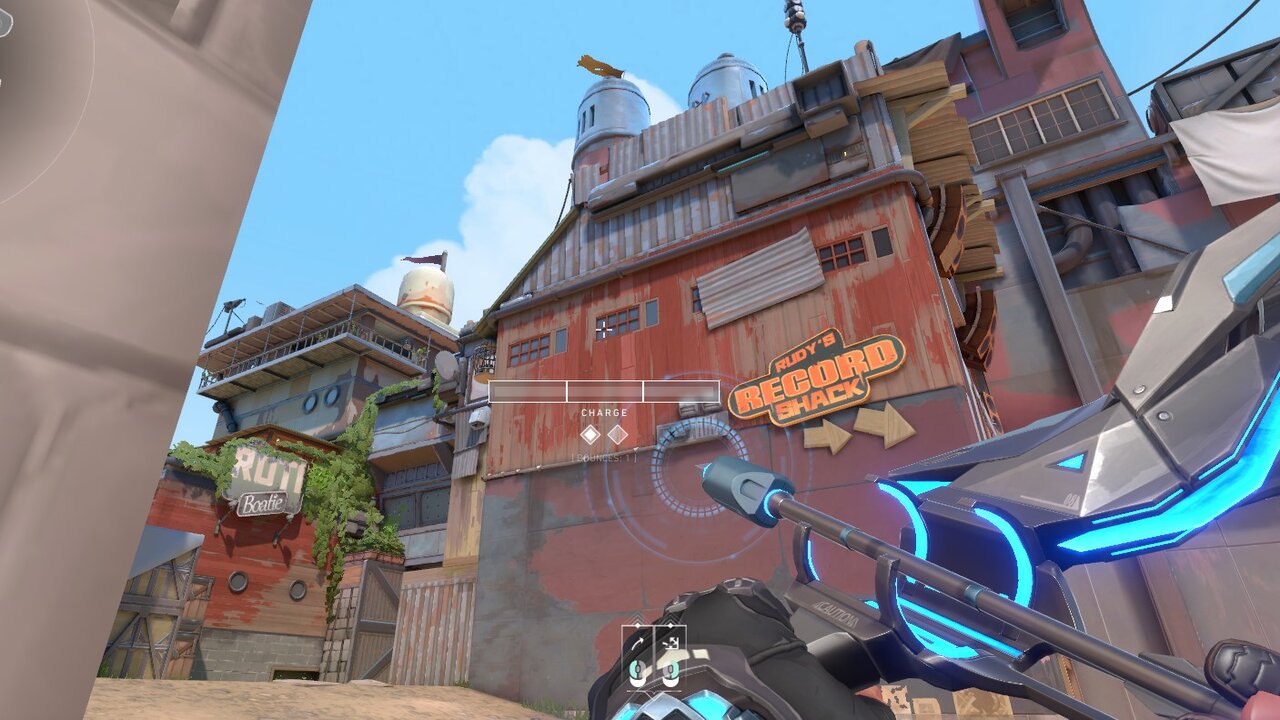
I personally believe it’s a smart play to reveal enemy positions at mid-doors. Simply stand at the left edge of the barrier. You’ll see some dotted windows on the buildings on your right. Aim your crosshair at the top dot of the second window. Fire with one charge. You’ll know what’s cooking in the mid-doors this way.
Defending Mid – Recon Bolt
I think mid is where Sova truly shines, considering how hard it is for a team to break through here. Stand in the right corner next to the entrance to the Nest. You’ll see the wall on the B-side of Nest’s exit. Aim your arrow at the bottom of the thin slit window before you. Fire with max charge and one bounce. The arrow will land at the rusty wall right at the entrance of the mid, revealing all enemies. If done right you can carry your teammates out of gold in no time.
B Default – Shock Dart
Stand in the corner next to the spawn site. Take aim at the corner of the leaf above, right next to the green flag for the first arrow. Fire with two bars of charge and no bounce. For the second arrow, aim at the bottom corner of the edge above you, the one covered with leaves. Fire your arrow with one bar of charge and no bounce. Fire consecutively and your enemies won’t know what hit them.
God A Site – Recon Bolt
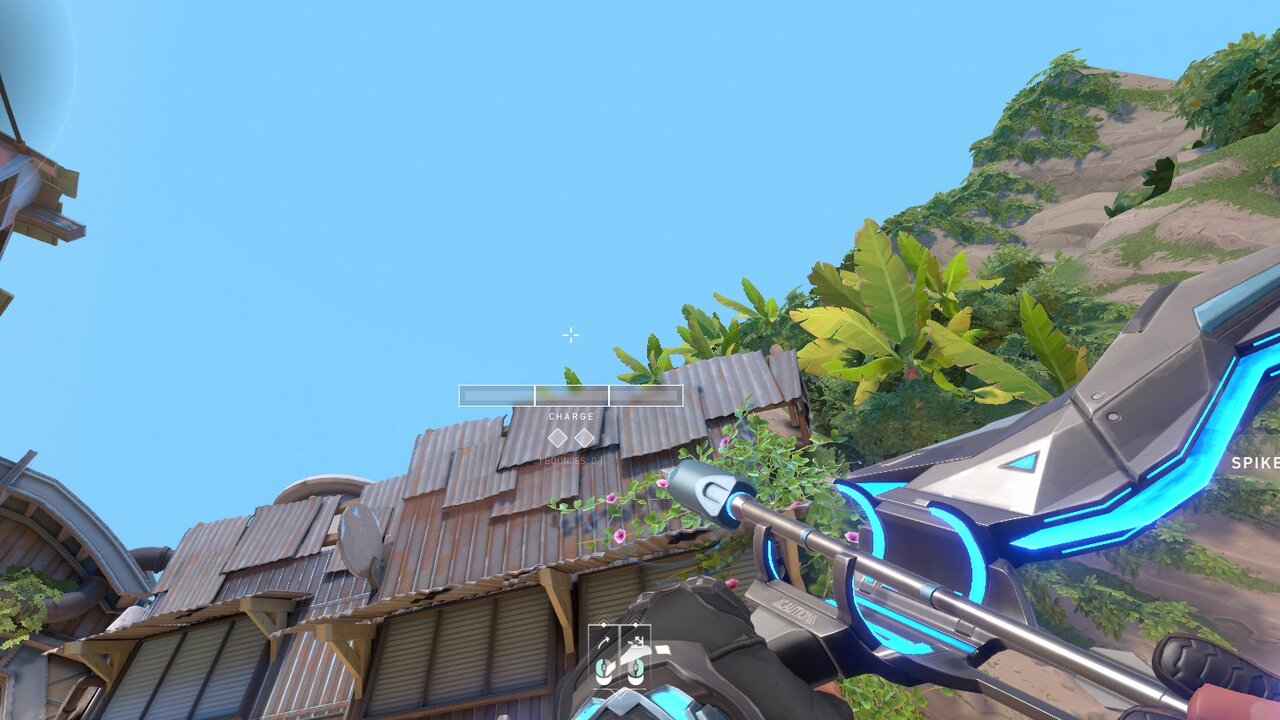
Go to A Lobby. Stand on the rock next to the box. Aim your arrow at the leaf poking out from the roof of the building above you. Fire with two bars of charge. The arrow will soar through the skies, hidden from your opponents’ sight.
A Default – Shock Dart
Stand in the corner next to the boxes. Aim your crosshair at the top corner of the lines on the roof above you. Fire your first arrow with one bar of charge and two bounces. Aim your second arrow at the same spot with no max charge or bounce.
Remember to communicate with your teammates. Coordination is the key to surviving on Breeze. Also, make sure to practice these lineups offline so you can execute them in the heat of battle without a hitch.





Published: Nov 23, 2023 08:40 am