The Flower Kingdom introduced in Super Mario Bros Wonder has an almost daunting number of levels to pick from. Some of these levels are incredibly challenging while others are difficult enough to simply discover. While not every course needs to be completed to beat the game, players must find them all if they want to achieve 100% completion. Anyone looking to clear every challenge possible should learn about all of the worlds and courses in Super Mario Bros Wonder.
Number of Worlds in Super Mario Bros Wonder
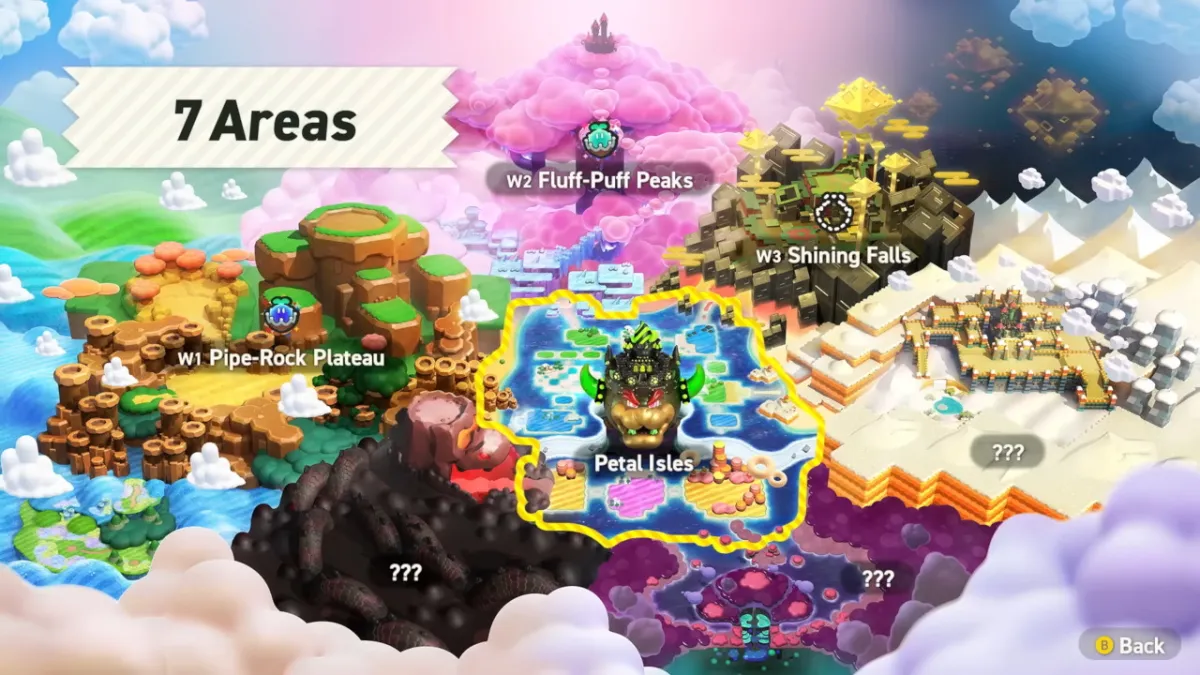
While the game only shows 7 major areas for the most part, there are actually a total of eight “worlds” in the game. This includes a secret Special World, which can be accessed with the help of numerous hidden exits found in certain locations. The Castle Bowser levels are part of Petal Isles, making it part of that “world” despite having its own unique locations.
All Courses in Super Mario Bros Wonder
There’s a large number of traditional courses to be found throughout the game alongside several smaller levels, with the smaller levels usually providing a single Wonder Seed or some other benefit. Some courses will also have their own secret exits, with a select few even having false exits that simply finish a level without unlocking the path forward.
All main courses (outside of castles and airships) and Badge Challenge levels will have a flagpole and three collectibles worth 10 flower coins each. Unless otherwise stated, every side course will also only have one Wonder Seed available. With that out of the way, here are all courses to be found in Super Mario Bros Wonder:
- World 1: Pipe-Rock Plateau
- 12 Main Courses (including castle)
- Welcome to the Flower Kingdom! — 1-star difficulty, 2 Wonder Seeds
- Piranha Plants on Parade — 1-star difficulty, 3 Wonder Seeds
- Scram, Skedaddlers! — 1-star difficulty, 2 Wonder Seeds
- Bulrush Coming Through! — 1-star difficulty, 3 Wonder Seeds
- Here Come the Hoppos — 2-star difficulty, 2 Wonder Seeds
- Rolla Koopa Derby — 2-star difficulty, 2 Wonder Seeds
- Swamp Pipe Crawl — 3-star difficulty, 2 Wonder Seeds
- Angry Spikes and Sinkin’ Pipes — 2-star difficulty, 2 Wonder Seeds
- Bulrush Express — 4-star difficulty, 3 Wonder Seeds
- Sproings in the Twilight Forest — 2-star difficulty, 2 Wonder Seeds
- Cosmic Hoppos — 3-star difficulty, 2 Wonder Seeds
- Pipe-Rock Plateau Palace — 3-star difficulty, 1 Wonder Seed
- 8 Side Courses
- Badge Challenge: Parachute Cap I — 1-star difficulty
- Badge Challenge: Wall-Climb Jump I — 1-star difficulty
- Expert Badge Challenge: Jet Run I — 3-star difficulty
- Wiggler Race: Mountaineering! — 1-star difficulty
- KO Arena: Pipe-Rock Rumble — 70 second target time
- Break Time: Hurry, Hurry
- Break Time: Wonder Token Tunes
- Break Time: Pop Up, Hoppo!
- 1 Badge House and 1 Poplin Shop
- 12 Main Courses (including castle)
- World 2: Fluff-Puff Peaks
- 10 Main Courses (including airship and castle)
- Outmaway Valley — 3-star difficulty, 3 Wonder Seeds
- Pokipede Pass — 1-star difficulty, 2 Wonder Seeds
- Condarts Away! — 2-star difficulty, 2 Wonder Seeds
- Pole Block Passage — 2-star difficulty, 2 Wonder Seeds
- Up ‘n’ Down with Puffy Lifts — 2-star difficulty, 2 Wonder Seeds
- Jump! Jump! Jump! — 4-star difficulty, 2 Wonder Seeds
- Countdown to Drop Down — 3-star difficulty, 2 Wonder Seeds
- Cruising with Linking Lifts — 2-star difficulty, 2 Wonder Seeds
- Fluff-Puff Peaks Flying Battleship — 3-star difficulty, 1 Wonder Seed
- Fluff-Puff Peaks Palace — 4-star difficulty, 1 Wonder Seed
- 8 Side Courses
- Badge Challenge: Wall-Climb Jump II — 4-star difficulty
- Badge Challenge: Floating High Jump I —1-star difficulty
- Expert Badge Challenge: Spring Feet I — 3-star difficulty
- KO Arena: Fluff-Puff Kerfuff — 70 second target time
- Search Party: Puzzling Park
- Break Time: Kick It, Outmaway
- Break Time: Cloud Cover
- Break Time: Zip-Go-Round
- 1 Wonder Seed House and 2 Poplin Shops
- 10 Main Courses (including airship and castle)
- World 3: Shining Falls
- 6 Main Courses
- The Hoppycat Trial: Hop, Hop, and Awaaay — 3-star difficulty, 2 Wonder Seeds
- The Anglefish Trial: Ready, Aim, Fly! — 2-star difficulty, 2 Wonder Seeds
- The Midway Trial: Hop To It — 2-star difficulty, 2 Wonder Seeds
- The Sharp Trial: Launch to Victory — 4-star difficulty, 2 Wonder Seeds
- The Sugarstar Trial: Across the Night Sky — 3-star difficulty, 2 Wonder Seeds
- The Final Trial: Zip Track Dash — 3-star difficulty, 2 Wonder Seeds
- 6 Side Courses
- POOF! Badge Challenge: Crouching High Jump I — 1-star difficulty
- Search Party: An Empty Park?
- Break Time: Unreachable Treasure?
- Break Time: Watery Wonder Tokens
- Break Time: Timer-Switch Climb
- Break Time: Timer-Switch Dash
- 1 Wonder Seed House, 1 Poplin Shop, and 1 Royal Seed location
- 6 Main Courses
- World 4: Sunbaked Desert
- 10 Main Courses (including castle)
- Armads on the Roll — 3-star difficulty, 2 Wonder Seeds
- The Desert Mystery — 2-star difficulty, 2 Wonder Seeds
- Rolling-Ball Hall — 2-star difficulty, 2 Wonder Seeds
- Ninji Jump Party — 1-star difficulty, 2 Wonder Seeds
- Bloomps of the Desert Skies — 3-star difficulty, 2 Wonder Seeds
- Valley Fulla Snootles — 2-star difficulty, 2 Wonder Seeds
- Color-Switch Dungeon — 2-star difficulty, 2 Wonder Seeds
- Secrets of Shova Mansion — 2-star difficulty, 3 Wonder Seeds
- Flight of the Bloomps — 4-star difficulty, 2 Wonder Seeds
- Sunbaked Desert Palace — 4-star difficulty, 1 Wonder Seed
- 11 Side Courses
- Badge Challenge: Parachute Cap II — 3-star difficulty
- Badge Challenge: Crouching High Jump II — 4-star difficulty
- Expert Badge Challenge: Invisibility I — 3-star difficulty
- KO Arena: Sunbaked Skirmish — 100 second target time
- Search Party: Pipe Park
- Break Time: Treasure Vault
- Break Time: Raise the Stage
- Break Time: Revver Run
- Break Time: Floating Wonder Tokens
- Break Time: Bouncy Tunes
- Break Time: Lights Out
- 1 Wonder Seed House and 2 Poplin Shops
- 10 Main Courses (including castle)
- World 5: Fungi Mines
- 7 Main Courses
- Upshroom Downshroom — 1-star difficulty, 2 Wonder Seeds
- Taily’s Toxic Pond — 3-star difficulty, 2 Wonder Seeds
- Light-Switch Mansion — 2-star difficulty, 2 Wonder Seeds
- Beware of the Rifts — 3-star difficulty, 2 Wonder Seeds
- An Uncharted Area: Wubba Ruins — 2-star difficulty, 2 Wonder Seeds
- Another Uncharted Area: Swaying Ruins — 3-star difficulty, 2 Wonder Seeds
- A Final Uncharted Area: Poison Ruins — 4-star difficulty, 2 Wonder Seeds
- 4 Side Courses
- Badge Challenge: Grappling Vine I — 2-star difficulty
- KO Arena: Fungi Funk — 90 second target time
- Break Time: Tumble House
- Break Time: Trottin’ Piranha Plants
- 1 Wonder Seed House, 1 Poplin Shop, and 1 Royal Seed location
- 7 Main Courses
- World 6: Deep Magma Bog
- 10 Main Courses (including airship and castle)
- Where the Rrrumbas Rule — 2-star difficulty, 3 Wonder Seeds
- Raarghs in the Ruins — 3-star difficulty, 2 Wonder Seeds
- Pull, Turn, Burn — 4-star difficulty, 2 Wonder Seeds
- Hot-Hot Hot! — 2-star difficulty, 3 Wonder Seeds
- Wavy Ride through the Magma Tube — 4-star difficulty, 2 Wonder Seeds
- Dragon Boneyard — 4-star difficulty, 2 Wonder Seeds
- Deep Magma Bog Flying Battleship — 3-star difficulty, 1 Wonder Seed
- Deep Magma Bog Palace — 4-star difficulty, 1 Wonder Seed
- 10 Side Courses
- Badge Challenge: Floating High Jump II — 3-star difficulty
- Badge Challenge: Boosting Spin Jump II — 3-star difficulty
- Badge Challenge: Grappling Vine II — 3-star difficulty
- Expert Badge Challenge: Jet Run II — 3-star difficulty
- Expert Badge Challenge: Invisibility II — 3-star difficulty
- Expert Badge Challenge: Spring Feet II — 4-star difficulty
- KO Arena: Magma Flare-Up — 100 second target time
- Search Party: Item Park
- Break Time: Hot-Hot Rocks
- 4 Wonder Seed Houses and 1 Poplin Shop
- 10 Main Courses (including airship and castle)
- Hub World: Petal Isles
- 9 Main Courses (including airship)
- Leaping Smackerel — 2-star difficulty, 2 Wonder Seeds
- Robbird Cove — 2-star difficulty, 2 Wonder Seeds
- Blewbird Roost — 2-star difficulty, 2 Wonder Seeds
- Downpour Uproar — 3-star difficulty, 2 Wonder Seeds
- Jewel-Block Cave — 2-star difficulty, 2 Wonder Seeds
- Gnawsher Lair — 3-star difficulty, 2 Wonder Seeds
- Maw-Maw Mouthful — 2-star difficulty, 2 Wonder Seeds
- Muncher Fields — 2-star difficulty, 2 Wonder Seeds
- Petal Isles Flying Battleship — 3-star difficulty, 1 Wonder Seed
- 6 Side Courses
- Badge Challenge: Dolphin Kick I — 1-star difficulty
- Badge Challenge: Dolphin Kick II — 2-star difficulty
- Badge Challenge: Boosting Spin Jump I — 1-star difficulty
- Wiggler Race: Swimming! — 2-star difficulty
- Wiggler Race: Spelunking! — 4-star difficulty
- KO Arena: Petal Meddle — 80 second target time
- 5 Castle Bowser Courses
- Missile Meg Mayhem — 3-star difficulty, 2 Wonder Seeds
- High-Voltage Gauntlet — 4-star difficulty, 2 Wonder Seeds
- Evade the Seeker Bullet Bills! — 4-star difficulty, 2 Wonder Seeds
- KnuckleFest: Bowser’s Blazing Beats — 4-star difficulty, 2 Wonder Seeds
- The Final Battle! Bowser’s Rage Stage — 5-star difficulty
- 1 Wonder Seed House and 2 Poplin Shops
- 9 Main Courses (including airship)
- Special World
- 7 Main Courses (All main courses have 5-star difficulty and 2 Wonder Seeds)
- Pipe-Rock Plateau Special: Bounce, Bounce, Bounce
- Fluff-Puff Peaks Special: Climb to the Beat
- Shining Falls Special: Triple Threat Deluge
- Sunbaked Desert Special: Pole Block Allure
- Fungi Mines Special: Dangerous Donut Ride
- Deep Magma Bog Special: Solar Roller
- Petal Isles Special: Way of the Goomba
- Final Tests
- The Semifinal Test: Piranha Plant Reprise — 5-star difficulty, 2 Wonder Seeds
- The Final Test: Wonder Gauntlet — 5-star difficulty, 2 Wonder Seeds
- The Final-Final Test: Badge Marathon — 5-star difficulty, 1 Wonder Seed
- 1 Badge House and 1 Standee Shop
- 7 Main Courses (All main courses have 5-star difficulty and 2 Wonder Seeds)
Related: How Many Flower Coins Can You Carry in Super Mario Bros Wonder?
In total, Super Mario Bros Wonder has around 79 levels when counting all main courses. If you’re counting all courses in general, then Super Mario Bros Wonder has 132 levels. Including the houses, shops, and Royal Seed locations, that’s 156 places to find on each map. This does not count Captain Toad appearances, overworld Poplin exchanges, and other hidden extras throughout the Flower Kingdom.


Published: Oct 20, 2023 03:30 am