In Destiny: Rise of Iron player can take on a series of quests to get the Year 3 Gjallarhorn. One of the most powerful rocket launchers in the game, players must complete a number of different activities in the new Plaguelands area of the game. First things first, however, How to get the Year 3 Gjallarhorn requires that you’ve completed the story missions of the expansion first. Once you’ve done that you can start doing patrol missions in the Plaguelands to embark on your quest.
Going into Patrol Missions in Rise of Iron, players will always start at Lord’s Watch. Most of our instructions will direct you from Lord’s Watch to specific locations where you must collect items, kill enemies, and complete missions to unlock the Gjallarhorn.
Get Splicer Key from Brood Mother in Lord’s Watch

Heading directly the right out of Lord’s Watch, you’ll need to get a Splicer Key from a Brood Mother witch nearby. She drops the key almost everytime so this shouldn’t be a huge problem.
Accept Patrol Mission in Archon’s Keep

Next you’ll head to Archon’s Keep. Since you’re on patrol missions, you can start the mission for the Gjallarhorn by scanning the area in Archon’s Keep. When you see an icon like the one above, this will trigger the mission. The mission will be to scan for an anomoly, you’ll need to press further below to find this scanning opportunity in the Site 6 area.
Use Splicer Key at laser door in Site 6

Head into Archon’s Keep, through the Forge, down to Site 6. Here’s you’ll need to fight numerous enemies, so prepare for a big battle. You’ll notice that a door is lasered off, but if you have the Splicer Key you can access it. Please note, if you wait too long the door will close.
Scan the Anomaly next to the SIVA Tank

Once you remove the door you’re pretty much home for scanning the anomaly. There will be a massive SIVA Spider Tank that needs to be dealt with, but if you’re crafty you can get in and out with out having to fight anything. The anomaly scan is located right next to the tank.
Head back to the Iron Temple

After you’ve made the scan, you’ll need to head back to Felwinter Peak to speak with Tyra Karn at the Iron Temple. She’ll send you on a new quest to find Medallions of the Iron Lords. There are six medallions, we’ll post the six locations below.
Gjallarhorn Quest Medallion Locations
Felwinter Peak

Felwinter Peak’s got a hidden medallion just up on the rocks in the picture above. You’ll need to do a little bit of jumping trickery, but this one is pretty easy to get. Grab this one before heading back out on Patrol in the Plaguelands.
Lord’s Watch

Spawning into Lord’s Watch, you’ll find enemies to your immediate right. Fight through them, and then in the little shack/structure you’ll find medallion #2.
Giant’s Husk

Giant’s Husk you’ll remember from the story missions that had you opening containers that were full of enemies to complete a mission. There’s a medallion hidden between two containers in the middle of the upper level. If you’re coming from Lord’s Watch you can use the scaffolding on the ship to ascend from the bottom level to the top level and scoop up the medallion.
Archon’s Forge Medallion

Keep heading down the path from Lord’s Watch to Archon’s Keep and then you’ll find the second medallion just left of the entrance to Archon’s Forge. Instead of going up the hill and into the building that will eventually lead you to the Forge, veer left. If you’re having trouble finding any medallion you can use a scan and it will show you where they are if you’re in the area.
Site 6 Medallion

Since you’re close you might as well head down through the Forge to Site 6. Hint, it’s the place you just scanned the anomaly. However, this time, just left of the place where you used the Splicer Key a medallion is tucked away by the pipes.
Forgotten Pass Medallion

You’ll need to do some backtracking to get to Forgotten Pass, so head back up to Archon’s Keep and head away from Lord’s Watch. You’ll come to a bridge in Forgotten Pass, the medallion is located at the end of the bridge.
Bunker Triglav Medallion

The final medallion is in the Bunker Triglav. There are two sides to the bunker and a whole lot of enemies. Just do a quick scan to find the exact room that this medallion is located in.
A Symbol of Honor Story Mission Unlocked

Once you’ve completed this quest, a new story quest will open once you return to Felwinter Peak. A Symbol of Honor is set on a PvP map and has you doing numerous objectives. You’ll be in for a big fight here, defending areas, even using turrets to help you hold off an assault. This story mission culminates with a fight against Iliksis, Light Stalker, a massive Fallen enemy. Once this mission is complete, you’ll have yet another task to perform.

Collecting SIVA Fragments
There are a lot of different places to collect SIVA Fragments in the Plaguelands, some are pretty hard to find. The Destiny Reddit has done a good job of listing out the locations as they are discovered.
Head back to Iron Temple and speak with Lord Saladin

Heading back to the Iron Temple in Felwinter Peak you’ll be prompted to speak with Lord Saladin. Saladin tells you of one final piece that you must find to complete the Gjallarhorn. You’ll need to head back to the Cosmodrome for a fight.
Defend the Ghost while it assembles the Gjallarhorn

Your final step before getting the Gjallarhorn is to defend your Ghost from an all-out assault. This is probably the hardest part of this quest line, but if you hold out you’ll get the elite launcher. Enemies can come from all sides during the assault, and there will be multiple waves to deal with. You must also stay within the defending boundaries to make the timer tick up to 100% complete. Once you do, the Gjallarhorn is yours.
Complete the Gjallarhorn Mission

Bungie lets you have a little fun with the Gjallarhorn to close out the mission. You’ll be set loose with your new toy and seemingly unlimited ammunition for the Gjallarhorn. Your objective is to take out a couple of Splicer Walkers, which the Gjallarhorn make quick work of.
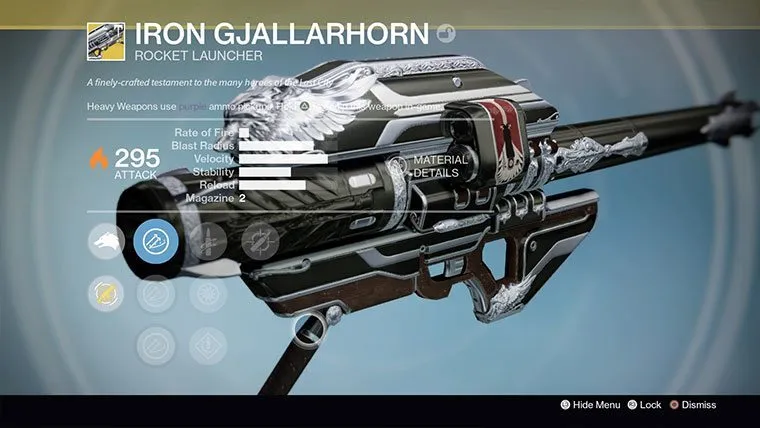
And that’s it. That’s how you get the Year 3 Gjallarhorn in Destiny: Rise of Iron. Owning the Year 3 Gjallarhorn also allows you to unlock the “Iron Gjallarhorn.” Let us know if you have any questions, comments, or insight to add for those trying to tackle one of the best new quests in Rise of Iron.


Published: Sep 20, 2016 07:10 pm