One of the biggest draws of Dragon Quest XI: Echoes of an Elusive Age is its simplicity. Rather than design a whole bunch of complex mechanics that players would need to spend hours to figure out, it offers up easy-to-access features that even the most inexperienced of JRPG players can understand.
However, that doesn’t mean you’ll be able to go into this adventure swinging. On the contrary, there are a handful of things that might not make sense when starting out. You’ll probably grasp each and every one of these eventually, but why leave it for later when you can do it now?
As such, here are 11 tips to help you get started on your quest to save Erdrea:
When In Doubt, Use Your Map
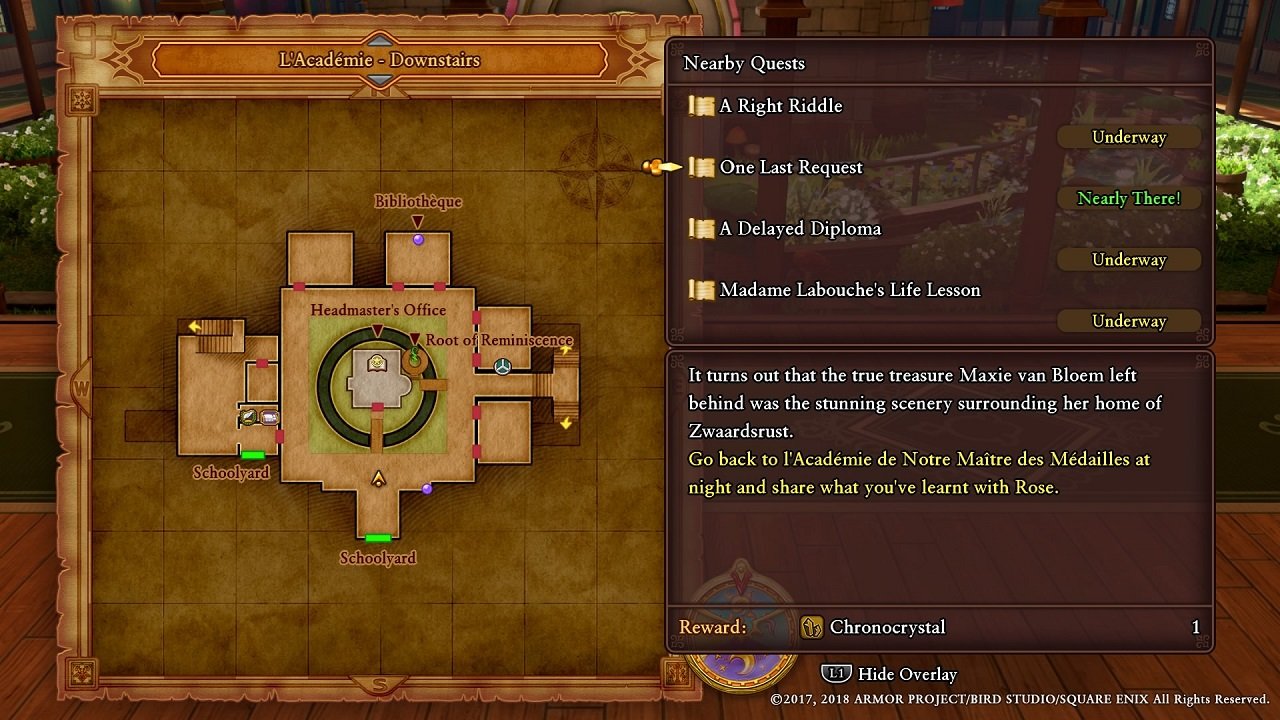
Are you lost? Don’t know where to go for a quest? Need to know what items can be found in a certain area?
If your answer to any of those questions is yes, then the map will no doubt be your best solution.
Dragon Quest XI might have one of the most informative maps I’ve ever seen in a JRPG, telling just players just about everything they need to know at any given time. Simply open it up and it will not only tell you if there are any quests in the area and even the location and identity (assuming you’ve picked it up before) of every nearby item.
In addition, the map marks the NPCs who can help you move forward with a pink dot (they’ll have a pink speech bubble on-screen) and those who provide quests with a purple one (they’ll have a purple bubble with an exclamation point when you find them).
Seriously, if you’re ever in doubt or even just want to double check something, whip out your map. It will never lead you astray..
Don’t Spend All Your Money In One Place
You just made it to a new town and you want to use all your hard earned cash on some shiny new pieces of gear, right?
Don’t.
Aside from the fact that new equipment costs a lot of money, there are many other things in the game that require you to pay for them. To name a few, there’s resting at an inn, refunding used skill points, resurrecting dead allies, curing curses and purchasing coins to fuel your gambling addiction.
To be fair, you’ll be dripping in money once you get farther in the game, but it’s better to cut costs early, so you can spend your money when you really need it, rather than spend everything all in one place and soon find that your pockets are empty when it counts.
So, how do you go about cutting costs? Making ample use of the Fun-Size Forge.
Fun With The Fun-Size Forge
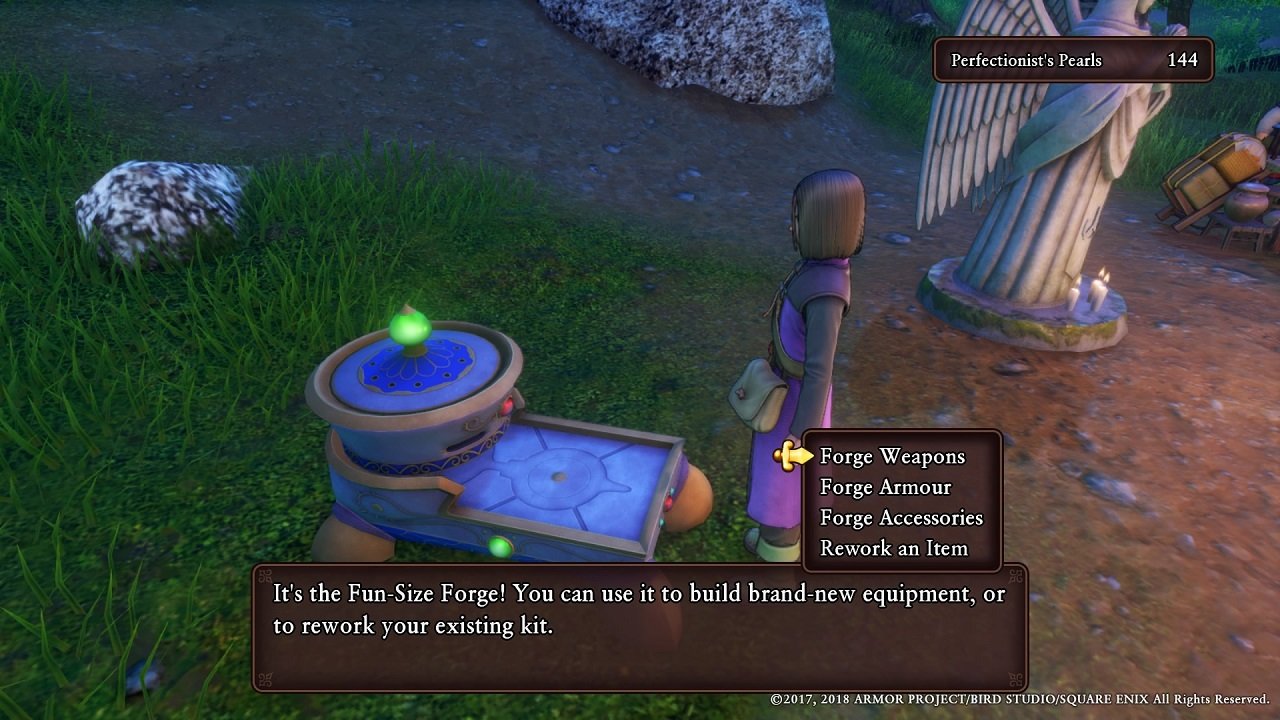
There’s a guide going more into depth about the Fun-Size Forge, but it wouldn’t hurt giving a quick explainer now.
By using recipes found in towns and treasure chests or earned by completing quests, you can use the Fun-Size Forge at any campsite in order to forge new equipment. Though you will have to procure the materials yourself, the process is entirely free, saving yourself a good deal of money.
And upon crafting equipment, you’ll earn an item called Perfectionist Pearls which can be used to enhance the piece of gear of your choosing. You won’t have to use too many of these items at the start, but the required amount will steadily increase as the rarity of the equipment you wish to enhance rises. Fortunately, you’ll be able to buy them in bulk later in the game to offset those rising costs.
Finally, the Fun-Size Forge offers more than just free gear — they’re often better too. The maximum upgrade level for most equipment is +3, and upon reaching that point, they are likely to be superior, or at least equal, to what you can purchase at any currently accessible shop.
As indicated by the “When In Doubt, Use Your Map” section, materials are very easy to find, so forge whenever you get the chance.
Camping
Considering that I just spent the last section talking about one of the features available at camp, I might as well talk about the whole thing.
Strewn across Erdrea are campsites that the Luminary and his party can use to rest after a long stretch of adventuring. Aside from the aforementioned Fun-Size Forge, you can use campsites to rest and fully recover HP and MP, advance the time of day to your choosing (some enemies and items only appear during certain times of the day), receive aid from Sacred Statues (saving, reviving, removing curses, refunding skill points, etc.), buying/selling items and equipment via a travelling merchant and getting an update on current events in case you don’t know what to do.
Even if you don’t need to use a campsite for any of its many functions, it’s still recommended to at least visit a new one at least once so it will be registered as a fast travel location when using the Zoom spell.
Taking Care With The Character Builder
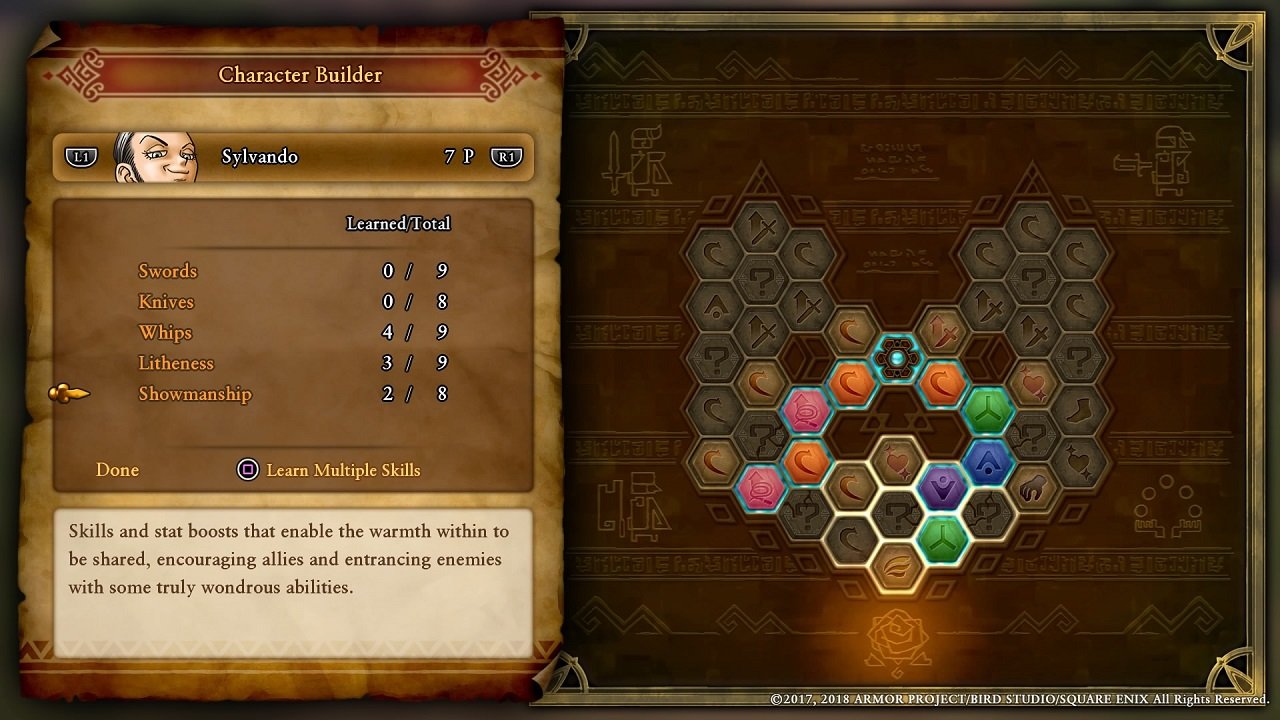
There’s a guide for this too, but It wouldn’t hurt providing a brief explainer here either.
The Character Builder is setup like a grid that branches out to up to six different skill trees depending on the character. Though they do also gain new skills upon leveling up, this is where the bulk of their development will take place.
Using the Character Builder is a relatively painless process, with the game asking if you’d like to use it after you gain a skill points upon leveling up and finishing a battle, and there’s actually a skill or ability that can be unlocked. Furthermore, you have free reign to pick whatever you want (so long as it’s unlocked and you’re adjacent to it) and thanks the grid showing most of these panels in advance, there’s little chance of you getting something you don’t want.
However, just because you can pick whatever you want, doesn’t mean you actually should. The bottom line is that until you get very far into the game, you just won’t have enough skill points to go down each tree and get any meaningful abilities from any of them. It’s better to focus on one or two early on, only branching out once you get stronger abilities and more skill points become available.
And in the chance that you do pick up something that’s unneeded or find the entire path you chose to be lackluster (like going down Veronica’s Whip Tree or Jade’s Claw Tree), then you can get use the Rectification option at any Sacred Statue or chapel to get on skill point back per 20 gold spent.
Diversify Your Party
Part of the reason why it’s so important to wisely pick your skills and abilities using the Character Builder is because the game allows you to switch between characters mid-battle, thus leading to the current section: “Diversify Your Party.”
Does it make more sense to have a party that mostly uses one or two weapon types or have a wide array of them? The answer, obviously, is the latter.
A diverse party is able to properly adapt to any situation and never find themselves crippled because one of them is gravely injured or impaired. Up against an enemy who is resistant to physical attacks? Replace one of your physical attackers with another spellcaster. Does your frontline need healing but you don’t want to risk losing your active healer in the process? Tag her out and bring in your healer from the reserves.
There will inevitably come a time when some characters will be viewed as irreplaceable in the long run, but there’s never a time when it’s better to let them die because you were too stubborn to switch them out.
The Power of Pep

Staying on the subject of switching between characters mid-battle, we inevitably come to one of Dragon Quest XI’s unique features: Pep.
As mentioned in the review, Pep is a combination between Final Fantasy IX’s Trance and Chrono Trigger’s Dual/Triple Techs, where a character can enter a powered-up state for a few turns, gaining enhanced stats and special skills, called Pep Powers, in the process.
The enhanced stats are self-explanatory, but the Pep Powers require a bit more explaining. In short, for a character to be able to use Pep Powers the following conditions must be met:
- At least one character (up to a maximum of four) needs to have Pep active
- All participating characters need to learn the appropriate skill
If both of these conditions are met, then you’ll be on your way to mastering the power of Pep. Beyond that, the only thing you need to know is that not all co-op Pep Powers require each participant to actually have Pep active. That said, the most powerful ones usually do, which is where switching between characters mid-battle comes into play: reserve characters will maintain their Pep state, allowing you to hold out for the Pep Power you want until it’s actually needed.
Of course, all good things come to an end and so does Pep. A character will lose Pep after a certain number of turns expire or upon using Pep Power. Therefore, while it’s generally advised to spend a few turns in Pep before using a Pep Power, there are other times when you might want to unleash one immediately.
What Your Stats Do
Surprisingly enough, one of the few things that Dragon Quest XI doesn’t immediately tell you is what your stats are. Well, here they are:
- Strength (STR): Increases physical damage at a rate of 1 extra point of damage dealt for every 2 points.
- Magical Might (M.Mi): Increases the potency of offensive and debilitating spells.
- Magical Mending (M.Me): Increases the potency of healing and revival spells.
- Deftness (DFT): Affects Critical Rate, Magic Critical Rate, Preemptive Strike chance, Escape success rate and increases Erik’s Steal success chance at a rate of 1 percent for every 20 points (capped at a maximum of 75 percent).
- Resilience (RES): Reduces damage at a rate of 1 less point of damage taken for every 4 Points.
- Agility (AGL): Affects Turn Order and Evasion
- Charm (CHA): Increases the chance enemies lose a turn due to ogling you and landing certain status effects.
Don’t Sleep On Debuffs & Status Effects
It’s common knowledge to buff your party to help even the odds against a tough foe, but the same can’t be said about applying debuffs or status effects on them to accomplish the same goal.
I know why this has come to be the case, but don’t let past experiences prevent you from trying them out in DQ XI. Not only are they rather effective, but certain characters can make them “stick” pretty easily thanks to them scaling off of Magical Might.
Every enemy can be hit with debuffs and they’re actually preferable against later bosses who can remove buffs from your party. Meanwhile, though not every enemy is equally vulnerable to status effects, they can be used against the ones who are to great effect. In particular, a surprising number of bosses aren’t immune to sleep or paralysis, providing a decent form of CC for those who wish to use it.
Not only that, but some moves become substantially more powerful when an enemy has the right status effect on them, allowing you to quickly dispatch them if you’re lucky enough. Admittedly, this technique loses its novelty in the late-game, but it’s highly potent before then.
The only status effect I’d avoid is poison — it sucks.
Making The Most Out Of Your Inventory
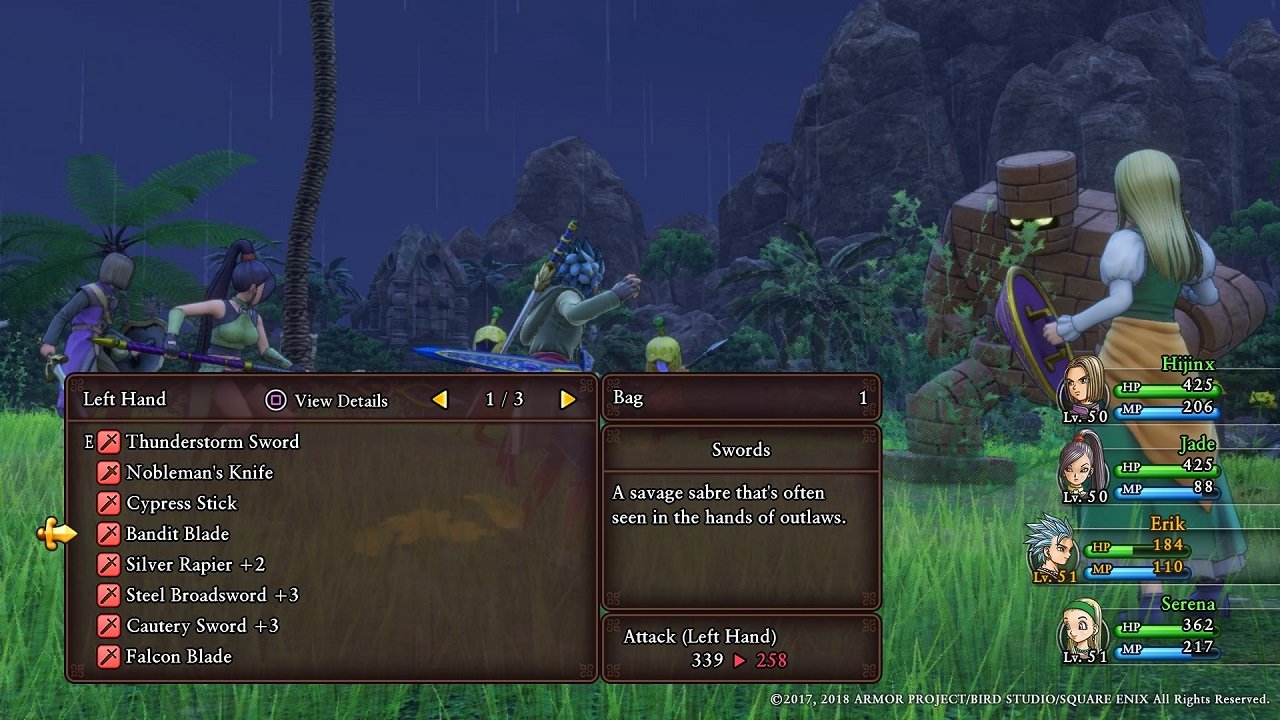
If you just use your inventory to use run-of-the-mill restoratives, then you’re doing it wrong. In Dragon Quest XI, there are two other ways your inventory comes into play outside of just using stock items.
First, you can actually use some weapons as if they’re items, increasing the range of options the relevant character has in combat. Not only does this option not destroy the weapon in question, but some of the abilities they have are quite strong, like the ability to clear all the debuffs off an ally.
The bad part? Even if a weapon doesn’t have a “use effect,” the game will still let you use it as if it did. Watch as your character holds the weapon above their head, nothing happens and lose a turn. It’s kind of funny the first time…not so much during the next.
Second, you can switch between weapons mid-fight. Not only does this mean that characters can have access to a wide range of “use effects” if you hold on the appropriate weapons, but it allows your characters to effectively fight in situations they normally wouldn’t — provided they have the skills to go along with the current weapon.
The downside? Outside of the fact that this might not be a wholly viable option until mid/late-game, there aren’t any.
Making Metal Slimes Meet Their Maker
Many JRPGs have a monster who are rare, weak and provide loads of exp. In Dragon Quest XI, those enemies are known as Metal Slimes.
As stated before, Metal Slimes are very rare, but that’s only the tip of the iceberg. They’re also fast, have high defense and evasion, immune to spells and often run away at the drop of a hat. Forget trying to kill them in an actual fight, they might flee before you get to act!
So how can you defeat them? The first way is to use skills (Metal Slash, Metalicker) or Liquid Metal Weapons which will increase your damage output against them. That said, the damage increase will only be by one and the Metal Slime will likely run away before you can do enough damage. Therefore, you’re going to have to go for something a little more extreme: critical hits.
The reason why Critical Hits are so effective is because they bypass a Metal Slime’s defense, allowing the user to kill them in one hit. Here are some skills that guarantee critical hits and the characters who learn them:
- Erik: Critical Claim
- Serena: Thunder Thrust
- Jade: Thunder Thrust, Lightning Thrust
- ???: Hatchet Man
Among these, Critical Claim stands out because it is the only one that doesn’t have reduced accuracy. The only problem is that it costs 64 MP to use.
Outside of that you also have the option to use multi-hitting skills, but they suffer from not being boosted by any special modifiers, so there’s always the chance of such skills still doing minimal damage due to most of the attack missing.
Dealing with Metal Slimes will always be a pain, but it’s well worth it when things go your way. And even if they don’t, considering how they rare they are, the ensuing disappointment won’t be something you’ll experience often.
That’s it for the 11 quick tips in Dragon Quest XI: Echoes of An Elusive Age. If you follow these, you’ll be way on your way to saving Erdrea. If you want more guides, head on over to the Luminary’s Tome.


Published: Sep 4, 2018 08:00 am