Easily Fallout 4’s biggest addition to the series is the Workshop. This semi-level editor allows players to shape their town to their whim, even adding in extra settlements along the way to help out. If you put a lot of time and effort into this mode then you’ll be able to reshape the wasteland, creating a network of settlements that help and support each other. Of course, to get there you need to know how it all works, so check out this guide to really get your Fallout 4 town running.
Let’s start with the basics of how the Workshop works. Essentially, when you are the leader of a town or settlement, you can build whatever you want there, and scrap anything else. To build things you need resources, which can be scavenged from the wasteland, or gathered from items around town. When you first take over a settlement the first thing you should do is go into Workshop mode and scrap everything you don’t want. Pretty much anything that isn’t useful should go, so just walk around scrapping anything you see that isn’t tied to some resource.
Once you’ve done this you should have a healthy amount of resources with which to rebuild the settlement to your whim. However, you might need more, and will certainly need more later on. Fallout 4 finally makes gathering random objects useful, as they contain the resources you need to build your city. When viewing an item in the Pip-Boy you should see what it would break down into. If it has something you need you can scrap it by either selecting it while in your settlement, or going to the Workshop table and selecting Transfer. In this menu you should be able to scrap anything you no longer want.
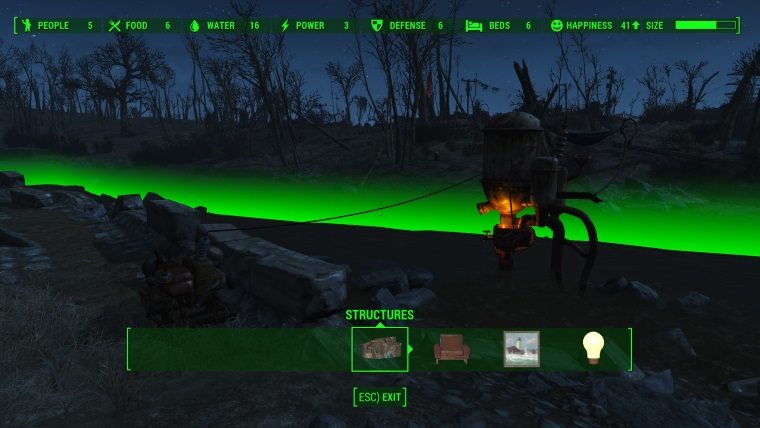
Once you have the resources you need it’s time to get down to the mechanics of making the Workshop function. Inside of the Workshop menu, at the very top, you’ll see what this settlement has and what it needs. Anything in the green is good, showing that you are covering your needs, but if it’s red you’ll want to get to work.
You always want to get the basic necessities up first, so throw some food down, and build a well for water. To do this you need the required resources, which should be displayed in the Workshop menu. If you don’t have something you need, you can mark it as a searched item, this will make things appear with the magnifying glass symbol if they contain that resource. Remember though, at the beginning your settlements aren’t linked, so if you have carrots at Sanctuary and want to put them in somewhere else, you’ll need to go there and grab them. We’ll talk more about linking settlements later.

So, you’ve got food and water ready, but the food is still red? This is where assigning settlers comes in. While in the Workshop menu you can go up to a settler and hit the A/X button to command them. If you have a defense tower, or crops then you need a person to work those items, so find someone, select them, and then select the item you want to assign them to. Once you have the basics up and running, it’s on to the more complex systems.
Defense is another very important part of the Fallout 4 Workshop experience. You don’t want your settlers to be murdered by wandering raiders now do you? The easiest way to keep them protected is to throw up an auto-turret. This requires some harder to find resources, but won’t tie up a settler, and is easily managed. If you don’t have the required resources then you can throw up a guard tower, but that will require a settler to man it. If you’re running low then you’ll have to really dive into the weeds.
Now we’re getting to the deep stuff of Fallout 4’s Workshop. Electricity. If you want to gain more settlers you’ll have to throw up a comm tower, which can be found in the Misc. section of the Electricity menu. But, this item, along with more powerful turrets and water purifiers which will be required for larger settlements, requires power. Throwing down a generator is easy enough, though it requires a bunch of resources that might be tough to find. After that you have to connect everything using wires.
Copper is the most important thing here, so make sure you’re grabbing those Hot Plates you find in the wasteland. Wires can run for a good distance, but if they need to go further, such as when using a larger generator that powers multiple things, you’ll need poles to hold the wires up. Make sure you are aware of how much electricity the generator is producing, and how much is required of the item, which should all be displayed in the Workshop UI.

Once you have it, and the other required items like the water purifier, powered up you should start to see settlers trickle in. Make sure you build enough houses and beds for all of them if you want them to stick around, and keep those defenses up and running, as you’ll start attracting the attention of raiders.
With so many settlers you’ll need more resources available to you, which is where connecting your settlements comes in. This is the next big step that takes you from just building stuff to actually forming a community. To do it you’ll need the Local Leader perk, which is new for Fallout 4. This lets you establish supply lines between settlements, making it so your resources are shared between any that are connected.
To do this, you can check out our other guide, but the basics are that you get the right perk then pick a settler, hover over him, and hit RB or R1. This will then pop up a menu where you select what other town to connect to. If you do this right you’ll end up with a wide network of resources to tap into.
This is really just the beginning of what you can do in Fallout 4’s Workshop, but it should get your started and on the way to a happy and healthy settlement. Let us know in the comments what helped you, and if you have any other tips to share.


Published: Nov 10, 2015 08:30 am