Crysis 2 is getting ready to release in just a couple of weeks, which gives you plenty of time to get started in learning the maps for the game’s multiplayer portion. Partly released by Crytek and partly with the help of teh internet, we pieced together what you can expect come March 22nd when Crysis 2 goes live for the PS3, Xbox 360, and PC. If you need prepping on the game’s modes you can check one of the three (1,2,3,) multiplayer progressions videos or these tips straight from the developer’s mouth when it comes to “playing it right”.
The demos which are available on the Xbox 360 and PC feature two of the maps: Pier 17 and Skyline you can expect the rest to ship with the game on the 22nd when it releases to retail.

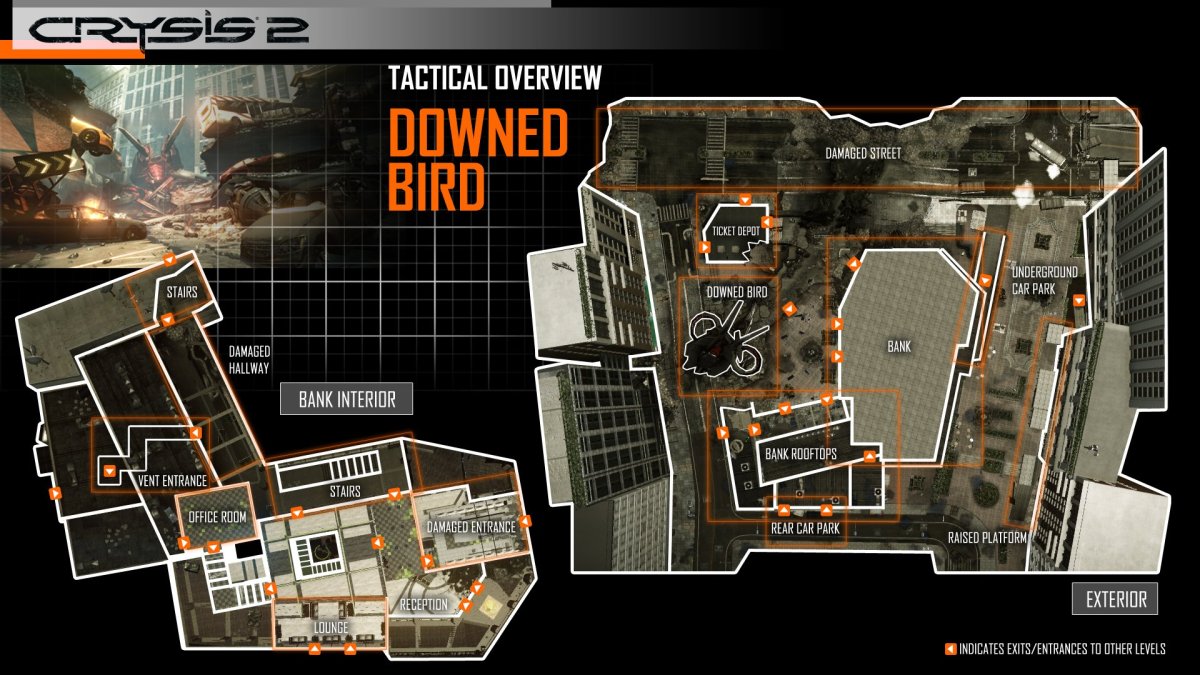
Downed Bird Description
A huge alien ship has been shot down here and carved a huge trench into the ground before coming to a shuddering halt. This map mixes long exterior sightlines suiting snipers and interiors suiting close range specialists. Use stealth and power to get into position then armour to finish the fight. The Grendel is a good choice for this map allowing engagement at medium and long ranges and consider adding the shotgun attachment for when enemies get too close. This map is excellent for hard fought Extraction matches.
_____________________________________________________________________________
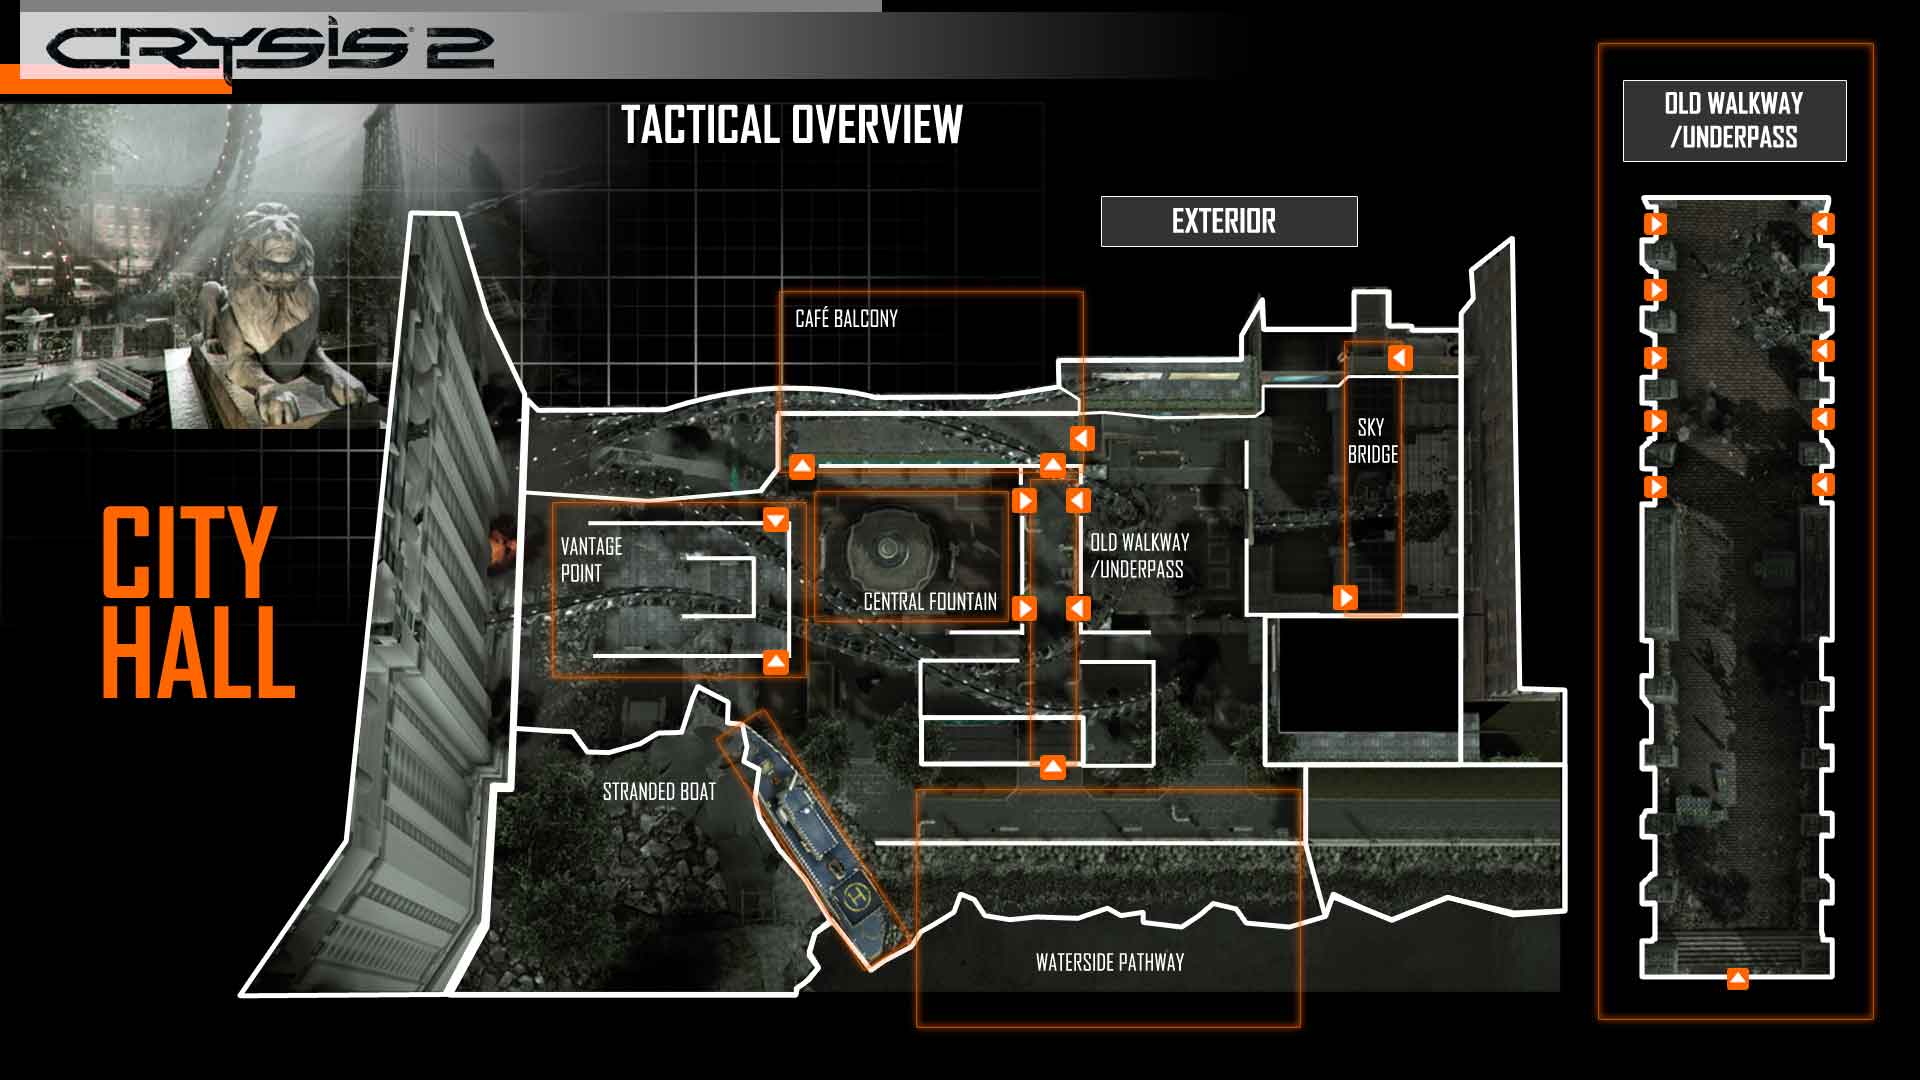
City Hall Description
Welcome to City Hall, or what’s left of it… This proud icon of New York has been ravaged by some form of alien craft and looks in danger of imminent collapse. Snipers can use the ruined sky bridge to gain a vantage point over much of the level, whilst the really adventurous can perch on the alien tentacle itself. With so many twisting turns and changes of height the enemy could be lurking anywhere so use the hologram decoy to lure them out. Capture the Flag matches work especially well here.
https://youtu.be/r84VP4VzLI8
_____________________________________________________________________________
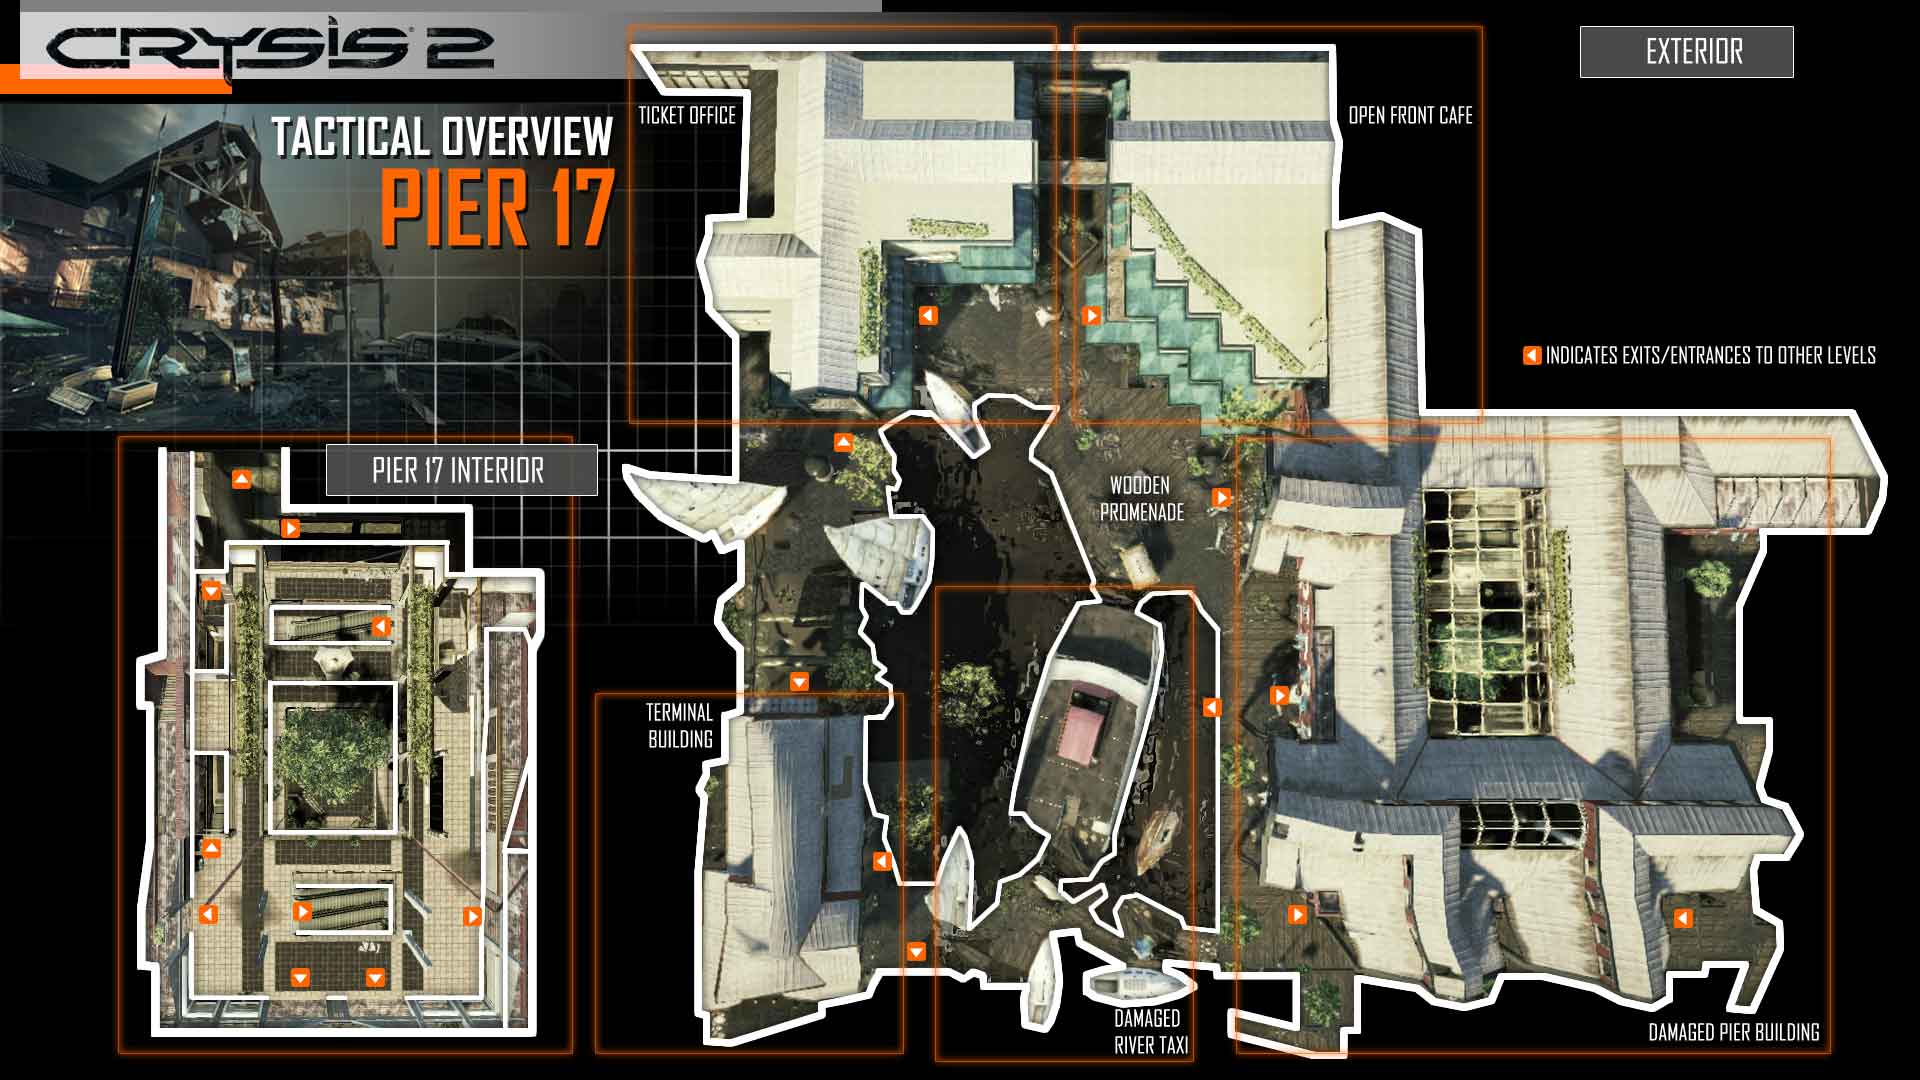
Pier 17 Description
The ruined mall at Pier 17 overlooks the shattered harbour with the ferry terminal opposite on the verge of toppling into the ocean. This U-shaped map has some large open spaces with limited cover so use stealth mode to move unseen and surprise your enemies. With longer range combat opportunities and various high vantage points the DSG1 is an excellent choice here and could make the difference in a close Team Instant Action match.
_____________________________________________________________________________
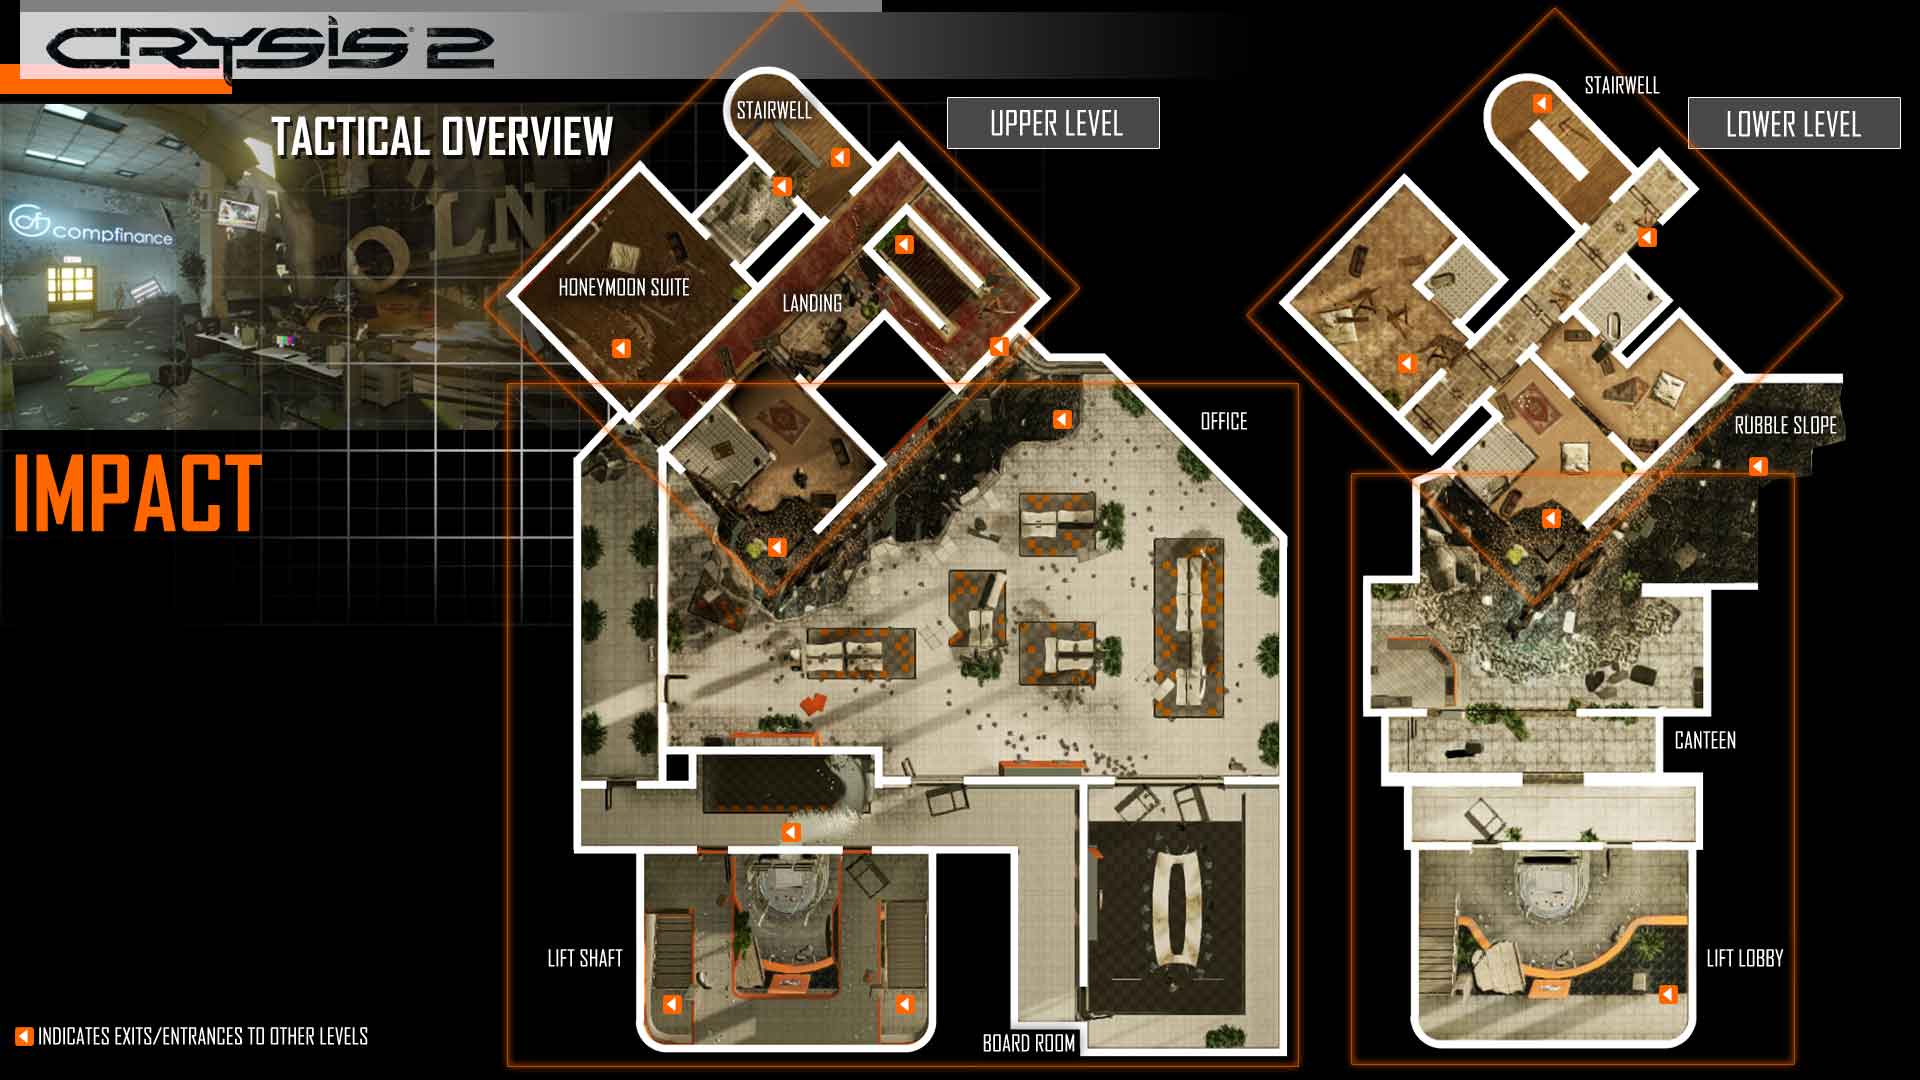
Impact Description
A grand hotel and an ultra modern office block have lurched together and are somehow propping each other up although the shockwaves periodically rippling through the structure indicate they won’t hold much longer. This is the smallest and tightest of all the maps and requires lightning reflexes to survive for long. Either keep continually on the move or set up an ambush, just remember to relocate after each kill.The tight spaces make the Jackal a superb choice as you don’t need to worry about longer range fighting. Team Instant Action matches are particularly intense on this map.
_____________________________________________________________________
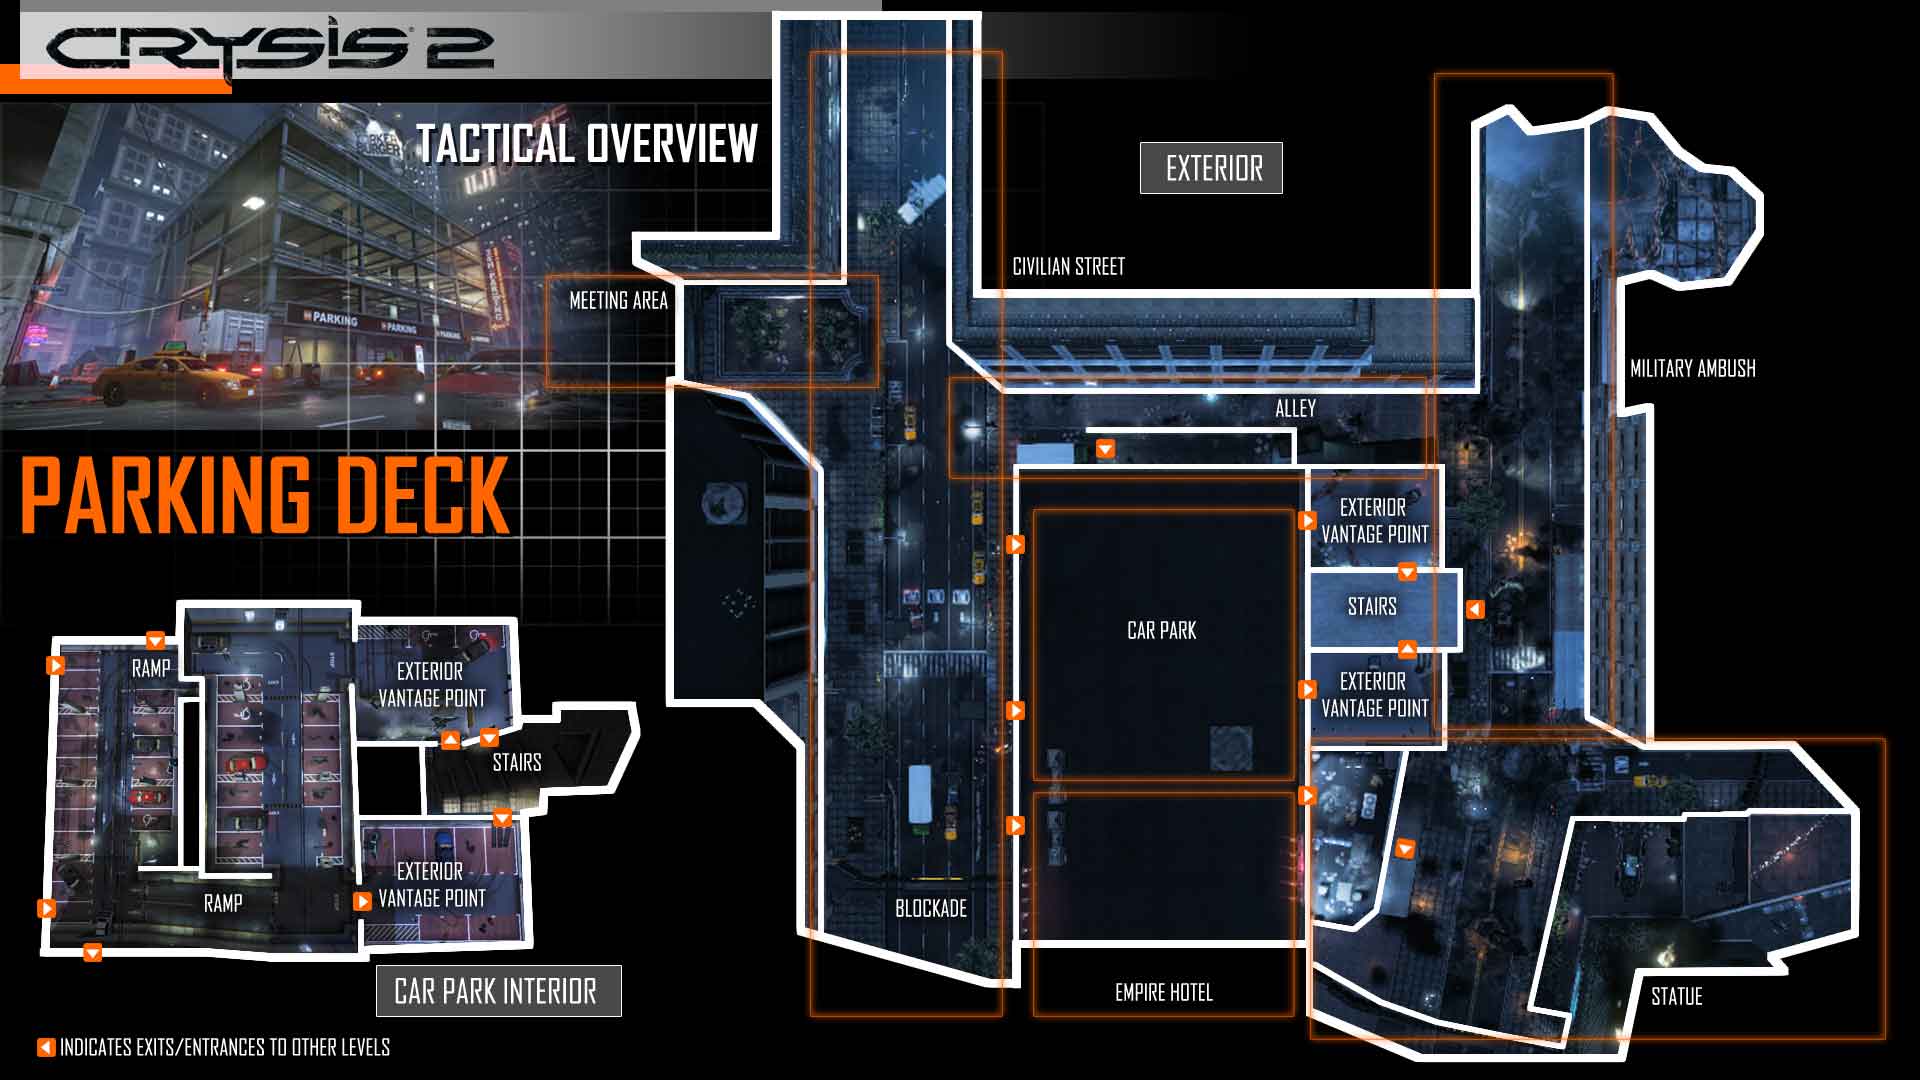
Parking Deck Description
The Parking Deck is the central feature of this map, surrounded by rubble strewn streets and smashed shops. Use power mode and you will realise there are a surprising number of routes into the Parking Deck so use the power jump to attack from unexpected directions. Most combat is at closer ranges so consider using the Mike and punish those who rely on armour to keep them safe. This map is excellent for tense Assault matches.
______________________________________________________________________________
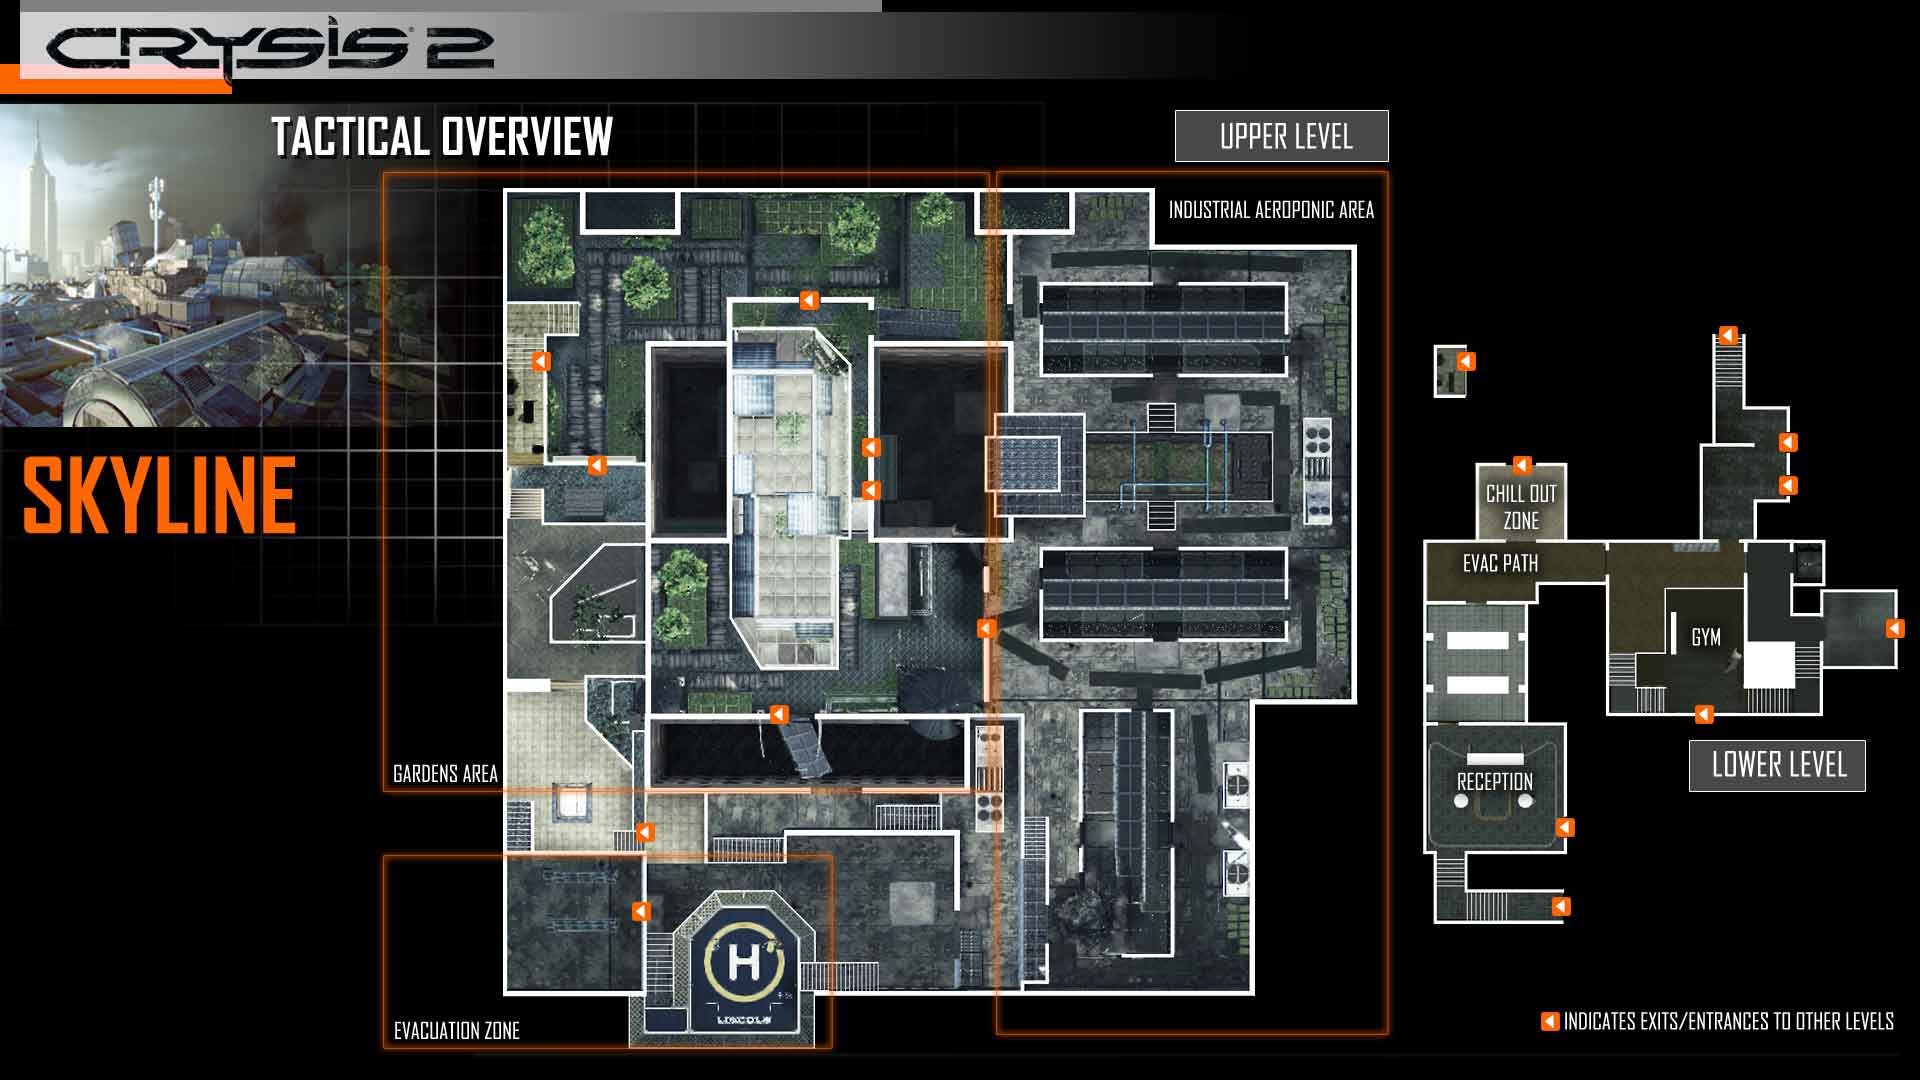
Skyline Description
The Glasshouse dominates the centre of this skyscraper rooftop and from the summit almost the entire area is revealed. Controlling this central high ground gives a major tactical advantage so expect fierce fighting in and around it. The map is small but with extreme verticality, use your Nanosuit abilities to quickly gain the high ground and then defend it against all attackers. The shorter distances mean the Feline is an excellent weapon choice on this map which is particularly well suited to intense Crash Site battles.
https://youtu.be/K5IZgIco6jk
Liberty Island Walkthrough –









Published: Mar 9, 2011 08:00 am