Koltin is an interesting merchant in The Legend of Zelda Tears of the Kingdom. While he isn’t the primary way to buy supplies, he is worth searching for as he will provide mystical armor pieces you can’t find anywhere else. Here are all the Koltin locations in Zelda Tears of the Kingdom.
Every Koltin Location in The Legend of Zelda: Tears of the Kingdom
Koltin goes to five locations in Zelda Tears of the Kingdom. The first encounter with Koltin will occur at Woodland Stable near Pico Pond. After this first encounter, he will start bouncing between the following locations. Koltin is hard to miss considering players can spot his balloon from a considerable distance.
Koltin Location #1 – Woodland Stable
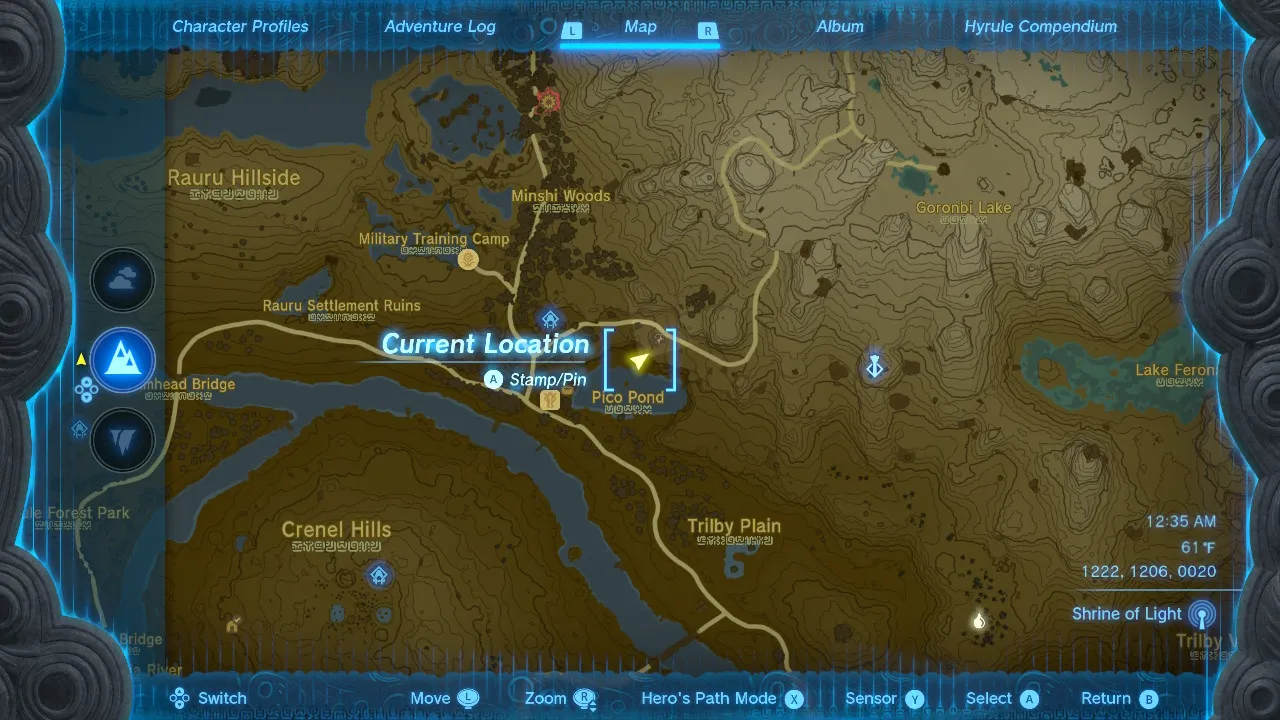
The first time you’ll meet Koltin — and essentially activate him as a merchant — will be east of Woodland Stable next to Pico Pond. The exact coordinates of Koltin at this location are 1222, 1206, and 0020.
Koltin Location #2 – North of Tarrey Town
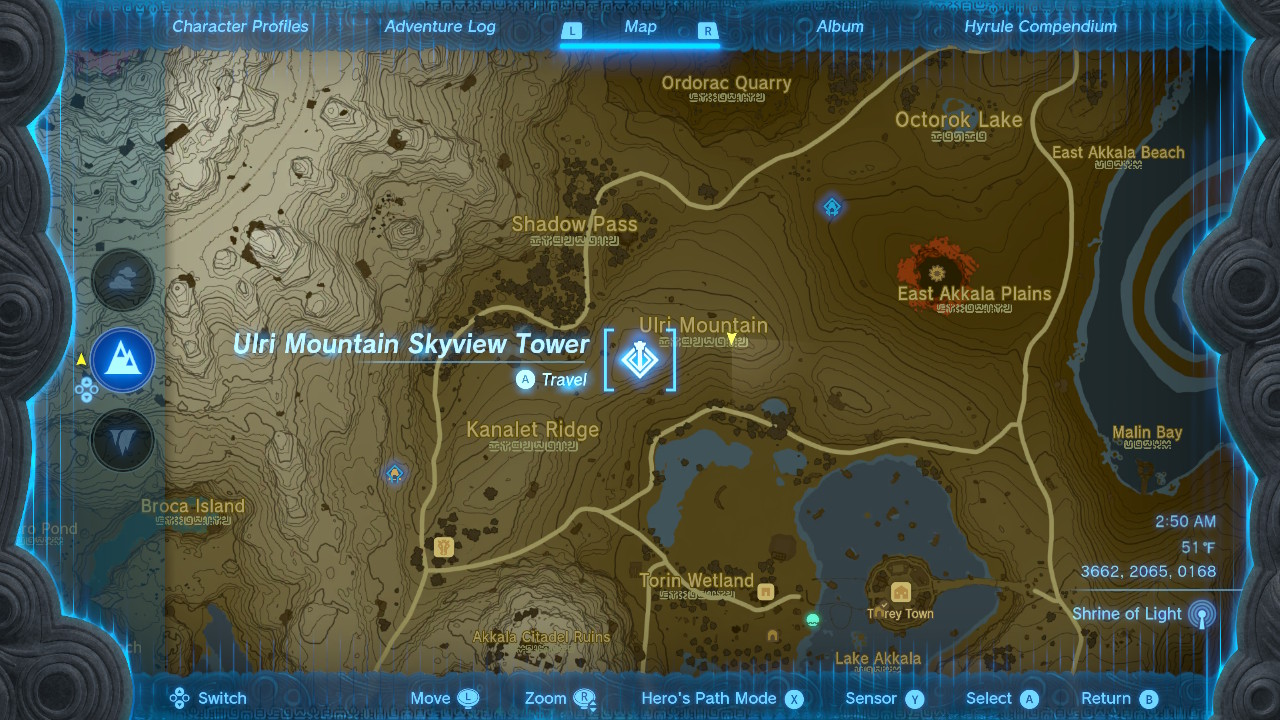
After the first interaction with Koltin, he will move locations and head to the eastern side of the map. More specifically, you can find Koltin at his second location northwest of Tarrey Town — and can be easily spotted on the mountainside. The exact coordinates of this location are 3662, 2065, and 0168.
Koltin Location #3 – South of Lookout Landing

Koltin will move near the center of the world map. You can find Koltin and his purple balloon south of Lookout Landing in Passeri Greenbelt. The exact coordinates of this location are -0319, 0163, and 0022.
Koltin Location #4 – East of Lake Hylia
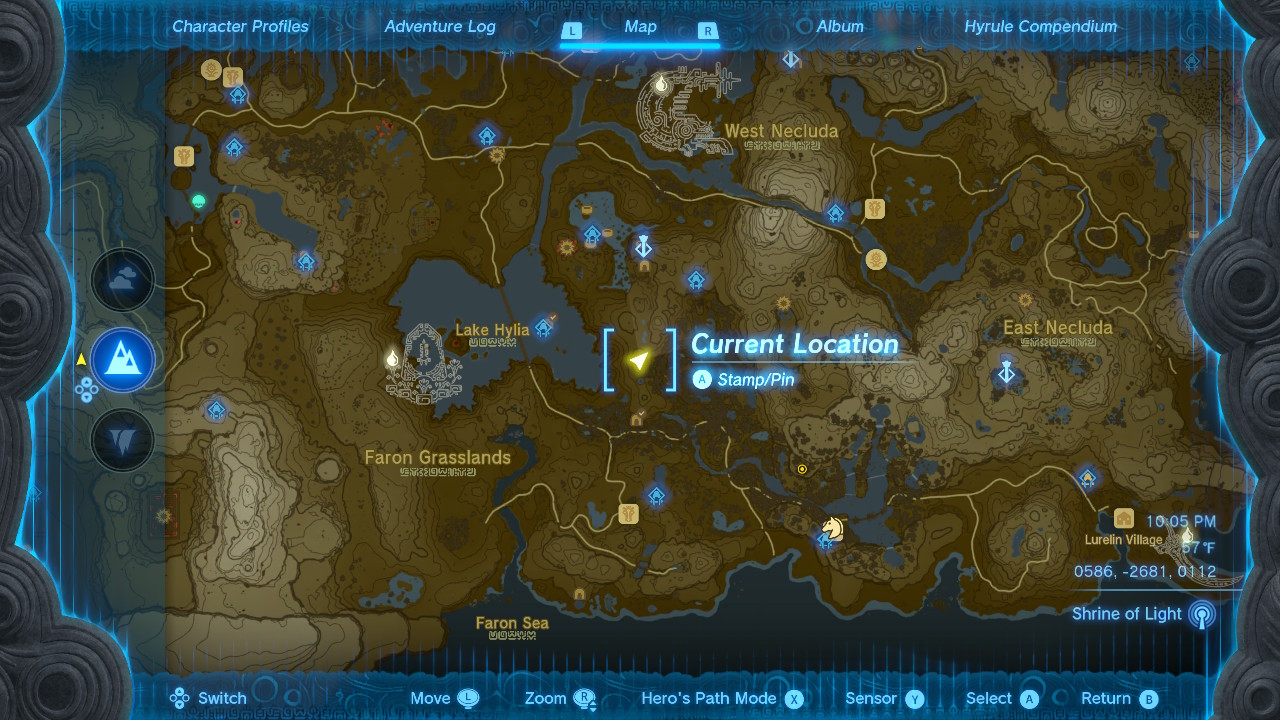
Lastly, Koltin will appear east of Lake Hylia in the Faron Woods region. The exact coordinates of his fourth position are 0586, -2681, and 0112.
Koltin Location #5 – Tabantha Tundra
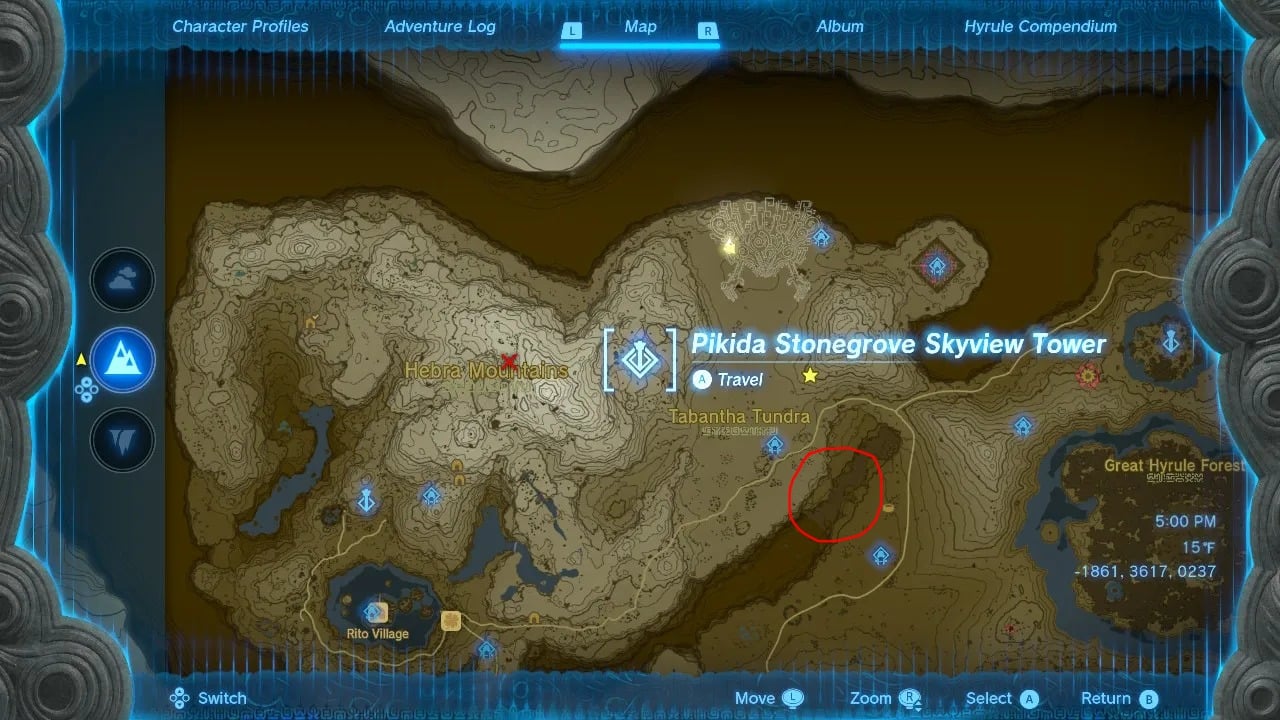
In the Tabantha Tundra, Koltin can be spotted on a cliff overlooking the Forgotten Temple, southeast of the Snowfield Stable. The exact coordinates are –1530, 2380, 0244. His balloon is easy to find even in snowy conditions.
How to Buy Products from Koltin
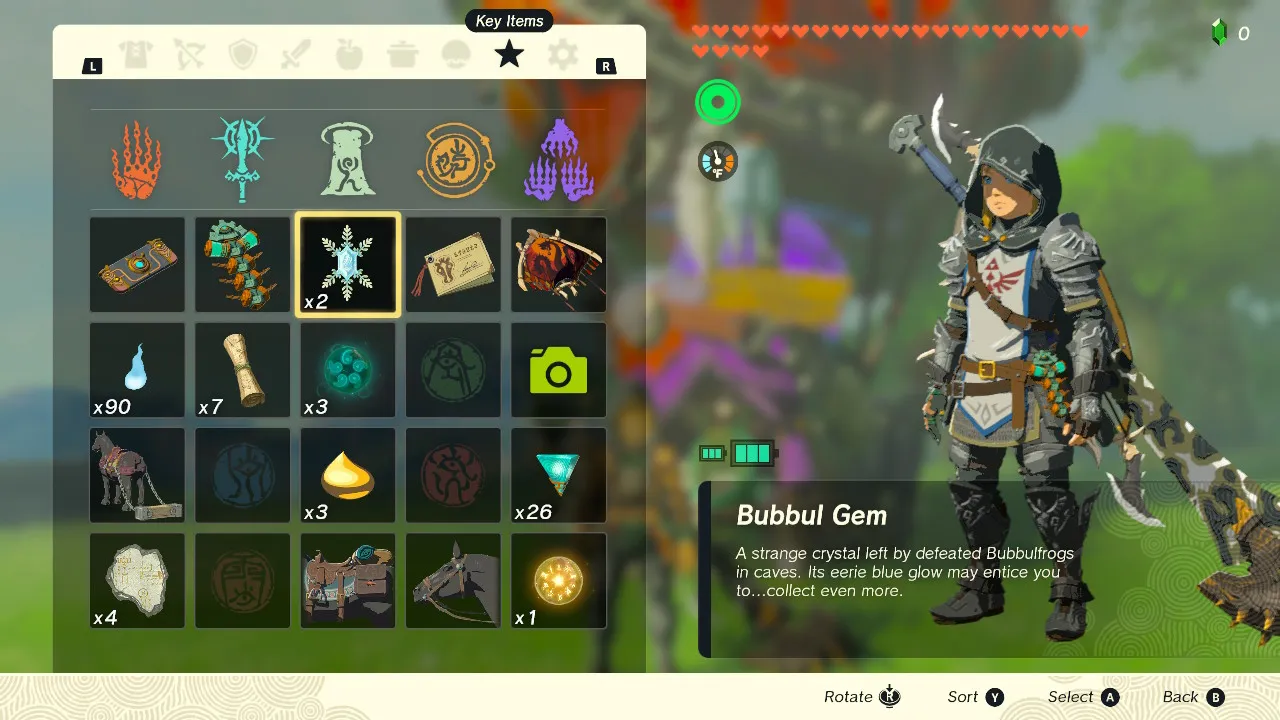
As you explore caves in Zelda Tears of the Kingdom, there are rare occurrences where you will encounter glowing giant frogs — also known as Bubbul Frogs. These Frogs, when killed, will drop Bubbul Gems, which are the only form of currency that Koltin will accept. At first, Koltin will offer to trade you for a small amount of Bubbul Gems, but the more you trade with him, the higher the price will go.
The good news is that these Bubbul Frogs that drop the Gems are extremely easy to kill. One shot of an arrow to the face will knock them on their back and easily have them drop a Bubbul Gem. The frogs always only drop one gem at a time.
All Koltin Rewards in Zelda: Tears of the Kingdom
As you trade Bubbul Gems with Koltin, he will offer you a variety of rewards. You can’t skip any rewards and can only receive them in a particular order. Below you will find all rewards Koltin offers and the order he provides them.
| Number of Bubbul Gems | Reward |
|---|---|
| 1 Bubbule Gem | Bokoblin Mask |
| 2 Bubbul Gems | Moblin Mask |
| 2 Bubbul Gems | Hinox Toenail |
| 3 Bubbul Gems | Mystic Robe |
| 3 Bubbul Gems | Fire Keese Eyeball x8 |
| 3 Bubbul Gems | Lizalfos Mask |
| 3 Bubbul Gems | Ice-Breath Lizalfos Tail |
| 4 Bubbul Gems | Mystic Trousers |
| 4 Bubbul Gems | White-Maned Lynel Mace Horn |
| 4 Bubbul Gems | Horroblin Mask |
| 4 Bubbul Gems | Gleeok Wing x2 |
| 4 Bubbul Gems | Lynel Mask |
| 4 Bubbul Gems | Gleeok Thunder Horn x3 |
| 5 Bubbul Gems | Mystic Headpiece |
As previously mentioned, you can only claim these rewards if you have claimed the one that comes before it. So, for example, if you want the Mystic Headpiece, you must collect 46 Bubbul Gems!
The best way to collect Bubbul Gems fast is to find Cherry Blossom Trees, which reveal the hidden locations of caves — which most likely have Bubbul Frogs inside that drop the Bubbul Gems.





Published: Sep 23, 2024 02:54 pm