You’ve investigated the Underwater Reservoir, and now you need to see what Bernard has been up to in Part 3 of our Bravely Default 2 Chapter 1 Walkthrough. After defeating Anihal in combat the former holder of the Beastmaster Asterisk has agreed to spill the beans on the Water Crystal’s location.
Now all you need to do is leave the Underground Reservoir and return to Savalon. If you are reading ahead and need to go back to Part 2 of Chapter 1 you can do so by following the link here.
Since Bravely Default 2 is a narrative-heavy game, I will try to keep all further spoilers to a minimum. Cutscene details will be scarce, and characters will only be named as required. Additionally, this walkthrough will follow a checklist format to keep things short and concise.
I will list monsters encountered along the critical path (to include their weaknesses), and treasure chests (as well as what they contain). Enemies and bosses are natural but necessary spoilers, so I’ll go ahead and tag this article with a mild spoiler warning here, and I will precede every boss with a more obvious spoiler warning.
Bravely Default 2 Chapter 1 Part 3 Walkthrough
Head to Anihal’s home in Savalon
- Leave the Underground Reservoir either by foot or via a Teleport Stone. Once back in Savalon head up to the market on the right side of the town, and make your way to Anihal’s home to the right (the building towards the middle with the blue dome).
- Once you enter a cutscene will begin. You’ll be given a key to Bernard’s Mansion, but you won’t be able to raid the place until after visiting the palace (which you’ll automatically port to during the cutscene: convenient).
- Prince Castor will leave your party.
- Bernard’s Mansion is not actually in the town of Savalon, so you’ll need to venture outside into the World Map to reach it.
- Rest up at the inn, and stock up and upgrade your equipment at the vendor before setting out. You’re heading to another dungeon after all.
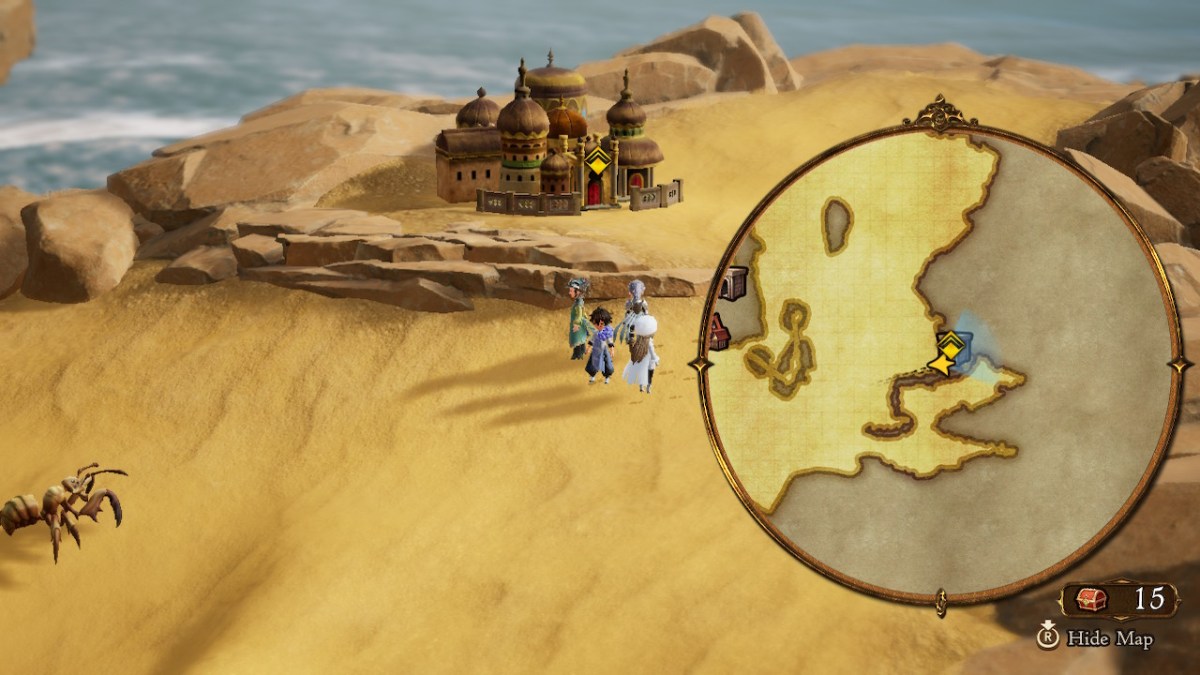
- After leaving Savalon you’ll need to head due east to reach Bernard’s Mansion. It’s along the coast, so use the larger minimap (by clicking R3) to orient yourself.
- The enemies out here should flee from you now, but you could always kill them for a little bit of experience and JP.
- Once you find the opulent manor upon the hill simply approach it to enter.

Bernard’s Mansion
- A short cutscene will play when you step into Bernard’s Mansion. Afterwards head towards the giant red door to use the key Anihal gave you to enter.
- Bernard’s Mansion has a good amount of guards patrolling it, though they shouldn’t prove much trouble.
- You should be at least level 14 and Job level 6 or higher.
- Enemies within Bernard’s Mansion include Henchmen, Swordsmen, Bowmaidens, Axemaidens, Peiste, and Minotaurs.
- Henchmen (Humanoid) are weak to Water, Swords, and Bows.
- Uses special attacks to hit one target for heavy damage.
- Will Silence individual party members.
- Swordsmen (Humanoid) are weak to Lightning and Bows. Takes half damage from Swords.
- Uses special attacks with high crit against single targets.
- Bowmaidens (Humanoid) are weak to Fire and Swords. Takes half damage from Bows.
- Will poison individual party members.
- Axemaidens (Humanoid) are weak to Lightning and Spears. Takes half damage from Axes.
- Will use special attacks to hit one target for heavy damage.
- Peiste (Aquatic) are weak to Earth, Spears, and Bows. Absorbs Water.
- Can poison party members.
- Minotaurs (Beast) are weak to Earth and Spears. Takes half damage from Wind and Staves.
- These giant hybrids hit like freight-trains, so you’ll want a tank to hold their attention.
- Henchmen (Humanoid) are weak to Water, Swords, and Bows.
- There are 11 treasure chests in Bernard’s Mansions – three on the first floor, and eight in the basement – but you can only grab six your first time through the dungeon.
- The first and second chests can be reached by turning left at the entrance to Bernard’s Manor. Keep heading this way until you can only go forward via the stairs into the basement. Once downstairs go down and to the left, defeating the Minotaur prior to looting the two chests. The chest on the right will have monsters within (3x Evil Eye and 2x Wiki-Wiki) for a Medium JP Orb. The second chest has 2x Remedy.
- Go back up to the staircase and go right. Cross both bridges and keep on the path until you can interact with the switch on the wall. Do so then return to the first floor. The door in the center is now open, so head right then up through it. The third chest is in the center of the room ahead (Bad Bone).
- Head left and up through the door, then down the stairs back into the basement. Go right at the fork and follow the path to the fourth chest (Tent).
- Return upstairs and go right to the last door, then back down into the basement. Hit the switch to open another door upstairs, then make your way back to the entrance of Bernard’s Mansion and go all the way to the right to a room with yet another switch. Hit this to open the door leading to the giant staircase on the right of the large room above. Go up the staircase, then continue left until you reach the last room.
- A cutscene will play, in which you’ll use the key from Anihal to open a secret passageway.
- Head down to reach a Dungeon Portal and save point.
- Back on the topic of treasure chests:
- The fifth chest is through the secret passage and beyond the save point. This whole area has a bunch of dead ends, so to get out head right until you see some stairs and a bridge next to them. Go under the bridge then down to the next set of stairs. Follow this patch round to the fifth chest (3000 pg).
- Go back down the stairs and continue right under another bridge. Go up the next set of stairs and then down to grab the sixth chest (Iron Bangle).
- The other chests have to wait until after you beat the boss battle coming up, so head up from the path and use the save point to pop a tent and save your progress.
- Step into the room when you are ready: you’ll trigger a cutscene, followed by a boss battle.
- Gloria can now use Special Abilities.
SPOILER WARNING FOR THE UPCOMING BRAVELY DEFAULT 2 BOSSES AND JOBS.

Bernard (Thief)
We have a full guide on how to beat Bernard in Bravely Default 2 here, but to give you a quick summary:
- Bernard: 17756 Health, is weak to Earth, Light, Axes, and Bows.
- Bernard starts with two guards alongside him:
- Swordsmen (Humanoid) has 1022 Health, and is weak to Lightning and Bows. Takes half damage from Swords.
- Uses special attacks with high crit against single targets.
- Axemaidens (Humanoid) has 1022 Health, and is weak to Lightning and Spears. Takes half damage from Axes.
- Will use special attacks to hit one target for heavy damage.
- Swordsmen (Humanoid) has 1022 Health, and is weak to Lightning and Bows. Takes half damage from Swords.
- Bernard will steal items from the party, as well as BP and Buffs.
- He counters Martial Arts abilities with steals.
- His Godspeed Strike can one-shot party members. You’ll need a capable White Mage and Vanguard in this battle.
- Use the Vanguard’s Enrage to keep Bernard focused on them, and have the White Mage support them with Cures and Protect.
- The slippery bastard will attack between your attacks. In other words: he’s an ass.
- Beastmaster excels in this battle: capture Minotaurs prior to the fight to unleash hell on Bernard.
- Alternatively, having a Bard capable of buffing/debuffing will help you mitigate his attacks.
Once you take down Bernard you’ll unlock the Thief Job in Bravely Default 2 and will enter one of Chapter 1’s lengthier cutscenes. After the sudden yet inevitable betrayal you’ll resume control in the Savalon dungeons thanks to a new ally.
Leave the dungeons to confront Castor to bring Bravely Default 2 Chapter 1 Part 3 to a close.
- This final segment doesn’t take too long, but before you leave the dungeons to take on the devilish Prince Castor there are three chests to loot, two in the cells and one on the way out. Heal up before proceeding.
- The one in the cell to the right has monsters within (3x Restless Souls) and contains a Well-Worn Muleta accessory.
- The second chest is in the cell below the one containing the gentleman with a side quest (4x Mini Ether).
- The last one is down the corridor, then in a cell to the right (3x Phoenix Down).
- Leave the dungeon to enter Savalon. Before moving ahead with the story you will want to stop by the vendor and inn. You are about to jump directly into another boss fight.
- While your at it save your game.
- When you are ready head up to the palace and into the room on the right to trigger a cutscene and the final boss battle of Chapter 1 part 3 in Bravely Default 2.
SPOILER WARNING FOR THE UPCOMING BRAVELY DEFAULT 2 BOSSES AND JOBS.

Prince Castor (Berserker)
We have a full guide on how to beat Prince Castor in Bravely Default 2 here, but to give you a quick summary:
- Castor: 28140 Health, and is weak to Water, Wind, Daggers, and Bows.
- Castor is a Berserker, meaning his attacks will ignore the defensive bonus from Default.
- You will want to Default to bank BP, not to mitigate damage.
- Castor hits harder than anyone else up to this point in the game (easily for four-digits), so you’ll want a Vanguard to taunt him and to soak as many of his attacks as possible.
- Use a Bard and White Mage to provide physical damage mitigation and to counter his attack that reduces physical damage resistance.
- Furthermore, Castor likes to use Water spells, so equip Ice Talismans to either make characters immune, or two on a character you’d like to receive free heals from absorbing the spell.
- Poison from Black Mage works wonders against Castor, as does Freeze from the Cait Sith monster Beastmasters can tame.
Bravely Default 2 Chapter 1 Part 3 Walkkthrough Finale
- After you defeat Prince Castor you’ll unlock the Berserker Job, and a cutscene will play in which you’ll learn the truth of what happened to Castor’s father, the King. Things take a turn for the tragic, but you know what they say about violent delights and violent ends.
- You’ll recover the Water Crystal, and the more level-headed Prince Pollux will debrief you on the mysterious stranger who gave Castor the Asterisk and set him on his wayward path.
- Afterwards head down towards the entrance to Savalon to trigger a cutscene in which Anihal will point you towards the next Crystal – it’s in Wiswald, Elvis’s home.
- Leave Savalon and head north, then west to find Truff near a blocked bridge that leads to Wiswald, scholars’ haven.
- You’ll have to help Truff to clear the bridge, so head back to Savalon and speak with the man near the Gaming Hall to learn about where to grab a schnitzel.
- Head to the inn to grab the schnitzel, then return to Truff near the bridge on the World Map. He’ll clear the bridge after a cutscene.
- You can now reach Wiswald and conclude Chapter 1.
- You can also fell trees blocking your path elsewhere, or just in general.
- Continue north towards the waypoint until a cutscene kicks in. This will officially wrap up Chapter 1 Part 3 of Bravely Default 2. Now on to Chapter 2, and the Earth Crystal.
Chapter 2 Part 1 in our walkthrough series for Bravely Default 2 can be found here.
Bravely Default 2 is available now on the Nintendo Switch.


Published: Feb 28, 2021 11:59 pm