If one thing is for certain in Bravely Default 2, is that the Beastmaster Job will draw your attention right away. That, or the exact opposite and you will stray as far away from it as possible due to its complexity. This game’s equivalent of a Blue Mage, focuses on capturing wild beasts and then unleashing them to enemies for various effects or for inflicting damage. In this guide here we are going to take a look at these interesting features, alongside some extra goodies.
Beastmaster guide and overview
A Beastmaster handles efficiently a bow or spear, and pretty much nothing else in terms of weapons, but that is not their selling point at all. True to their name, these wild tamers capture creatures you defeat in combat with the sole purpose to increase their stats and unleash them at enemies.

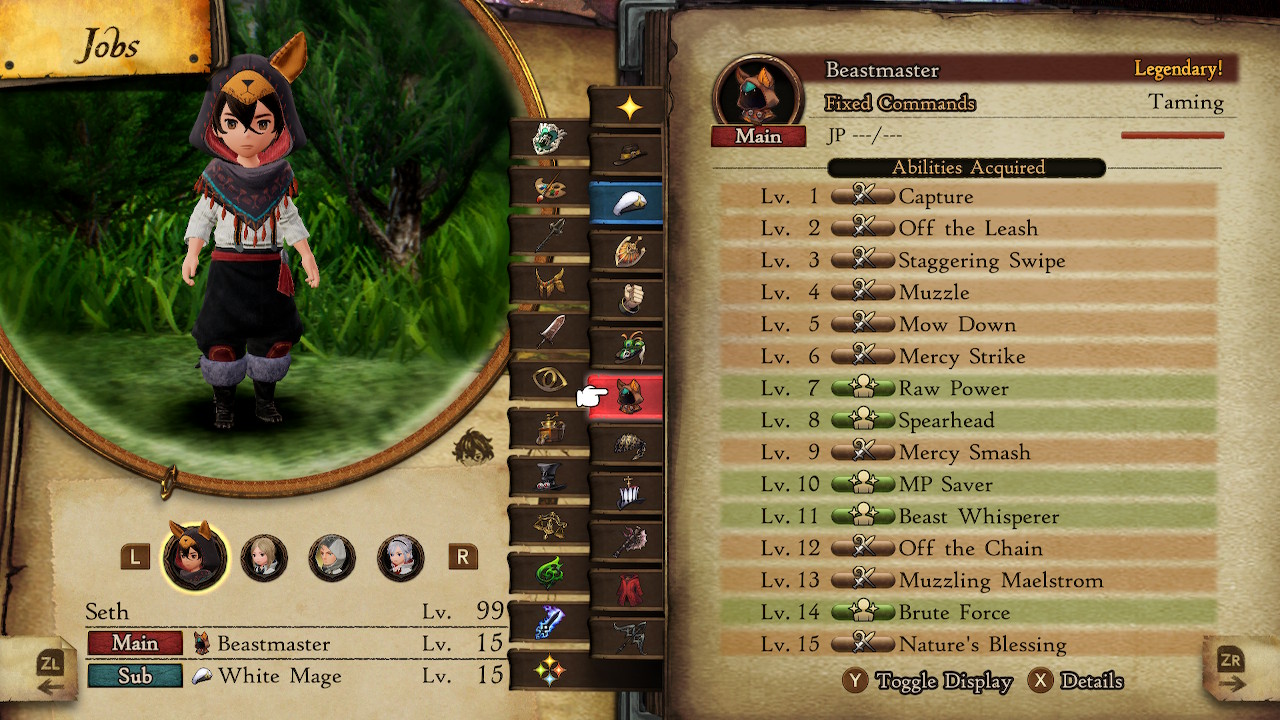
Beastmaster Abilities
- Capture: Capture a weakened monster. Chance of success is based on the target’s remaining HP—the lower the better. Will not work on humans or more powerful enemies.
- Off the Leash: Let a captured monster loose on a target.
- Staggering Swipe: Perform a physical attack on a target and significantly delay their next action – 19 MP cost
- Muzzle: Attempt to silence multiple targets – 12 MP cost
- Mow Down: Perform a physical attack on all targets – 21 MP cost
- Mercy Strike: Perform a physical attack on a target. This attack cannot reduce HP below one – 11 MP cost
- Raw Power: Every use of the brave command increases physical attack by 10% until the end of the turn – Passive/ 1 Slot
- Spearhead: The user will act first in battle when a spear is equipped, unless the enemy has the advantage – Passive/ 1 Slot
- Mercy Smash: Perform a powerful physical attack on a target. This attack cannot reduce HP below one – 35 MP cost
- MP Saver: Reduces MP consumption by 20% – Passive/ 1 Slot
- Beast Whisperer: Roughly 30% chance of capturing defeated monsters – Passive/ 1 Slot
- Off the Chain: Send a captured monster to brutally savage a target – 2 BP cost
- Muzzling Maelstrom: Use equipped spear to perform four powerful physical attacks at random. These attacks may also silence their targets – 115 MP cost
- Brute Force: Increases physical attack by 50% when three BP are spent performing the Brave command in the same turn – Passive/ 1 Slot
- Nature’s Blessing: Reduce the user’s MP costs to zero for two turns – 1 BP cost
Beastmaster Specialities
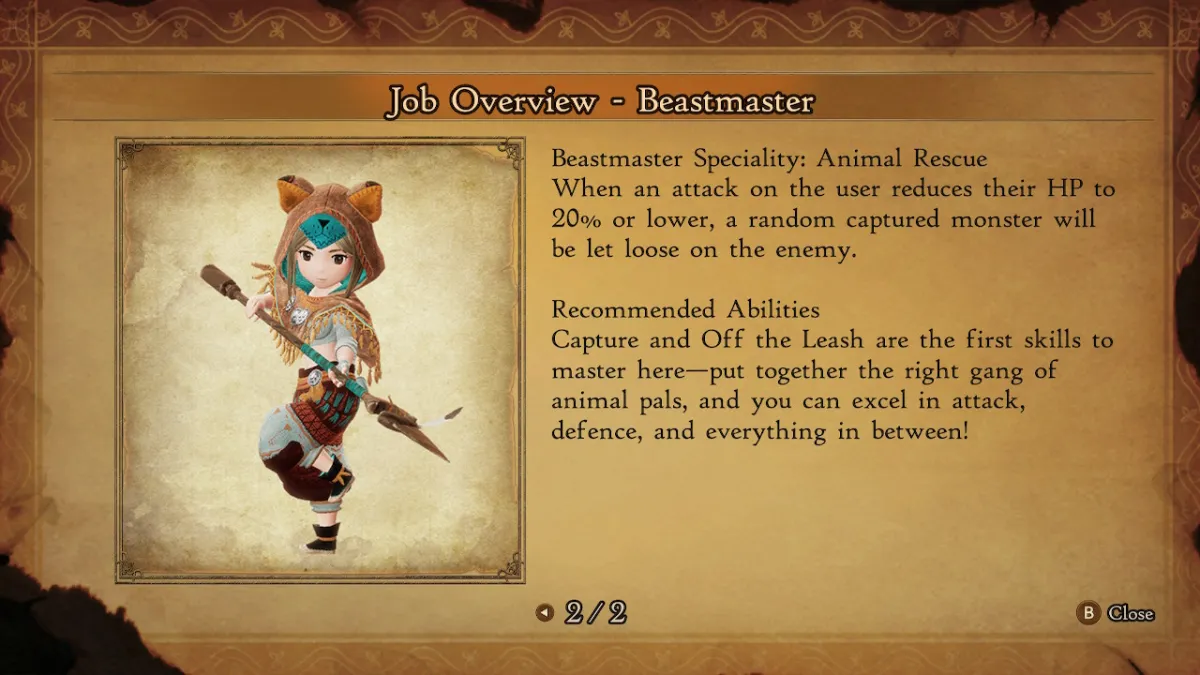
- Speciality I: Animal Rescue – When an attack on the user reduces their HP to 20% or lower, a random captured monster will be let loose on the enemy.
- Speciality II: Creature Comforts – All Stats are increased by an amount based on the number of monsters captured.
Beastmaster Weapon Affinity
- Swords: D
- Daggers: D
- Axes: C
- Spears: A
- Bows: A
- Staff: C
- Shields: B
Beastmaster Overview
The Beastmaster Asterisk is found very early into the game, and for a good reason. It needs a lot of investment to actually being able to help the team, but if you dedicate the time needed to them, they are absolute beasts in terms of everything. When you reach level 12, this fact is further supported due to obtaining a very useful Speciality, Creature Comforts. For every beast you captured, your overall stats increase little by little, eventually rising to absurd amounts.
The reason you need time with this Job, is because you need to catch a lot of monsters. This can be done either through their active ability Capture, or by having equipped the Beast Whisperer passive. I prefer the latter method, so whenever I want to go for some beast hunting, I equip the whole team with it and this way I can catch monsters without even having the Beastmaster Job equipped. Every single monster type you get unlocks a different ability, resulting to a great number of various skills you can use, either for supporting the team or causing damage.
This can be abused form the beginning to the end, with some monsters like the Skeletal Sellswords inflicting cap damage very early into your adventure. This is only one of the many examples you can take advantage of their kit, but it is of course intended. It is not an easy task to capture hundreds of enemies and test their skills to see what each can do, so the game rewards you for doing so, by letting you have some way overpowered abilities, without even reaching half-way through the end of your journey.
With all that said, it is something obvious that Beastmasters can fill a lot of roles. Support, damage, you name it. It all depends to what hole you need to fill in your team. They pretty much pair with every Job in the game very well, both as a main and sub-job. Due to this, don’t hesitate to experiment with a lot of combos, especially when Beastmasters also have great passive skills to equip. The most notable one is easily their Spearhead skill, that lets the character equipped with it and a Spear in one hand to always act first in the battle, if the situation lets them to do so. Great for farming or setting up your party in a tough boss fight, or even abusing this method to Steal from enemies and then fleeing, if you are not into the mood of battling.
Due to their versatility and chemistry between other Jobs, Beastmasters are really favored for pretty much the whole game. Stat-wise they are solid, their abilities provide both utility and offensive prowess, and their Off the Chain ability can cause your beasts to inflict tremendous fixed damage to Bosses, if they are not immune or resistant to it. For sure a Job that can fit every team setup, so go for it and unleash your mighty hordes of monsters.
With this Beastmaster guide coming to an end, a fan favorite Job is going to be looked upon next, namely the trickster Thief and their almighty Godspeed Strike. Make sure to check it out when time comes.
Bravely default 2 is exclusively available on the Nintendo Switch.


Published: Mar 10, 2021 08:09 pm