It’s time to kick-off our Walkthrough series for Bravely Default 2 with the Prologue Walkthrough, which begins with the main character (whom you get to name) floating out at sea (though it’s not long until he is rescued by a pair of potential allies). The Prologue quest is your bog-standard tutorial at the start, but there are a few things within worth noting, especially for those of you in a rush.
Since Bravely Default 2 is a narrative-heavy game, I will try to keep all spoilers to a minimum. Cutscene details will be scarce, and characters will only be named as required. Additionally, this walkthrough will follow a checklist format to keep things short and concise.
I will list monsters encountered along the critical path (to include their weaknesses), and treasure chests (as well as what they contain). Enemies and bosses are natural but necessary spoilers, so I’ll go ahead and tag this article with a mild spoiler warning, and I will precede every boss with a more obvious spoiler warning.
Bravely Default 2 Prologue Part 1 Walkthrough
Halcyonia
- Wake up in inn to a cutscene.
- Once it ends open chest directly behind you for 2x Phoenix Downs.
- Talk to innkeeper directly outside of room.
- Cutscene will auto-play when you pass her by.
- Will be shown an unmarked map.
- Will obtain the map after cutscene ends
- Exit the inn and follow the road south out of town towards the coast.
- A cutscene will play after you leave town.
- Once outside of town you’ll enter the world map, and the coast is just down the road and to the left (per the camera).
- If looking at the minimap, the coast is due east, then slightly south. Adjust your camera to face away from Halcyonia to see the yellow waymark indicating the coast.
- A cutscene will trigger once we reach any portion of the beach.
- You’ll be attacked by a pair of goblins, and Bravely Default 2 will only let you attack by burning BP with the Brave command.
- Go ahead and burn three BP to attack four times (twice per Goblin) – you will not take any real damage from the Goblins (this is a tutorial battle after all).
- Cast Default to trigger an in-battle cutscene, where two allies will join the fight.
- From here you are free to attack as you see fit.
- Goblins are weak to water spells (Blizzard, etc.) and sword damage.
- A cutscene will play after the battle.
- After the post-battle cutscene Elvis and Adelle will join your party, and you’ll be tasked with heading back to Halcyonia.
- That said, another cutscene will play after the first.
- Once the second cutscene concludes, just head back up (I.E. west) towards town.
- There are monsters on the field now, so either engage them to power-level some, or avoid them (I recommend fighting at least a few for experience, JP, and gold).
- You can also view jobs and abilities within the main menu at this point.
- There are Ratbitts, Wolves, Goblins, and Orcs in the area, as well as a few chests slightly off the main road.
- Goblins (Humanoid) are weak to Water and Swords.
- Orcs (Humanoid) are weak to Fire and Bows.
- Wolves (Beast) are weak to Fire and Daggers.
- Ratbitts (Beast) are weak to Water, Dagger, and Staves.
- A cutscene will play once you arrive back in town; you’ll need to rescue Gloria by venturing to an abandoned warehouse north of town.
- Sir Sloan will join your party as an Occasional Companion.
- You can’t control him in combat, nor can you alter his gear, job, or abilities.
- Before leaving town, head up the stairs to the palace, where there’s a Pilgrim’s Hat in the chest to the right.
- There’s also a Buckler in a chest located in the tower down the stairs near the old man. Head down and enter the tower to loot it.
- BE SURE TO REST AT THE INN BEFORE HEADING OUT.
- Sir Sloan will join your party as an Occasional Companion.
- Leave town and follow the road west around the ridge, then north according to the minimap to reach the abandoned building Gloria is being kept in.
Outlaw’s Hideout
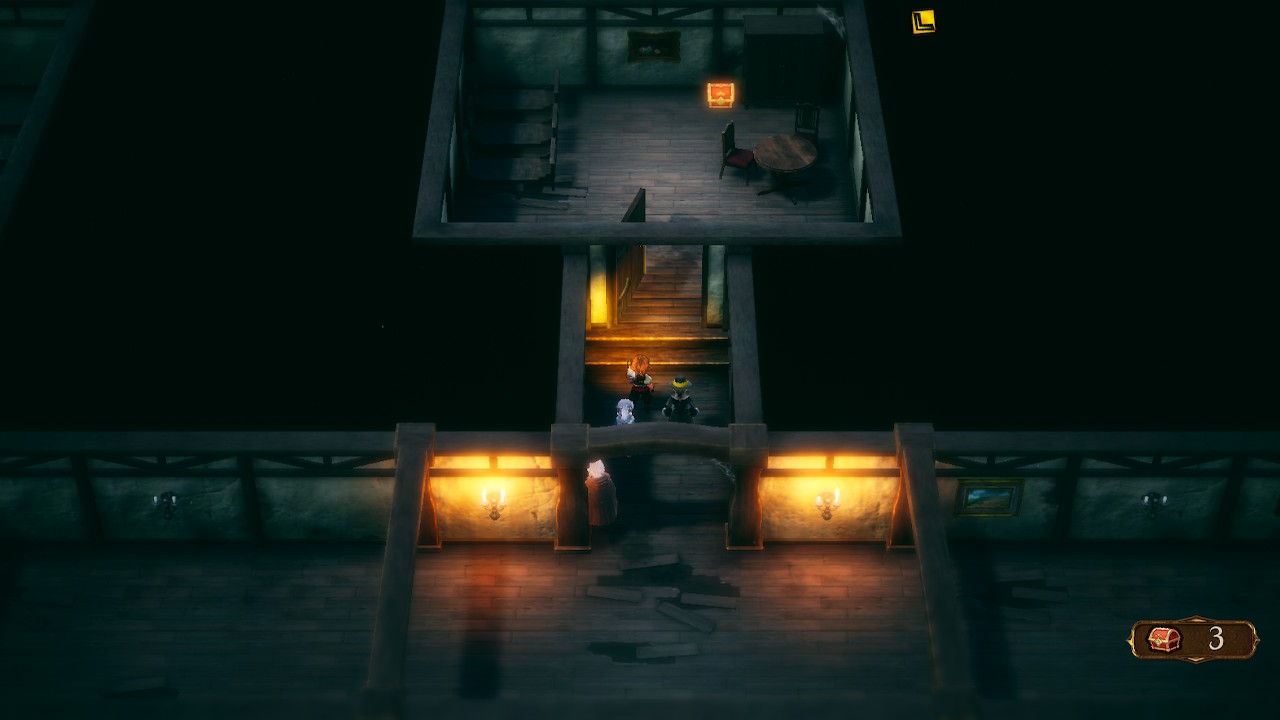
- Welcome to your first Bravely Default 2 dungeon! A cutscene will play before you are able to explore and make your way towards the boss battle.
- Enemies within are Goblins, Magelings, Bronzegoyle, Ghost Knights, and Freyr.
- Magelings (Humanoid) are weak to Lightning and Swords.
- Bronzegoyles (Demon) are weak to Lighting, Wind, and Staves. Takes half damage from Darkness.
- Ghost Knights (Undead) are weak to Holy and Axes. Absorbs Darkness.
- Freyr (Spirit) are weak to Water and Light. Absorbs Fire.
- There are nine chests in the Outlaw’s Hideout dungeon:
- The first side room leading up (Teleport Stone).
- Head up the first corridor and enter the room directly ahead. Take the stairs down and hook an immediate right, followed by heading down to the bottom room (trap with two Bronzegoyals; rewards Francisca battle axe).
- Head back upstairs, and follow the hallway leading right. The second room up has the third chest (320 pg)
- After heading back down to the hallway make you way right once more and turn immediately up into the next, wider hallway. Follow it to the right to find the fourth chest (2x Mini Ether).
- Take the stairs down from this room and follow the corridor all the way around to three chests (Dart, 570 pg, Round Shield).
- The other two chests are found after you head upstairs.
- Take the stairs up at the end of the corridor on the first floor to trigger a cutscene before moving on to tackling the second floor.
- There will be a Dungeon Portal here, which can be used to teleport to and from the dungeon entrance. Use it to leave and head back to town to purchase items and equipment as needed.
- The final two chests are located:
- Head to the far upper-left of the giant ballroom you enter immediately on the second floor, and follow the corridor down until you can turn right. Follow this until you reach the room at the very end, where the two chests await (Long Sword, Tent).
- After grabbing the two chests retreat back up the hallway and back down and around to reach a Save Point and a hallway leading to the Outlaw’s Hideout boss fight in Bravely Default 2.
- Save your game, and use a tent if you need to.
- A lengthy cutscene will play prior to the fight.
- You will be given a choice during it: head towards the light to keep playing.
SPOILER WARNING FOR THE UPCOMING BRAVELY DEFAULT 2 BOSSES AND JOBS.
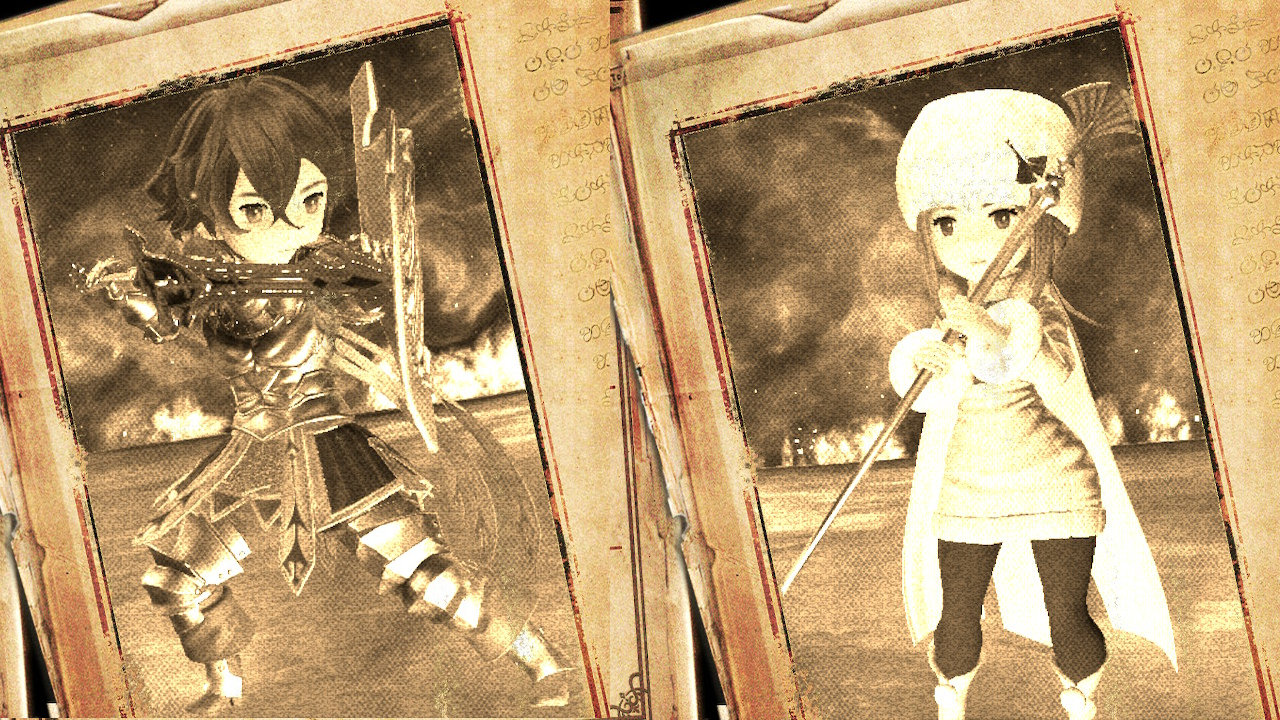
Selene (White Mage) and Dag (Vanguard)
- Selene: 2457 Health, weak to Fire, Swords, and Bows.
- Dag: 3822 Health, weak to Lightning, Daggers, and Staves. Has +20% to Physical Defense.
- You can now perform special attacks with the main character, though Sir Sloan is really gonna carry the boss battle with heavy attacks and heals.
- A full guide to the boss battle can be found here, but to summarize:
- Press the attack against Selene since she’s the healer (she’s especially weak to Darts if you have them), and keep an eye on your party’s health.
- Don’t push to many Brave attacks in the hopes of killing her: she will just heal back up as you wait on your BP to reach zero.
- She will also prioritize healing herself if she’s getting low, so be sure to have a character with either daggers or Lightning magic chip away at Dag.
- Sir Sloan will provide Musan Medicine to critically wounded characters, but be sure to have a potion at the ready just in case.
- He will also use Phoenix Down to resurrect downed characters.
- Press the attack against Selene since she’s the healer (she’s especially weak to Darts if you have them), and keep an eye on your party’s health.
Bravely Default 2 Prologue Part 1 Walkthrough Finale
- A cutscene will play after the fight, and once it ends Gloria will join the party.
- Either head out of the dungeon by returning to the Portal at the start of the second floor, or by using a Teleport Stone.
- Make your way back to Halcyonia to progress the story.
- If you want to level your new jobs a bit you can always take on a few monsters along the way.
- Once in town another cutscene will play, and the party will “disband”.
- You need to “look around town to progress the Prologue: there’s a mandatory tutorial side quest you need to pick up in the first building up the stairs heading towards the palace (the blue text bubble).
- This side quest is simple: the old lady from the coast earlier wants you to take a ride on her boat, and by ride I mean “gives you a boat.”
- Congrats, you’ve unlocked Explorations in Bravely Default 2.
- After the boat returns from your first Exploration you’ll wrap up the side quest, and can resume the Prologue.
- This side quest is simple: the old lady from the coast earlier wants you to take a ride on her boat, and by ride I mean “gives you a boat.”
- Head to the inn once the side quest is done to progress the story.
- A long cutscene will play, and you will wrap up the first part of the Prologue. There will be additional side quests in Halcyonia, and you will need to head east to the desert city of Savalon to continue.
Part 2 of the Bravely Default Prologue Walkthrough can be found here, which details what comes after you leave Halcyonia for Savalon.
Bravely Default 2 is available now on the Nintendo Switch.


